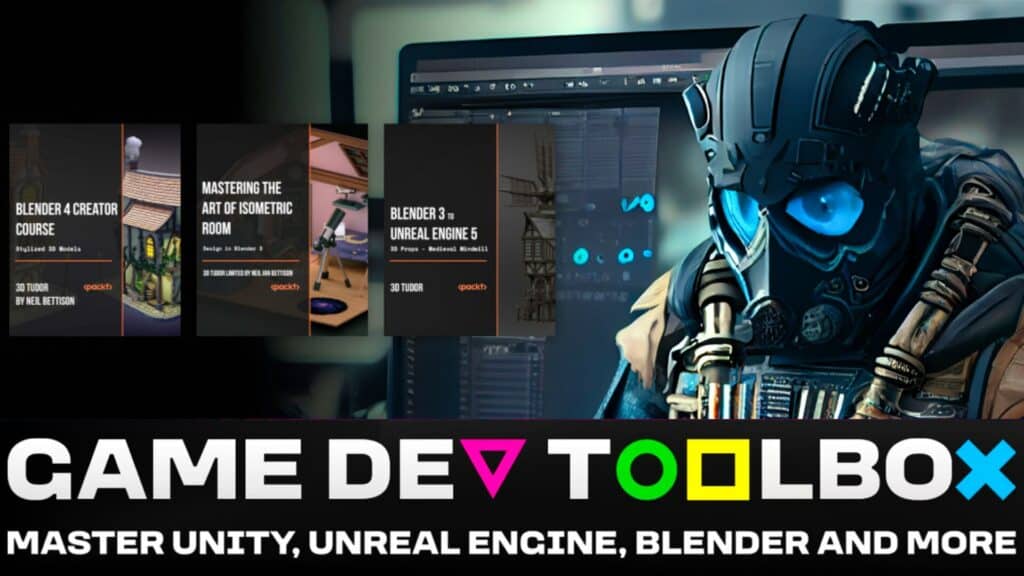
Audio in Haxe and NME

29. April 2013

So we've already look at general development, graphics programming and handling input with Haxe with NME, now we are going to take a look at audio support.  This is by far going to be the shortest post of the series, as frankly, it's the simplest.


Let's jump right in with playing audio.


package gfs;

import nme.Assets;
import nme.display.Sprite;
import nme.Lib;
import nme.media.Sound;

class Main extends Sprite
{
	public function new()
	{
		super();
	    var song = Assets.getSound("audio/background.mp3");
		var soundfx1 = Assets.getSound("audio/effect2.wav");
		
		song.play();
		soundfx1.play();
	}
}


Well, that was pretty straight forward.  There are only a few things to be aware of here.  First, notice we loaded the sounds using the Assets class with the path "/audio/something".  This path needs to be defined in the NMML file.  Here is what mine looks like:

<assets path="Assets/audio" rename="audio" type="audio" include="*" />

The actual directory on your hard disk should be located within the folder Assets.  The next up thing to know is the file formats.  At the end of the day the supported formats are defined by the SDL_mixer library.  Notice how I used loaded the soundfx from a wav file, while the background music as an MP3?  There is a very important reason for this; you can only have one mp3 playing at a time.  Other more "short term" sound effects should be stored in a  lighter format.  Audio is going to be one of those tricky things, as different platforms can play different formats. It's also important to realize that mp3 is a patent encumbered format, so if you are looking to sell your game, be careful with mp3, or they could come back to you looking for licensing fees!  The ogg vorbis format is a free alternative, but isn't as widely supported.


Now let's take a look at a slightly more advanced sample:


package gfs;

import haxe.Timer;
import nme.Assets;
import nme.display.Sprite;
import nme.events.Event;
import nme.Lib;
import nme.media.Sound;
import nme.media.SoundTransform;

class Main extends Sprite
{
	var playLeft = true;
	var song : Sound;
	
	public function new()
	{
		super();
	    song = Assets.getSound("audio/background.mp3");
		var soundfx1 = Assets.getSound("audio/effect2.wav");
		
		var soundChannel = song.play();
		
		// Call our sound effect every second... forever.
		new Timer(1000).run = function() {
			soundfx1.play();
		}
		
		soundChannel.addEventListener(Event.SOUND_COMPLETE, onSongEnd );
	}
	public function onSongEnd(event:Event) {
			Lib.trace("Fired");
			var channel = song.play();
			playLeft = !playLeft;
			
			if (playLeft)
				channel.soundTransform = new SoundTransform(1, -1);
			else
				channel.soundTransform = new SoundTransform(1, 1);

			channel.addEventListener(Event.SOUND_COMPLETE, onSongEnd );
		}
}


This example is a bit more complex to show off a couple of the features of the audio libraries.  You may notice that play() returns a SoundChannel object.  This object has a number of useful features… you can manipulate the playback of the sound using this guy, by applying SoundTransform's like we do here, to pan sound left or right, you can modify the volume, get current playback position, etc…  In this particular example, we load our two sound effects, start the background music playing, then create a timer that fires ever second, playing our second sound effect over and over and over.

We also wire up an event handler that will be fired when your soundChannel gets to the end ( SOUND_COMPLETE event ).  When that occurs, we toggle the sound to either play only on the left channel, or right channel.  We then recursively wire up our onSongEnd event on our newly created SoundChannel.  This code worked perfectly on every tested platform, although Android had some weird issues… it didn't play properly at first, but once I lost and regained focus, it worked perfectly.


So, what about Video?

This is one area current NME is a bit lacking.  There are projects out there that provide native video playback on iOS as well as this project for playing back webm encoded video files, otherwise I believe you are currently out of luck.  So if you need to play cut screens, you are currently left rolling your own solution for each platform.  Fortunately, I do not need video support. :)

,


Input in Haxe and NME

24. April 2013

In the past we covered basic program structure as well as using graphics using Haxe and NME.  In this section we are going to look at handling input.  A number of these samples, such as multi touch, will only work on a device, although we will briefly look at how to create device specific code that still compiles on other platforms.  Alright, let's jump right in.


First lets look at the basics of handling touch and mouse click events.


Mouse click and finger touch event handling

 package gfs;

import nme.Assets;
import nme.display.Bitmap;
import nme.display.Sprite;
import nme.events.Event;
import nme.events.TouchEvent;
import nme.events.MouseEvent;
import nme.Lib;


class Main extends Sprite
{
	private var sprite:Sprite;
	
	public function new()
	{
		super();
		
		var img = new Bitmap(Assets.getBitmapData("img/mechwarriorFrameScaled.png"));
		
		//Bitmap unfortunately cannot receive events, so we wrap it in a sprite
		sprite = new Sprite();
		sprite.addChild(img);
		
		sprite.x = Lib.current.stage.stageWidth / 2 - sprite.width / 2;
		sprite.y = Lib.current.stage.stageHeight / 2 - sprite.height / 2;
		
		sprite.addEventListener(MouseEvent.CLICK, mechClicked);
		Lib.current.stage.addEventListener(TouchEvent.TOUCH_TAP, onTouch);
		Lib.current.stage.addEventListener(MouseEvent.CLICK, onClick);

		Lib.current.stage.addChild(sprite);
	}
	
	public function mechClicked(event: MouseEvent)
	{
		sprite.x = Lib.current.stage.stageWidth / 2 - sprite.width / 2;
		sprite.y = Lib.current.stage.stageHeight / 2 - sprite.height / 2;
		event.stopImmediatePropagation();
	}
	
	public function onTouch(event: TouchEvent)
	{
		sprite.x = event.stageX - sprite.width / 2;
		sprite.y = event.stageY - sprite.height / 2;
	}
	
	public function onClick(event: MouseEvent)
	{
		sprite.x = event.stageX - sprite.width / 2;
		sprite.y = event.stageY - sprite.height / 2;
	}
	
} 

When you run this code you should see:

1

The mech will move wherever you click or touch.  If you click on the mech sprite, it will move back to the centre of the screen.


Now back to the code. I was informed that I didn't need to create a static main function when working with NME, so in my prior examples… ignore that bit. :)

Therefore we now start of in our constructor new.  First we create an image, a small version of our now familiar mech image.  There is a catch though, even though it has the method addEventListener, a Bitmap object can't actually receive events.  Therefore we are creating a Sprite object to hold our Bitmap.  Next up we centre the sprite to the screen.  Then we wire up sprite to receive MouseEvent.CLICK events, which will causer it to call the function mechClicked.  We also wire up TouchEvent.TOUCHT_TAP and MouseEvent.CLICK event handlers to the actual stage.

It's important to realize the order things are handled when a click or touch occurs.  It will ultimately be the object that is touched that get's first crack at the event, then it's parent, then it's parent, etc…  this is called 'bubbling'.  It's a very important thing to get your head around, as consider the current situation…  we are setting up a click handler in our mech sprite that handles the click, causing the sprite to be re-entered back to the middle of the screen if clicked.  Then the stage handles the event and moves the sprite to where the user clicked, effectively overwriting the actions the Sprite's event handler took.  In this case we want to stop handling the event  once the mech is clicked, so it's parent's handler won't run.  This is accomplished by calling event.stopImmediatePropagation().  The only other thing to notice is the different event types passed in to the various event handlers.

There is however one current gotcha in the above code… for CPP targets it doesn't actually work.  The call to stopImmediatePropagation() doesn't actually do what it says.  I reported this on the forums and most impressively, they already fixed the bug!  Colour me impressed on that one.  So, depending on when you are reading this, mechClicked() may not appear to be working if run on one of the CPP targets.  It does however work just fine on Flash and HTML5.

If you aren't working from NME sources, you can work around with this simple fix:

class Main extends Sprite
{
	private var sprite:Sprite;
	var clickHandled = false;
	
	public function new()
	{
		super();
		
		var img = new Bitmap(Assets.getBitmapData("img/mechwarriorFrameScaled.png"));
		
		//Bitmap unfortunately cannot receive events, so we wrap it in a sprite
		sprite = new Sprite();
		sprite.addChild(img);
		sprite.x = Lib.current.stage.stageWidth / 2 - sprite.width / 2;
		sprite.y = Lib.current.stage.stageHeight / 2 - sprite.height / 2;
		
		sprite.addEventListener(MouseEvent.CLICK, mechClicked);
		
		Lib.current.stage.addEventListener(TouchEvent.TOUCH_TAP, onTouch);
		Lib.current.stage.addEventListener(MouseEvent.CLICK, onClick);
		
		
		Lib.current.stage.addChild(sprite);
	}
	
	public function mechClicked(event: MouseEvent)
	{
			sprite.x = Lib.current.stage.stageWidth / 2 - sprite.width / 2;
			sprite.y = Lib.current.stage.stageHeight / 2 - sprite.height / 2;
			clickHandled = true;
	}
	public function onTouch(event: TouchEvent)
	{
		sprite.x = event.stageX - sprite.width / 2;
		sprite.y = event.stageY - sprite.height / 2;
	}
	
	public function onClick(event: MouseEvent)
	{
		if (clickHandled) {
			clickHandled = false;
			return;
		}
		sprite.x = event.stageX - sprite.width / 2;
		sprite.y = event.stageY - sprite.height / 2;
	}
}

Basically you just set a flag that the current click action has been handled.  Of course, this system falls on it's face once you start looking at multi-touch, as we will shortly


Keyboard Handling

So that's the basics of clicking and touching, now let's take a look at using keyboard control.  This will only work on devices with a physical keyboard.

package gfs;

import nme.Assets;
import nme.display.Bitmap;
import nme.display.Sprite;
import nme.events.Event;
import nme.events.KeyboardEvent;
import nme.Lib;
import nme.ui.Keyboard;


class Main extends Sprite
{
	private var sprite:Sprite;
	
	public function new()
	{
		super();
		
		var img = new Bitmap(Assets.getBitmapData("img/mechwarriorFrameScaled.png"));
		
		//Bitmap unfortunately cannot receive events, so we wrap it in a sprite
		sprite = new Sprite();
		sprite.addChild(img);
		
		sprite.x = Lib.current.stage.stageWidth / 2 - sprite.width / 2;
		sprite.y = Lib.current.stage.stageHeight / 2 - sprite.height / 2;

		Lib.current.stage.addEventListener(KeyboardEvent.KEY_UP, function(event) {
			if (event.keyCode == Keyboard.RIGHT)
			{
				if (event.altKey || event.ctrlKey || event.shiftKey)
					sprite.x += 10;
				else
					sprite.x += 1;
			}
			if (event.keyCode == Keyboard.LEFT)
			{
				if (event.altKey || event.ctrlKey || event.shiftKey)
					sprite.x -= 10;
				else
					sprite.x -= 1;
			}
		});

		Lib.current.stage.addChild(sprite);
	}
	
	public static function main()
	{
		Lib.current.addChild(new Main());
	}
} 

When you run this code, you can use the left and right arrows to move the sprite left or right.  Holding down the alt key, shift key or control key will cause the sprite to move by 10 pixels, otherwise it moves by 1 pixel in the given direction.

As you can see, handling keyboard events is almost exactly the same as handling mouse and touch events.  You simply wire up the stage to listen for the event KeyboardEvent, in this case KEY_UP.  You simple compare the keyCode of the event against the enum specified in Keyboard to see if your key has been pressed.  There are also a series of flags, altKey, ctrlKey and shiftKey that tell you the status of each of these keys.

One important thing to note, you do not use KeyboardEvent to handle text field input, instead use the methods of TextField.


Accelerometer/motion control handling 

Now let's take a look at how to handle the Accelerometer.  This code will compile on any platform, but will only work on mobile platforms for obvious reasons.


package gfs;

import nme.Assets;
import nme.display.Bitmap;
import nme.display.Sprite;
import nme.events.Event;
import nme.events.AccelerometerEvent;
import nme.Lib;
import nme.sensors.Accelerometer;
import nme.ui.Accelerometer;


class Main extends Sprite
{
	private var sprite:Sprite;
	
	public function new()
	{
		super();
		
		var img = new Bitmap(Assets.getBitmapData("img/mechwarriorFrameScaled.png"));
		
		//Bitmap unfortunately cannot receive events, so we wrap it in a sprite
		sprite = new Sprite();
		sprite.addChild(img);
		
		sprite.x = Lib.current.stage.stageWidth / 2 - sprite.width / 2;
		sprite.y = Lib.current.stage.stageHeight / 2 - sprite.height / 2;

		Lib.current.stage.addEventListener(Event.ENTER_FRAME, onFrameEnter);
		Lib.current.stage.addChild(sprite);
	}
	
	public function onFrameEnter(event:Event) {
		#if (android || ios)
		if (Accelerometer.isSupported) {
			var y = nme.ui.Accelerometer.get().y;
			Lib.trace(y);
			if (y < 1 && y > 0.6) sprite.y-=5; // straight up and down
			else if (y < 0.4 && y > 0.0) sprite.y+=5;  // turned 90 degrees from user
		}
		else
			Lib.trace("No Accelerometer support");
		#else
			Lib.trace("Not a mobile target");
		#end
	}
	
	public static function main()
	{
		Lib.current.addChild(new Main());
	}
}

When you run this code, our trusty mech sprite is drawn centred to the screen.  If the phone is straight up and down ( parallel to your head ) nothing will happen.  As you tilt the phone away from you, for the first 40 or so degrees the sprite will move up.  Then a dead zone, then for the next 40 os so degrees the sprite will move down, until you are holding the phone perpendicular to you, at which point the sprite will stop moving.

Now for a bit of a red herring… there are Accelerometer events… THEY DONT WORK!  Don't go that route.  The events are simply never fired.  Instead you need to poll the Acelerometer when you want data.  In this case we are going to use the ENTER_FRAME event, which is fired at the beginning of each frame, causing the onFrameEnter function being called.

In onFrameEnter, we have our first compiler conditional.  If you are used to pre-processor directives, this will be familiar with you.  Basically code starting with the # symbol tell the compiler what to id.  In this case, code within the #if (android || ios) will only be executed if those values are true.  If it is an iOS or Android device, we simply read the G value of the y axis.  A value of 1 indicates a motionless phone straight in from of you.  A value of 0 is a motionless phone perpendicular to you.  You can get the motion values of all 3 axis and use them to determine orientation as well as movement.


Handling multitouch

Finally let's take a look at multitouch support.  Once again you obviously need a multi-touch capable device to run this sample.


package gfs;


import nme.Assets;
import nme.display.Bitmap;
import nme.display.Sprite;
import nme.display.Stage;
import nme.display.StageScaleMode;
import nme.events.Event;
import nme.events.TouchEvent;
import nme.Lib;
import nme.ui.Multitouch;
import nme.ui.MultitouchInputMode;


class Main extends Sprite
{
	private var sprites: Array<Bitmap>;
	
	public function new()
	{
		super();
		
		sprites = new Array<Bitmap>();
		
		sprites.push(new Bitmap(Assets.getBitmapData("img/mechwarriorFrame.png")));
		sprites.push(new Bitmap(Assets.getBitmapData("img/mechwarriorFrame.png")));
		sprites.push(new Bitmap(Assets.getBitmapData("img/mechwarriorFrame.png")));
		sprites.push(new Bitmap(Assets.getBitmapData("img/mechwarriorFrame.png")));
		
		for (i in 0 ... sprites.length) {
			sprites[i].x = Std.random(800);
			sprites[i].y = Std.random(1280);
			Lib.current.stage.addChild(sprites[i]);
		}

		Lib.current.stage.addEventListener(TouchEvent.TOUCH_BEGIN, function(e) {
			sprites[e.touchPointID].x = e.localX;
			sprites[e.touchPointID].y = e.localY;
		});
	}

}

Here is the code running on my Galaxy Note.  Each mech sprite is positioned where you touched.  Up to four sprites/touches can be tracked in this example.

Export 04

So, each sprite represents the location I most recently touched with each finger. 


We simple create an array of images all holding the same image, one for each of our four fingers.  We then randomize it's starting location ( for no particular reason ) then add it to the stage.  Touch is handled exactly as it was before, the only real difference is the event can be fired a number of times.  You determine if it is multiple touch by checking the touchPointID value of event.  This ID value can be thought of as the index value of your finger… so if you are using a single finger, it will have a value of 0.  If you are using 3 fingers, and it is the third touchpoint, the value will be 2.  


One word of warning, there is mention in the docs of GESTURE modes… such as ZOOM, etc… these do not exist in NME.  If you want gesture support, you need to roll it yourself.


So that's IO in Haxe…  I have to say, other then a bug ( which was fixed almost instantly! ) and a red herring in the documentation about gesture support, that was a painless experience and has all the functionality I need.  Of course, I just used a portion of what's there… you can also mouse over, key up, mouse enter, etc...


I did run into a few annoyances with FlashDevelop though.  First, if you run an cpp target project, while one is already running on your device, not only will it fail, it will bork the debugger forcing you to reset FlashDevelop.  It sounds like a mild annoyance, but I did it probably 15 times!  Another annoyance is Flashdevelop loses intellisense when inside anonymous methods, or whatever Haxe/Flash calls them.

,


More PlayStation Mobile tutorials available (not made by me)

16. April 2013


While I was working on my PlayStation Mobile book I didn’t produce all that many PlayStation Mobile tutorials.  I guess it was a matter of PSM overload in a way, although you should expect to see a few more in the near future covering things that have been added since the book was released.  The good new is, there is another developer, Alex McGilvray, that has created some great PSM tutorials!  His series of tutorials are a bit lower leveled than the ones here on GameFromScratch and are a good compliment.


He has made the following tutorials:

Tutorial 1 -- Getting Started

Tutorial 2 Part 1 – Shader Programming

Tutorial 2 Part 2 – Vertices, Indices and Vertex Colors

Tutorial 2 Part 3 – Texture Coordinates

Tutorial 2 Part 4 – Vertex Buffers

Tutorial 2 Part 5 – The Render Loop

Tutorial 3 – Improving PSM Rendering Performance


Or you can just check out his blog.  Nice work Alex! 

Programming , ,


Programmer Art: Blender for Programmers Part 4 -- Modelling operations

26. March 2013


In this section we will look at the various operations you perform when modelling in 3D.  Much like when working with clay in the real world, you can actually make some remarkably detailed work with only a small number of tools.


There is one concept we haven't really touched on as of yet, and that is the edge loop.  An edge loop is important concept in modelling, as the edge loop is ultimately the contour or backbone of your model.  You can select, move, remove and add edge loops all at once, allow you to make huge changes to a model quickly and easily.  When modelling in Blender, it is important to keep edge loops in mind.  For a better description of what an edge loop actually is be sure to check this post out.


Edge loops in Blender

There are a number of operations you can perform on edge loops.

First and most obvious is selecting an edge loop:


Selecting an Edge loop:

To select an edge loop, first switch in to Edit mode ( Tab ), then set Mesh Select Mode to edges ( CTRL + Tab + 2 ).

Hold Alt + Right click and edge and the entire edge loop will be selected.  Holding down SHIFT allows you to select multiple edge loops.


Blender1


Deleting an Edge loop:

Select an edge loop.

Hit X.  In menu select Delete -> Edge Loop

BlenderDeleteEdgeloop


Loop Cut and Slide

Loop Cut and Slide is a great example of how edge loops allow you to quickly add detail to a mesh be inserting an additional edge loop.  It is essentially two operations in one.  First you create a new edge loop parallel to an existing one, then you "slide" it, which is equivalent to moving while maintaining the shape of the mesh.

First switch in to Edit mode ( Tab ), then set Mesh Select Mode to edges ( CTRL + Tab + 2 ) if not already in edit mode.

Hit Control + R

Move the mouse to select which direction you wish to create the edge loop along, an indicator will be displayed on screen.

Left click to select the direction.  Indicator will change colour.

Move mouse up and down, or left and right, depending on the direction of the edge loop to move the loop along the surface, Left Click to commit.  Right click to cancel.

LoopCutAndSlide


In addition to using CTRL + R you can perform a loop cut and slide using the following button from the tools menu:

LoopCutAndSlideMenuOption 


Edge Rings in Blender

An Edge Ring is very similar to an edge loop, but it selects the perpendicular edges instead.


Selecting an Edge Ring

First switch in to Edit mode ( Tab ), then set Mesh Select Mode to edges ( CTRL + Tab + 2 ) if not already in edit mode.

HIt Control + Alt + RIght Click on an edge in the edge ring.


SelectEdgeRing


Common Modelling Operations


Now we will take a look at some of the most common operations performed while modelling in Blender.


Extrusion

Extrusion is a very common way to add more detail to a model.  If you were modelling in clay, think of extrusion as the act of pulling out or pushing in a portion of the clay.  You can perform an extrusion on multiple selected items at the same time and it can be performed on vertices, edges and faces, although faces are the most commonly extruded type.  It's important to know, if you perform and extrusion with no movement, new geometry is still created, it's just directly over top of existing geometry!  If you cancel an extrusion, make sure you have properly undone it, or you can create unwanted polygons.

First switch in to Edit mode ( Tab ), then set Mesh Select Mode to faces ( CTRL + Tab + 3 ) if not already in edit mode.

Right click select the faces you wish to extrude.

HIt 'E' and then move the Mouse left to extrude "in" or right to extrude "out".  Left click when complete.

You can optionally hit 'X', 'Y' or 'Z' to constrain the extrusion to a certain axis.

Extrusion


Knife Tool

Using the knife tool allows you to add new edges to existing geometry easily.  The knife tool automatically creates new edges where you cut.

In edit mode, press K.

A green dot will appear where the cut will appear.

Left click to make cut, move mouse and repeat.

Press Enter to complete cut.

Knifetool


Holding Control while performing a cut automatically centres the cut location between the two bordering vertices.


Create Face

You can easily create new geometry using the create new face tool. 

In edge mode ( Ctrl + 2 ), holding down Shift and left click to select the edges surrounding the face you wish to create.

Once complete, press 'F' and a face will be completed.  

This process will also work when working with vertices and allows you to create faces with more than 4 edges.

CreateFace


Inset

Inset works a lot like extrude, but instead of pulling the geometry out of the mesh, it insets a face within an existing face.  Its a good way for adding detail within a polygon.

In edit mode, select one or more faces to inset.

Hit 'I' to inset face.  The distance you move the mouse toward the centre of the face determines how much it will be inset.  Left click to finish.

Insetface


Merge/Collapse

Sometimes you have too much or unwieldy geometry and you want to get rid of some of it.  This is when the merge tool comes in handy.

In edit mode, select two or more items you wish to merge.

Hit Alt + M

In the resulting menu, select how you would like the merge to perform.

Merge


Change Subdivision Level

A very common modelling technique is called subdivision surfaces.  Essentially you model a rough outline of the shape you want to create, then add detail to it by sub-dividing it over and over into more detailed geometry.

Select the geometry you want to subdivide.

Press Control + 1/2/3/4 or 5.  Press Control + 0 to reset to no subdivisions. Do NOT use the number pad numbers.

SubDivision

As you may notice, the original hull is preserved while sub-dividing.  You can still work on the source shape and it will be updated in the subdivided mesh.

You can also permenantly sub-divide geometry by pressing W then typing subdivide. 


Hotkeys / Actions used in the Tutorial


Key/ActionAction
ALT + RMB Select edge loop

X

Select "Delete edge loop"

Delete edge loop

CTRL + R

Loop cut and slide
CTRL + ALT + LMB Select edge ring

E

Extrude

E + x, y or z

Extrude along axis

K

Knife tool

F Create Face

I Inset face

Alt+M Merge/Collapse

CTRL + 1,2,3,4 or 5 Set sub-division level

CTRL + 0 Turn off sub-division


On to quick reference

,


A closer look at the Loom Game Engine: The Conclusion

22. March 2013

The past several days I've been looking at the Loom Game Engine, which as of writing is still available for free, but for a limited time only.  Loom is an ActionScript based game development system with a bit of C# mashed in, built over top of the Cocos2D library, driven by a handy command line interface that supports live reloading of code as well as easy deployment to iOS and Android devices.


The series was a combination of tutorial, diary and review, documenting my experiences working with Loom.  The parts are:


Getting started

Running on Android

Hello World! and a bit more

Graphics

Input and Sound


The Results

Keep in mind, this is only my experiences after spending about 40 or so hours with the SDK.  I have pretty much zero prior ActionScript experiences and not a ton of experience with Cocos2D coming in.  This isn't strictly a review, there will be no score at the end, instead its my first impressions and nothing more.  Hopefully my time evaluating will make your own evaluation quicker.


So…  shall we jump in with the good, or the bad first?  Well, let's hit the good first.


The Good


Quick to download, install, configure and run.  Server side processing and CLI make it easy to get things up and running.  No need to set up a complicated toolchain, including Android and iOS dev environments.  Learn a few commands and you've got a project up and running on your device of choice.

Cocos2D.  If you know it and like it, you will like Loom.  In many ways you can think of Loom as Cocos2D++, powered by a slightly improved ActionScript.

Support.  It's stellar, seriously AAA stellar.  Most of the times I ran into a problem, the forums had my solution, which is pretty impressive for a new game engine.  The developers are very active on their forums and are willing to go a step beyond, it's very impressive.  My one support inquiry was answered, not just by someone from TheEngine.co, but also from someone in the community.

It's free right now.  That's always nice.  However, 7 days from today, it no longer will be.

LoomScript.  It's ActionScript.  Plus delegates from C#, plus the by value Struct type, plus type inference, plus reflection, plus being strongly typed.  In my experiences with the language, I enjoyed it, with a but*.

Development is rapid.  They release sprints, rapid iterations with well defined purposes.  Coupled with a very clear bug tracking/priority system.  This is good, I wish other projects *cough*Moai*cough* would adopt this attitude!

Documentation and samples.  There is a good amount of documentation, but far too much of its stubs, and a good 15 or more examples.  These are the key to learning, much more so than the documentation.

Source code is available.  If you are the C++ type, it's all there.  I only looked briefly, but it is clean enough.  I would hesitate to commit a serious project to a library I didn't have the source code for.  It's not a deal breaker by any means, but it buys a whole lot of peace of mind having source access.


The Bad


Cocos2D.  Every single time I ran into confusion or frustration, at the end of the day, Cocos2D was to blame.  The library is large, some might say bloated, and not entirely intuitive.  It often does things in a manner you wouldnt expect, and provides three ways to do things, even if one way is better. At times it's over-engineered and other times, it just sloppy.  Naming conventions can be pretty inconsistent, parts have been deprecated.  Then again, this is a Python library, ported to ObjectiveC, then C++ and now wrapped again so expect a certain number of warts.  Simply put though, if you hate Cocos2D, you will hate Loom.  If you've never used Cocos2D, expect a bit of a learning curve.

Documentation isn't as extensive as I would like.  LoomScript specifics are under documented, you need to glean what you can from the forums and examples, because the documentation isn't that extensive.  At the same time, when trying to puzzle out parameters for delegates (which Loomscript add over ActionScript), I had to drop down to the C++ source code level to figure things out.

Requires an internet connection.  You need to log in to build your app.  In this day and age, this generally isn't a huge problem, and you've got full source code if this really bothers you, but it can be an annoyance.  While evaluating I found my password was inexplicably reset and there was a DNS error one day that prevented the tools from working, so obviously there are downsides to requiring a server connection.  On the other side of this code, the simplicity of building for Android and iOS is enabled by the server based nature of Loom.

LoomScript extensions are nice, but confusing.  This is an area that really needs more documentation and focus in the examples.  The LoomScript changes can on occasion make existing Cocos2d-x wrong, these are the kinds of things they need to point out.


The Things I Would Change


There are two things I found… annoying I suppose is the word, while working with Loom.  Both things that can be easily fixed, and both wholly related to each other.

The first thing… in order to access the forums, you need to register.  Second, in order to access the documentation ( which is pretty good, but flawed as you can see above ), you need to run it locally, even though it's HTML based.

Why do these two things suck?  You handicap Google.  My workflow generally starts with going to Google, and I can't with Loom.  As a result of hiding your forums behind a password and your documentation being locally installed, I completely lose the ability to use Google.  Yes, the local help has search functionality, but it doesn't even approach what I can do with Google queries.


The Conclusion


This is pretty simply summarized…  If you don't like Cocos2D, you won't like Loom, it's that simple.

On the other hand, I am highly considering using Loom for my own upcoming game project, even though I have zero ActionScript background.  So, the fact I am willing to use it for my own project is probably as good of an endorsement as I can give.


Loom is certainly an interesting project, be sure to sign up before the price tag rises!

, ,