As part of our ongoing “Closer Look at” series, today we will be looking at the Babylon HTML5 3D game engine. These posts are a mashup of a review, preview and tutorial aimed at giving you a quick overview of what to expect from the game engine in question.
If you prefer, there is an HD Video version of this post.
BabylonJS is a very code centric game engine, with very few tools. There is no level editor like PlayCanvas that we looked at last week. There are however 3D model exporters that we will see shortly. In terms of functionality, BabylonJS is most similar to Three.JS which we’ve also looked at earlier.
The following is Babylon’s description of themselves:
About babylon.js
Babylon.js is a 3D engine based on webgl and javascript. It supports the following features:
- Complete scene graph with lights, cameras, materials and meshes
- Collisions engine
- Physics engine (thanks to cannon.js)
- Scene picking
- Antialiasing
- Animations engine
- Particles Systems
- Sprites and 2D layers
- Optimizations engines:
- Frustum clipping
- Sub-meshes clipping
- Hardware scaling
- Selection octrees
- Offline mode (Assets are saved locally to prevent reloading them)
- Incremental loading
- Binary compressed format
- Hardware accelerated instances
- Standard material is a per pixelmaterial that supports:
- Diffuse lightning and texture
- Ambient lightning and texture
- Specular lightning
- Opacity texture
- Reflection texture (Spheric, planar, cubic and projection)
- Mirror texture
- Emissive texture
- Specular texture
- Bump texture
- Up to 4 lights (points, directionals, spots, hemispherics)
- Custom materials
- Skybox
- Vertex color
- 4 bones per vertex
- Fresnel term for diffuse, opacity, emissive and reflection
- Special FX
- Fog
- Alpha blending
- Alpha testing
- Billboarding
- Fullscreen mode
- Shadow Maps and Variance Shadow Maps
- Rendering layers
- Post-processes (blur, refraction, black’n’white, fxaa, customs…)
- Lens flares
- Multi-views
- Textures:
- Render target textures
- Dynamic textures (canvas)
- Video textures
- Compressed (DDS) textures
- Cameras:
- Arc rotate camera
- Free camera
- Touch camera
- Virtual Joysticks camera
- Oculus Rift camera
- Gamepad camera
- VR Device Oriention camera
- WebVR camera
- Follow camera
- Meshes:
- Mesh cloning
- Dynamic meshes
- Height maps
- Bones
- Constructive solid geometries
- Import:
- Babylon scene file can be converted from .OBJ, .FBX, .MXB
- Exporter for Blender
- Exporter for Cheetah3d
- Exporter for 3ds max
- Support for drag’n’drop
- Assets manager
Our First Application
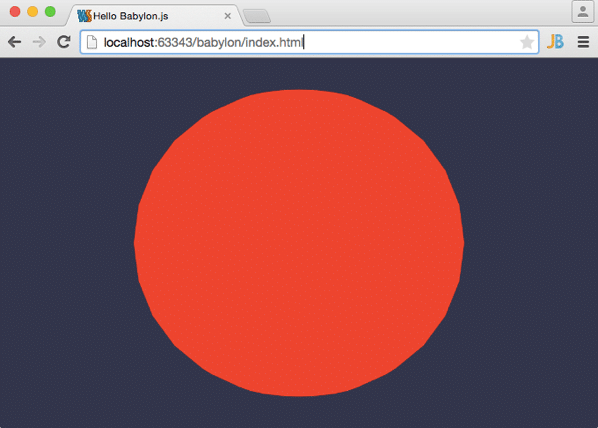
<!DOCTYPE html> <html xmlns="http://www.w3.org/1999/xhtml"> <head> <title>Hello Babylon.js</title> <script src="babylon.js"></script> <style> html, body { width: 100%; height: 100%; padding: 0; margin: 0; overflow: hidden; } #renderCanvas { width: 100%; height: 100%; } </style> </head> <body> <canvas id="renderCanvas"></canvas> </body> <script> if (BABYLON.Engine.isSupported()) { var canvas = document.getElementById("renderCanvas"); var engine = new BABYLON.Engine(canvas, true); var newScene = new BABYLON.Scene(engine); var camera = new BABYLON.ArcRotateCamera("ArcRotateCamera", 0, 0, 0, BABYLON.Vector3.Zero(), newScene); camera.setPosition(new BABYLON.Vector3(0,0,-3)); newScene.activeCamera = camera; newScene.activeCamera.attachControl(canvas); var sphere = new BABYLON.Mesh.CreateSphere("sphere",12,2,newScene); sphere.material = new BABYLON.StandardMaterial("material",newScene); sphere.material.emissiveColor = new BABYLON.Color3(1,0,0); engine.runRenderLoop(function() { newScene.render(); }); } </script> </html>
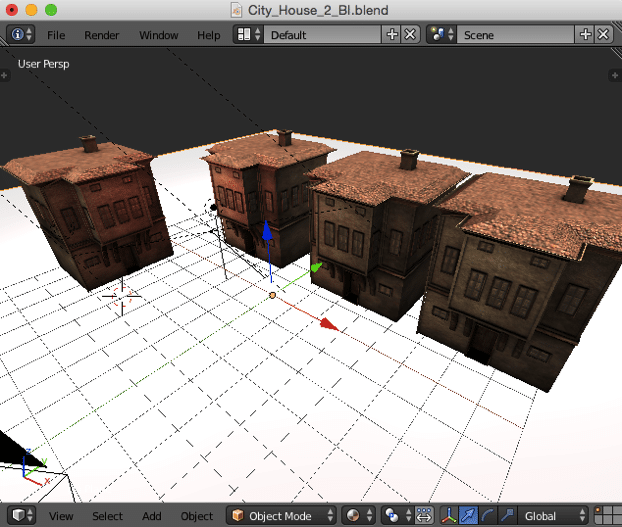
Working with 3D Models
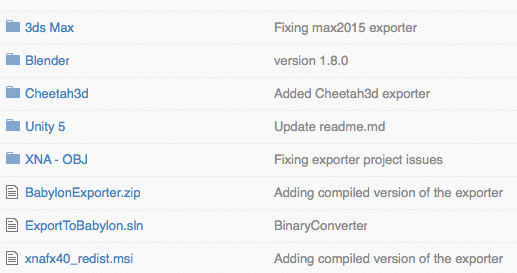
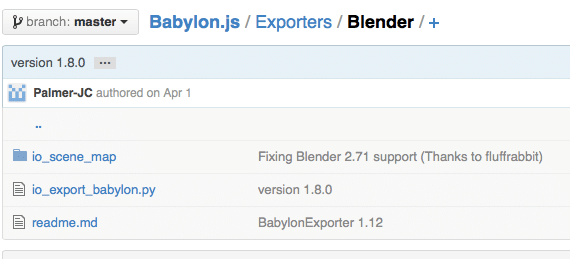
svn checkout https://github.com/BabylonJS/Babylon.js/trunk/Exporters/Blender

/Applications/Blender.app/Contents/Resources/2.74/scripts/addons
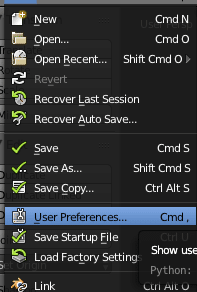
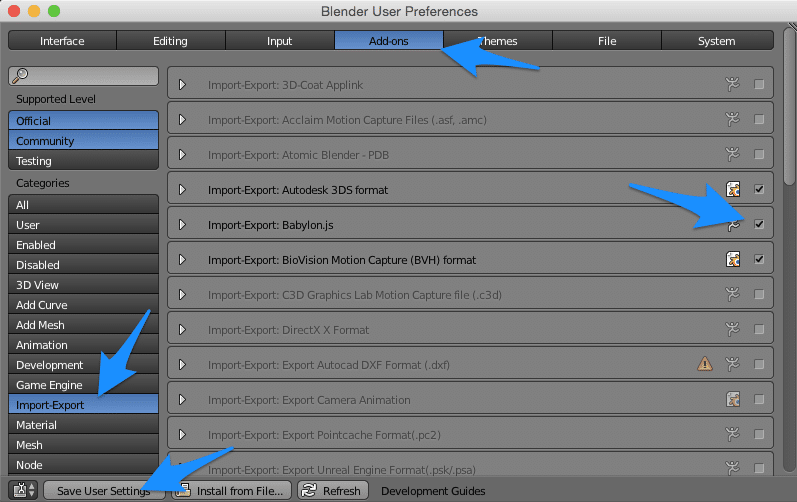
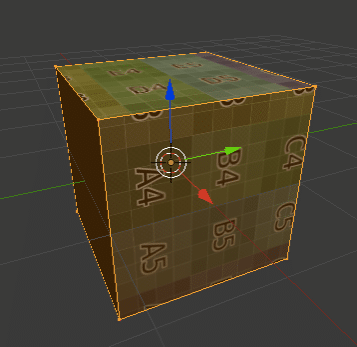
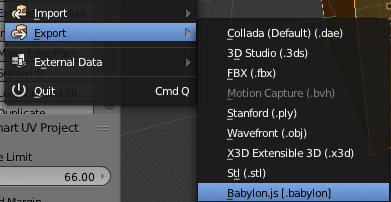
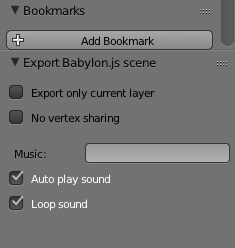
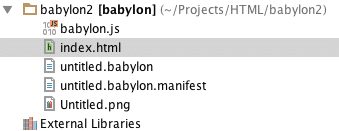
You may notice the .manifest file. This is simply a descriptor of your file, I added it simply to get rid of a warning. The contents look like:
{ "version" : 1, "enableSceneOffline" : true, "enableTexturesOffline" : true }
More Coding
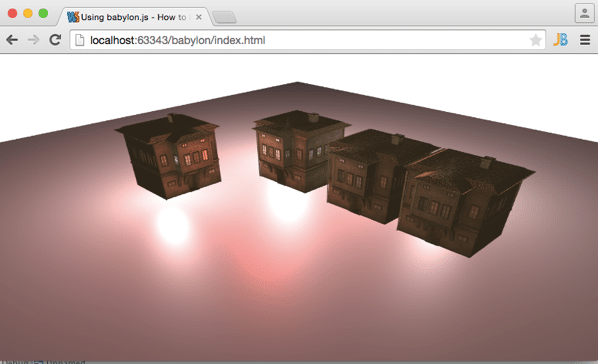
<!DOCTYPE html> <html xmlns="http://www.w3.org/1999/xhtml"> <head> <title>Using babylon.js - How to load a scene</title> <script src="babylon.js"></script> <style> html, body { width: 100%; height: 100%; padding: 0; margin: 0; overflow: hidden; } #renderCanvas { width: 100%; height: 100%; } </style> </head> <body> <canvas id="renderCanvas"></canvas> </body> <script> if (BABYLON.Engine.isSupported()) { var canvas = document.getElementById("renderCanvas"); var engine = new BABYLON.Engine(canvas, true); BABYLON.SceneLoader.Load("", "untitled.babylon", engine, function (newScene) { // Wait for textures and shaders to be ready newScene.executeWhenReady(function () { var camera = new BABYLON.ArcRotateCamera("ArcRotateCamera", 0, 0, 0, BABYLON.Vector3.Zero(), newScene); camera.setPosition(new BABYLON.Vector3(0,0,-3)); newScene.activeCamera = camera; newScene.activeCamera.attachControl(canvas); newScene.clearColor = new BABYLON.Color3(1,1,1); var light0 = new BABYLON.HemisphericLight("Hemi0", new BABYLON.Vector3(0, 1, 0), newScene); light0.diffuse = new BABYLON.Color3(1, 1, 1); light0.specular = new BABYLON.Color3(0, 0, 0); light0.groundColor = new BABYLON.Color3(0, 0, 0); var light1 = new BABYLON.HemisphericLight("Hemi1", new BABYLON.Vector3(0, -1, 0), newScene); light1.diffuse = new BABYLON.Color3(1, 1, 1); light1.specular = new BABYLON.Color3(0,0,0); light1.groundColor = new BABYLON.Color3(0, 0, 0); // Once the scene is loaded, just register a render loop to render it engine.runRenderLoop(function() { newScene.render(); }); }); }, function (progress) { }); } </script> </html>
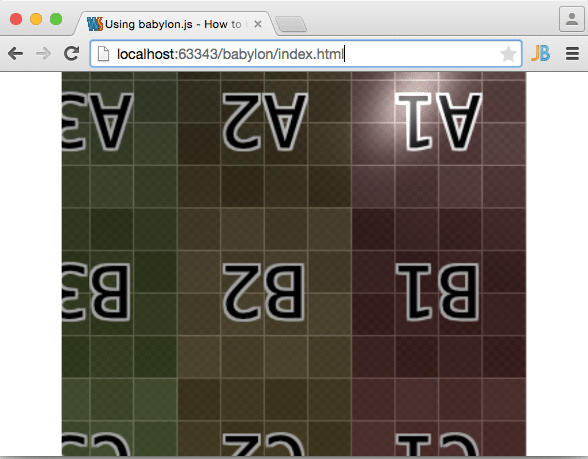
// Import a Mesh BABYLON.SceneLoader.ImportMesh("","","untitled.babylon",scene, function(meshes){ meshes[0].position = new BABYLON.Vector3(0,0,0); engine.runRenderLoop(function(){ scene.render(); }); });
The Documentation
This is an area that is both good and bad. The primary source of documentation is the wiki available here. Let me just start by saying I HATE the wiki software they used. It’s just annoying in a thousand little small ways. For example, clicking column headings on the left hand side often brings you to pages like this…
It’s a minor gripe, but it really annoyed me. Even little things like resizing can cause the software to go completely stupid, oh and you can’t even resize the width of the sidebar… Wiki’s are something that have been solved… so why use this subpar implementation? Anyways, back to the actual contents…
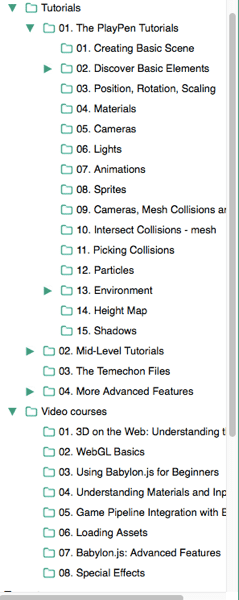
The Tutorials first… there are a good collection of tutorials, in both Text and Video form. Some are hosted locally, some on external sites. The breadth of topics is solid though:
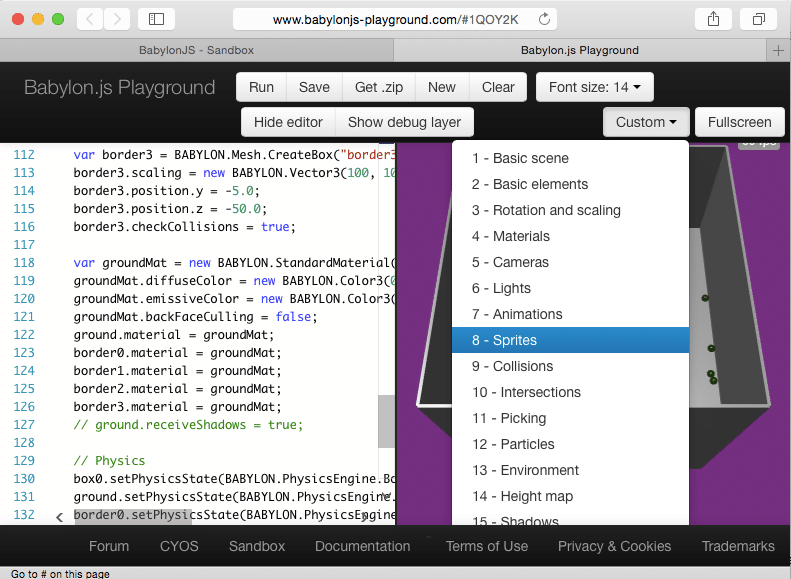
Truth is, I almost never needed them, thanks to the playground. The playground is a collection of samples that you can play with live and contain most of the examples you would need to get started. If you are a sample code focused learner, you will love this.
You can access the playground here.
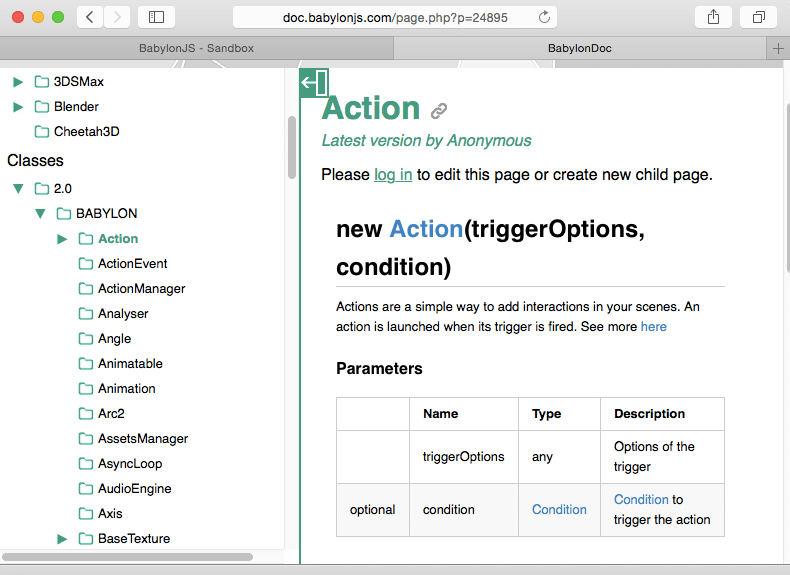
There is also a class reference that is like the rest of the documentation, both good and bad. Generated documentation is another thing that has mostly been solved… and it’s another area where BabylonJS decided to use a different solution, one that is vastly inferior to the norm.
It can be access from the left hand sidebar, and is subject to the same screwy navigation as the rest of the wiki… clicking column heads brings up a useless page to the right. You need to dig down on the left to the class you want, and it will then appear on the right. Unfortunately, and I really missed this, there was no inheritance based information in the documentation, like you get with other offerings. Therefore figuring out class hierarchies are a great deal more difficult than they need to be. The actual documentation itself is fairly solid, generally having the information you need in sufficient detail, an area where many of these projects fail hard.
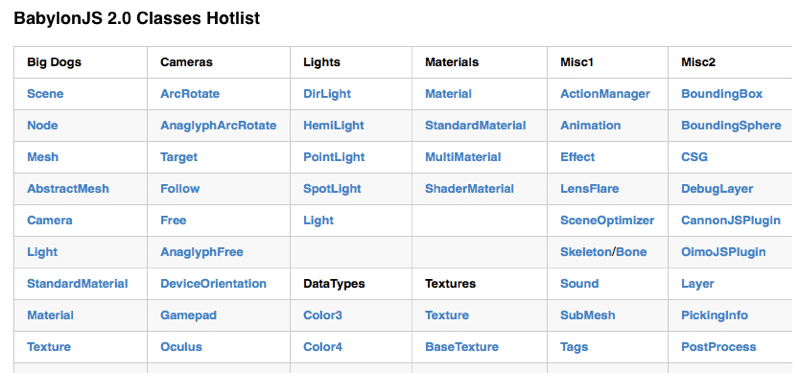
There is however this page. It’s a hand curated list of the most popular classes… although they didn’t always use the same class names ( often short hands ) which adds unneeded confusion.
When starting out however, this is probably a page you will have bookmarked on a permanent bases.
Finally there are the forums, like Phaser and Pixi, they are hosted on Html5GameDevs Forums. This is a good community with good participation. Oddly though, I find it does really poorly with Google searches, so if you need help on a topic, you are often best going to the forums and searching directly. This was true of Phaser as well… not really sure what the issue is.
So basically the contents of the documentation is fine, good even. The Playground is exceptional. The wiki/reference software they use on the other hand is just bad and hurts the whole experience.
Other Tools
So, Babylon is a very code focused engine, there is no integrated editor, font creation tools, animation tool, etc… However there are a couple tools that you should be aware of, even if you don’t work in BabylonJS!
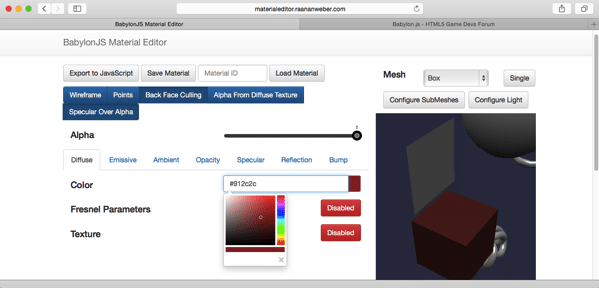
There is the Material editor. For programmatically creating materials that can be previewed in real time:
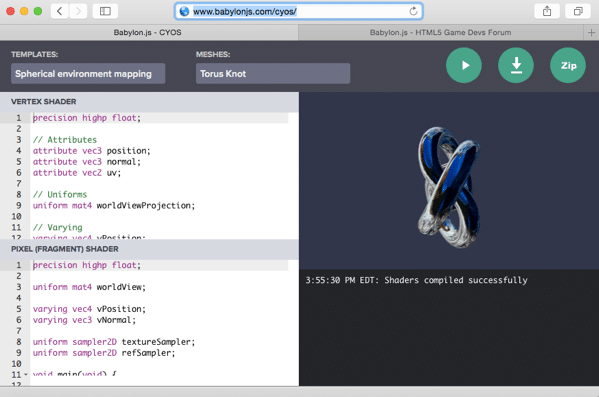
There is the shader editor (CYOS), enabling you to create GLSL shaders, tested in real time. A handy tool, even if you aren’t working in BabylonJS.
There is also the Sandbox, for testing your assets out. Frankly it never worked for me… Granted I didn’t really look into it all the deeply either.
Conclusion
As I’ve said a number of times, BabylonJS is a code focused engine. It provides the low and medium level plumbing to enable you to create a 3D game. Due to the restraints of time, page length and my own experience, I obviously can’t deep dive into the technical abilities of this engine. This is a shame, as I believe it’s at that level that this engine really starts to shine. That said, its an approachable, clean, relatively complete 3D game library/engine, that if you prefer to work in your CAD program of choice, is a great pairing. If you are looking for more of an editor experience, you should certainly look elsewhere.
As is important with these types of projects, the community behind Babylon is good, the documentation/tutorials/materials are all quite good in content, but could use a great deal of polish in presentation.
If you are looking to make 3D games using HTML, should you consider Babylon? If you don’t require an editor… certainly!
The Video

