In part 3 we created a simple Loom application.
In this section, we are going to look at how to draw graphics using the Loom game engine. I am going to make use of a sprite sheet I obtained here. Feel free of course to substitute whatever image you want. Keep in mind, I have no rights to that image, so neither do you! If you are the author and want it removed, let me know and I will.
Anyways, lets jump right in and draw a single sprite centred on screen.
package
{
import cocos2d.Cocos2DGame;
import cocos2d.CCSprite;
import cocos2d.Cocos2D;
public class HelloWorld extends Cocos2DGame
{
override public function run():void
{
super.run();
var sprite = CCSprite.createFromFile(“assets/robin.png”);
sprite.x = Cocos2D.getDisplayWidth()/2;
sprite.y = Cocos2D.getDisplayHeight()/2;
layer.addChild(sprite);
}
}
}
The code is pretty much identical to our Hello World code earlier. As you can see, CCSprite elements ( CCNode derived more accurately ) objects are positioned relative to their centre by default, while the positioning is relative to the bottom left corner of the screen.
Run this code and you will see:
As you can see from the bottom corner, we are running at 60 FPS, but considering we aren’t doing anything, thats not really all that impressive.
Let’s see what happens when we dial it up to 1000.
package
{
import cocos2d.Cocos2DGame;
import cocos2d.CCSprite;
import cocos2d.Cocos2D;
public class HelloWorld extends Cocos2DGame
{
override public function run():void
{
//var sprites:Array = new Array();
var sprites = new Vector.<CCSprite>();
var i:int = 0;
for(i = 0; i < 1000; i++){
var sprite = CCSprite.createFromFile(“assets/robin.png”);
sprite.x = Math.random() * Cocos2D.getDisplayWidth();
sprite.y = Math.random() * Cocos2D.getDisplayHeight();
sprites.push(sprite);
}
for each( var spr in sprites){
layer.addChild(spr);
}
super.run();
}
}
}
This code shows one of the differences from ActionScript. In comments you can see how the ActionScript array would work. Since LoomScript is typed you can’t do this, so instead your create a Vector of type CCSprite. Once created though, its functionally identical to an array, at least on the surface. We simply loop a thousand times, randomizing the position within the screen limits. We then loop through all of the sprites ( yes, I realize I could have simply done this in the first for loop ) in the array and add them to our layer. This is an area I found a bit odd, from my C++ warped programming mind, I couldn’t re-use the name sprite in my foreach scope because it recognized the previous variable ‘sprite’ as being in local scope. I don’t know if this odd scoping is an ActionScript thing, or LoomScript thing.
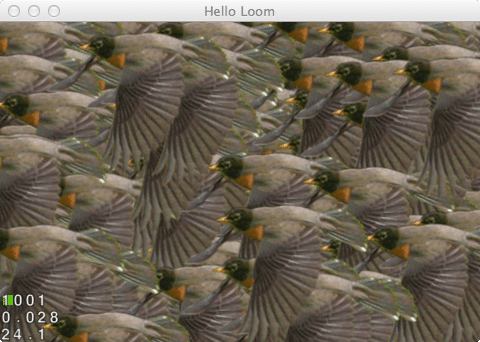
Here is our application running:
Down to 24FPS… hmm, 1000 sprites isn’t an unrealistic amount, let’s see if we can’t speed that up a bit. Generally there is a sprite batching system available, for when you are drawing similar images over and over, and Loom is no exception.
Here is the same application using CCSpriteBatchNode:
package
{
import cocos2d.Cocos2DGame;
import cocos2d.CCSprite;
import cocos2d.Cocos2D;
import cocos2d.CCSpriteBatchNode;
public class HelloWorld extends Cocos2DGame
{
override public function run():void
{
//var sprites:Array = new Array();
var sprites = new Vector.<CCSprite>();
var i:int = 0;
var spriteBatch = CCSpriteBatchNode.create(“assets/robin.png”);
layer.addChild(spriteBatch);
for(i = 0; i < 1000; i++){
var sprite = CCSprite.createFromFile(“assets/robin.png”);
sprite.x = Math.random() * Cocos2D.getDisplayWidth();
sprite.y = Math.random() * Cocos2D.getDisplayHeight();
sprites.push(sprite);
}
for each( var spr in sprites){
spriteBatch.addChild(spr);
}
super.run();
}
}
}
Now when we run this newly updated version:
A net gain of 13FPS. Of course, there are probably a few thousand optimizations I could perform, but its nice to see the most common ones are in there.
Up until this point, we’ve only used one sprite in our sprite sheet. Let’s take a look at performing an animation using them all.
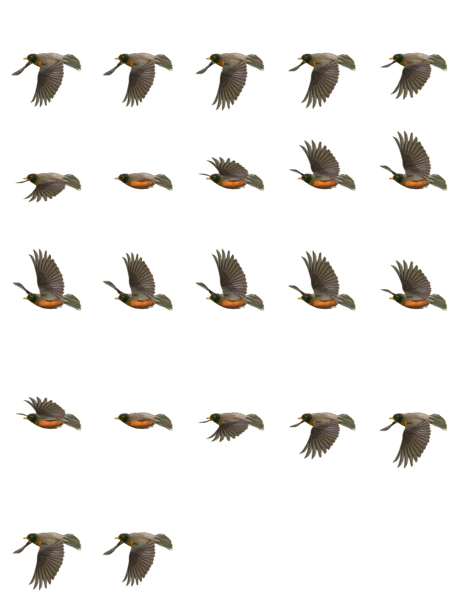
Here again is our source image:
The image is 1200×1570 in dimension and contains a 5×5 grid of sprites ( except the last three that is ).
Let’s take a look at the code behind animating a sprite sheet ( or texture atlas, pick your poison ):
package
{
import cocos2d.Cocos2DGame;
import cocos2d.CCSprite;
import cocos2d.Cocos2D;
import cocos2d.CCAnimation;
import cocos2d.CCSpriteFrame;
import cocos2d.CCRect;
import cocos2d.CCPoint;
import cocos2d.CCSize;
import cocos2d.CCAnimationCache;
public class HelloWorld extends Cocos2DGame
{
public var sprite:CCSprite;
public var currentFrame:int;
public var lastFrameTime:Number;
public var elapsedTime:Number;
override public function run():void
{
lastFrameTime = 0;
var animation:CCAnimation;
currentFrame = 0;
sprite = CCSprite.create();
sprite.x = Cocos2D.getDisplayWidth()/2;
sprite.y = Cocos2D.getDisplayHeight()/2;
animation = CCAnimation.animation(); // Why not createAnimation()?
var frameRect:CCRect;
var frameSize:CCSize;
frameSize.width = 240;
frameSize.height = 314;
for(var i =0; i < 5; i++){
for(var j =0; j < 5; j++){
if(i == 4 && j > 1)
break;
frameRect.setRect(j * frameSize.width, i * frameSize.height, frameSize.width, frameSize.height);
var frame = CCSpriteFrame.create(“assets/robins.png”,frameRect,false,new CCPoint(), frameSize);
animation.addSpriteFrame(frame);
}
}
CCAnimationCache.sharedAnimationCache().addAnimation(animation, “fly”);
layer.addChild(sprite);
super.run();
}
override public function onTick():void {
var thisFrameTime:Number = Platform.getTime();
var delta:Number = thisFrameTime – lastFrameTime;
lastFrameTime = thisFrameTime;
elapsedTime += delta;
if(elapsedTime > 100){
elapsedTime = 0;
sprite.setDisplayFrameWithAnimationName(“fly”,currentFrame);
if(currentFrame > 20){
currentFrame = 0;
}
else{
currentFrame++;
}
}
}
}
}
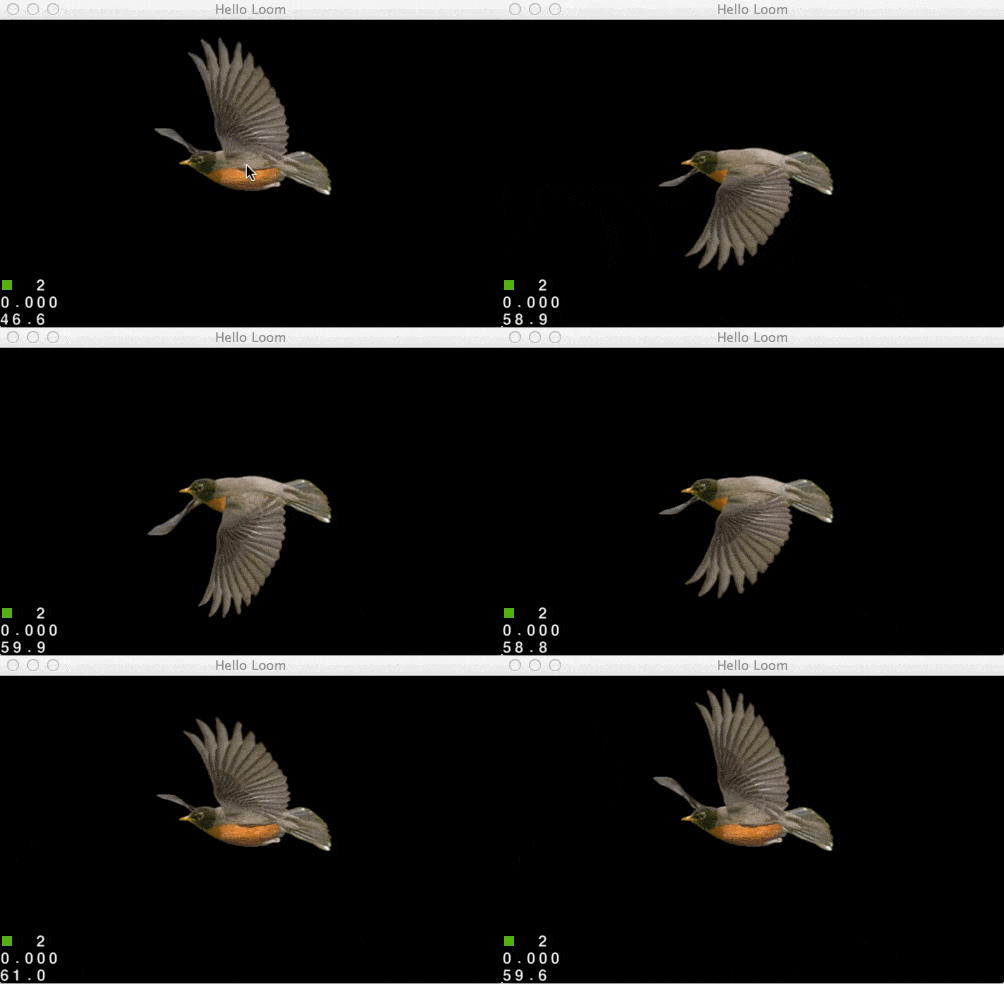
Now when you run the application, you should see:
The heart of this code is a pair of loops that create a Rect representing the location of the frame within the parent image. Each frame is created as a CCSpriteFrame, all using the same source image file as well as the newly created rect for the frames location within the sprite sheet. We then add each CCSpriteFrame to the CCAnimation variable with the call addSpriteFrame().
Now that our CCAnimation is fully populated, we add it to a global animation cache by calling CCAnimationCache.sharedAnimationCache().addAnimation(), passing in our newly created CCAnimation, as well as a string that we will access it by later.
This is an area I found quite annoying to deal with Loom, or more specifically Cocos2D. I don’t really like the idea of using global managers if I don’t have to, so I attempted to just keep a CCAnimation locally and use it to populate my CCSprite each frame. You can’t, or at least, you can’t easily. All (Cocos2D, not Loom) samples you will find either lead to a deprecated method in CCSprite, or down a wild goose chase of Animation related functionality in Cocos2D. There seem to be a dozen ways to perform animations, little of which work with each other. The Cocos2D library is definite need of streamlining! I also ran into inconsistent naming conventions, like the above mentioned CCAnimation.animation() call. The convention generally is CCAnimation.create() or CCAnimation.createAnimation(), and I believe both exist, so why break with the naming convention here? This is one of those things I ran into with Cocos2d-html and it’s frustrating and makes learning and working with the SDK harder. This isn’t a bash on Loom, it’s functionality it inherited from Cocos2D, but one is thoroughly tied to the other.
Our remaining code is the onTick handler, which will be called every iteration of the game loop. We want to advance to the next frame after 100 milliseconds have elapsed, so we figure out how much time has elapsed since the prior frame and add it to our running total. Once 100ms is reached, we advance to the next frame in the animation we cached earlier, with the call sprite.setDisplayFrameWithAnimationName().
As you can see though, once you puzzle out the convoluted hierarchy of classes provided by Cocos2D, drawing a sprite, drawing a sprite from a sprite sheet, and animating between frames is a rather easy task in Loom.
I did run into another snag, specific to LoomScript, on using the TimeManager class in place of Platform.getTime(), but truth of the matter, it’s probably me not understanding dependency injection. It’s the first time I haven’t been able to puzzle something out myself, which is rather impressive for a new library. It is also the first time I have personally used their support forum. It’s been less than an hour since I posted, and I’ve already received a useful reply, so I have to give them thumbs up for that!
In the next part we will look at controlling your application and maybe a bit more, as we near the end of this tour.


