I recently hosted a guest tutorial post on using Moscrif, a new Javascript based cross platform, game focused development environment. Thing is, I myself haven’t really had a chance to check out Moscrif myself. In the past I did try out a 
Moscrif on the other hand is a bit different. Like Appcelerator, it’s cross platform, mobile focused, JavaScript based and comes with it’s own IDE. Unlike Appcelerator it ships with a simulator you can use for stage 1 debugging, removing the biggest headache. Perhaps most important of all for readers of this site, Moscrif is also game focused while Titanium is not ( yet ).
So, I’ve decided to take a bit closer look at Moscrif, over a couple of posts. First off, this is *not* a review. I certainly haven’t put enough time in with Moscrif to even consider reviewing it. Consider it instead a tour of features available as well as my initial impressions.
So, what then is Moscrif anyways?
The above description is pretty much accurate. Moscrif is a cross platform JavaScript based IDE/language/library for creating mobile applications with a focus on games. If you’ve ever used Appcelerator Titanium, you’ve got a pretty good idea of what you are getting here, just with a more game oriented focus. The tools run on Windows, Mac and Linux, while you can target iOS, Android and oddly enough… Bada, with a single code base.
Installation process
Moscrif install was easy enough, but theres a catch. You need to create an account (which you can do here), and like the Corona SDK and Appcelerator, you will need to log in to do anything, making an always on connection pretty much a much. Unfortunately this login process is required even if you are just using the basic version.
Otherwise the install process is pretty much a no-brainer. In my case I am using Mac OS. You simply download the package and run a pair of installs. Moscrif depends on a particular version of the Mono framework, which you need to install first. It is included in the downloaded package, so simply download, run the Mono installer then the Moscrif installer, that’s about it. You can download (and register) right here.
Once you’ve finished installing, the first time you run Moscrif you will have to log in with your Moscif account.
A first look at the IDE
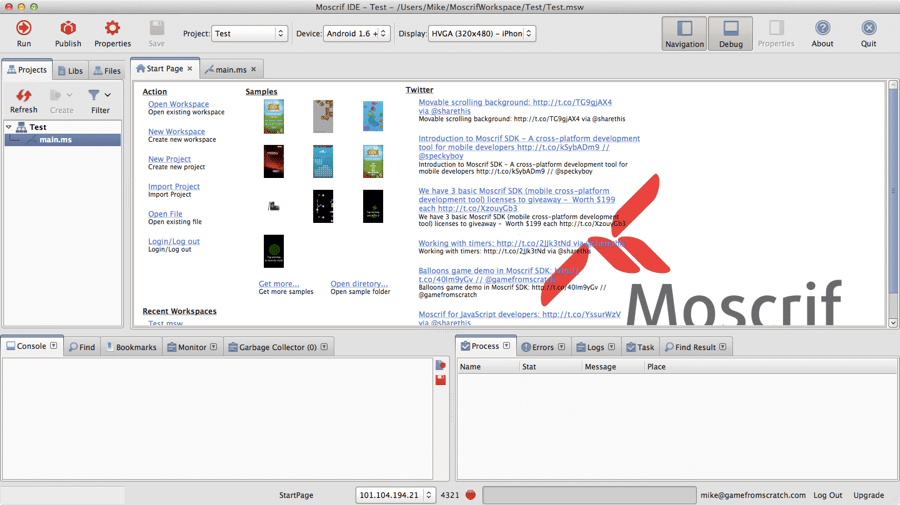
Load up and log in to Moscrif and you will be greeted by the screen:
As you can see, it’s a pretty complete and traditional IDE. Your project management window is on the left, your console and debug windows are across the bottom and the remains of the window is for code editing. You can use the icons at the top right to toggle sections of the IDE on and off. I do have one immediate annoyance though, I am running on MacOS and there is no ability to maximize the window, or whatever that feature is called. Considering that single feature is what makes Mac tolerable to me, hopefully support is added soon!
Hello World
To get a feel for the application, let’s create an extremely simple Hello World project.
To get started, select File->New->New Project.
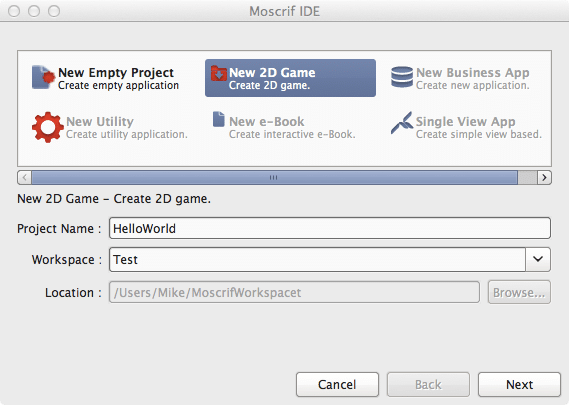
In the resulting dialog, choose 2D Game and name your project, I went with Hello World. Like so:
Now in the next dialog, keep Game2D selected and choose Finish.
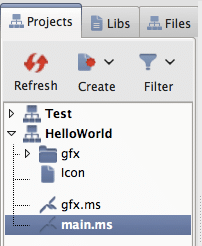
It will have created a project for you like the one pictured to the left.
Main.ms is the file we are most interest in, it is the main entry point of your project.
Now replace the code in main.ms with the following:
include “lib://game2d/game.ms”
class HelloWorld : Game {
function start()
{
super.start();
this.paint = new Paint();
this.paint.textSize = 72;
}
function draw(canvas)
{
canvas.clear(0xffffffff);
canvas.color = 0x000000ff;
var (w,h) = this.paint.measureText(“Hello world”)
canvas.drawText(“Hello world”,System.width/2 –w/2,System.height/2 –h/2, this.paint);
}
}
new HelloWorld().run();
As you can see, Moscrif is very similar to JavaScript with some obvious extensions, such as class or multiple return values.
Now let’s run our new application, which brings us to…
The Simulator
Across the top of our screen are the simulator controls:
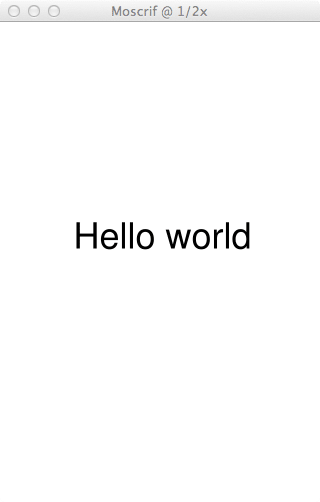
Simply click Run, and the iPhone4 simulator will run. Voila:
You can control the Simulator with the following hotkeys, although the rotation keys don’t work if you don’t support landscape changes in code. I also had a bit of a fight getting F11 and F12 working on Mac, but that is more an OS issue than a Moscrif issue.
| Operation | Mac OS | Linux | Windows | Moscrif symbol |
| Take screenshot | F12 | coming soon | F12 | |
| Rotate left | F11 | F11 | ||
| Rotate right | F11 | F11 | ||
| Left functional key | F1 | F1 | #left | |
| Right functional key | F2 | F2 | #right | |
| Send / Green / Talk | F3 | F3 | #send | |
| End / Red | F4 | F4 | #end | |
| Back | Backspace | Backspace | #back | |
| Ok / Centre key / Confirm | Return | Return | #ok | |
| Volume Up | F6 | #volumeUp | ||
| Volume Down | F7 | #volumeDown | ||
| Camera | F5 | #camera | ||
| Power | #power | |||
| Menu | F8 | #menu | ||
| Home | F9 | #home | ||
| Zoom In | Cmd + (=) | Ctrl I, Ctrl + | ||
| Zoom Out | Cms – | Ctrl O, Ctrl – |
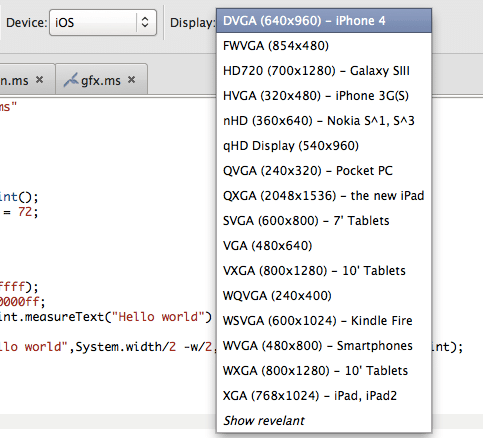
As you can see from the display options, there is a decent number of profiles pre-configured.
I did run in to a few issues, when I switched from Iphone3 to iPad, then implemented screen rotation, only a 480×320 portion of the screen was rendered. That said, having a simulator layer massively improves turn around time, especially when working on Android where the emulator is pure garbage.
Publishing
The simulator is nice, but at the end of the day you are going to want to run on an actual device. That process is actually quite simple.
Simply select the menu Project->Publish
The following dialog will appear:

Select your OS as a tab at the top, click a checkbox beside a skin and click the Publish button. You can totally tell a programmer wrote this dialog… Reset Matrix? Really? 😉 Coincidentally Reset Matrix is simply De-select, if you are curious.
After clicking Publish, Moscrif will churn away for a little bit and a Finder/Explorer window will pop up with your APK file ready for deployment. I have to admit, this process is quite impressive, as it doesn’t require you to install the Android tools, mess with any environment variables or any of the typical fun. If you are just starting out, this is about the easiest way to generate an APK file I’ve ever seen. Coincidentally, the APK was about 4MB in size, which is pretty impressive. When using Titanium, a Hello World measured in closer to 10MB.
There is however a downside (one Appcelerator Titanium shares), you can’t currently debug on device, which sucks. You can log/trace back to the IDE as your program runs, but that’s it. There are a whole class of bugs, especially on Android, that only express themselves on an actual device, so this can get a bit annoying. Let’s hope the simulator does a very good job of, well, Simulating. Fortunately, on device debugging is a very near term item on the roadmap of features. Even more confusing, it doesn’t appear you can debug in the simulator either, other than debug logging. I have become so used to being able to set breakpoints and step through code, it feels like a major omission when I cant. Hopefully this functionality gets added, at least to the simulator. Or perhaps I simply overlooked the functionality somewhere.
Other stuff and closing thoughts
The IDE is fairly easy to come to terms with. What you see is pretty much what you get, there aren’t a hundred menu items or nested dialogs, and there really doesn’t have to be. The code editing tools are pretty impressive, with good legible errors displayed in realtime. There is code completion, it’s quick and appears to work exactly as you would expect it to. Otherwise it’s a fairly barebones but functional code editor. There is smart tabbing, find/replace, code suggestions/completion, hover-over code tips and code folding and thats about it. For more advanced editing, such as refactoring, you need to move to a more dedicated text editor. Truth is, in 99% of occasions, the IDE is a perfectly capable and even enjoyable place to edit your code.
Next is the area of support and community. Let me start with the bad, community. I am not saying the community is bad, more… missing. One of the downsides of being a fairly new product is the lack of information online. When you run in to a problem on Moscrif, there isn’t yet a large community to turn to and Google won’t come to save you.
Now, the good. Moscrif’s documentation ROCKS. It staggers me how good of a job they have done. Theres a pretty good step by step documentation that walk you through many of the features with code examples. Where Moscrif really shines though is the reference materials. It’s comprehensive, complete, timely and almost always comes with a code sample. The reference material goes a long way to minimizing the lack of community… you don’t have as many people out there to answer your questions… but you have such great documentation that you don’t really have any questions in the first place! If you are middleware publisher and want to know how to do documentation… look no further!
I haven’t really gotten the chance to really dive in and code. That said, what I saw in my initial inspection certainly have my interest piqued, so I will be looking at the code side of things shortly. So stay tuned for a more detailed hands on with the code in the future. I am impressed by what I’ve seen so far.
Pros
- it’s JavaScript based
- no external dependencies. No need to install other tools or SDKs. Fastest way I’ve seen to build an Android app yet
- small executable size for the type of tool it is
- EXCELLENT reference materials
- all in one, easy to get started, reasonably complete
- simulator makes for fast dev turn around times
- JavaScript language enhancements that fix some of JavaScript’s warts
- Fast OpenGL based performance
Cons
- it’s JavaScript based
- lack of online presence, forum software is terrible and finding information not in the documentation is difficult
- internet connection required
- debugger needs improvement and basic debugging features ( breakpoints, inspection, etc ) added
- it’s young and relatively unproven
Stay tuned for a later post when I look at Moscrif from a coding perspective.
General Programming

