Today we are going to take a look at the PlayCanvas HTML5 3D Game engine. While not strictly a tutorial, this guide should give you a pretty good idea of what the PlayCanvas Engine includes,if it is right for you and give you enough information to get you started.
There is also a video version of this tutorial available here.
First off, what exactly is the PlayCanvas Engine? Well, let’s let them describe it in their own words:
PlayCanvas is the world’s easiest to use WebGL Game Engine. It’s free, it’s open source and it’s backed by amazing developer tools.
The amazing developer tools part isn’t hyperbole either, PlayCanvas ships with an impressive amount of polished and high quality tools. Where it does get a bit confusing is where the open source part stops, and the pay to use it part starts.
Getting Started
There are three ways to develop with PlayCanvas. Download and run the tools locally, use the online tools and code using a Github or Bitbucket repository or, as I am going to do in this example, work entirely in their online hosted IDE. It’s not a bad way to work but sadly is missing a few features, like code autocompletion. I would probably work in WebStorm using a Github repository if working on a production project instead of just playing around.
To get started with the online hosted tools, you need to create an account then log in to PlayCanvas. You actually have to create two accounts, first is your over all account, the second is a developer account. This is because PlayCanvas supports multiple concurrent developers working on and editing the same project. It is however a premium feature.
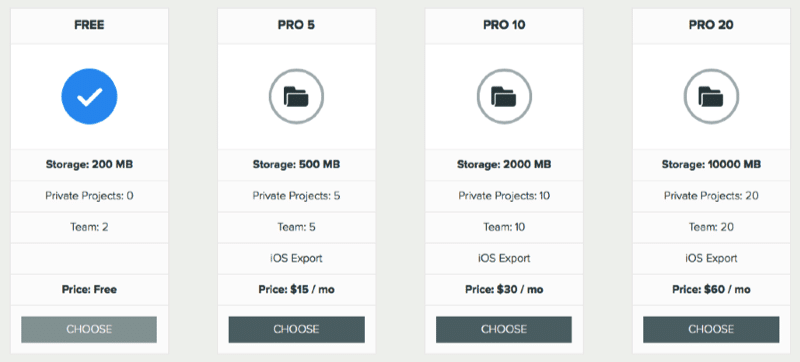
Let’s talk about that for a second… what is premium and what is not? PlayCanvas want to make money obviously, so let’s look at the tiers. First off, the game engine is open source and available on Github. However, not all of the tools like the content importer are. I haven’t downloaded the engine locally, so I am unsure how much of an impact this has. What is clear is the different tiers available. As of today, the pricing looks like the following:
There is a second tier entirely for organizations as well.
In a nutshell, the number one biggest drawback is going to be 0 private projects in the free version. If you are developing a free and open source game, this is a non issue, but obviously if you are creating a private commercial game, you will need to create a private project. Basically this means anyone can see your project, source, resources, etc with the free version. The remaining differences boil down to disk space availability, number of team member accounts you can create and being able to export an iOS ready project. Prices range from 15 – 60$ a month.
Everything you see today is from the free edition. Other than iOS functionality, all versions contain the same feature set.
The Editor
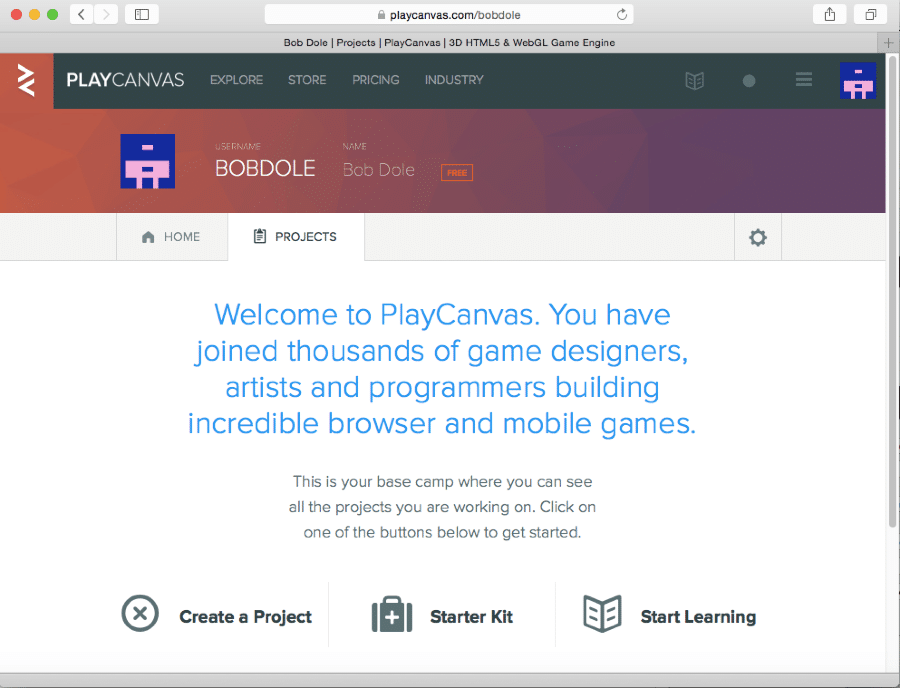
So once you’ve logged in and created a developer account, you should see a screen like this one:
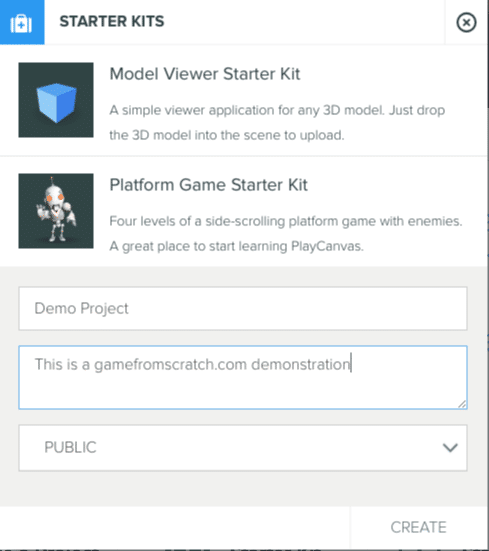
You can either create a new project from scratch, or start with one of the starter kits. We are going to use a starter kit. This is a pre-configured mini project to get you going. There are currently two starter projects available, a 3D model viewer and a platformer. Let’s go with the later kit. Since this is a free account, we have no options but to make the project Public.
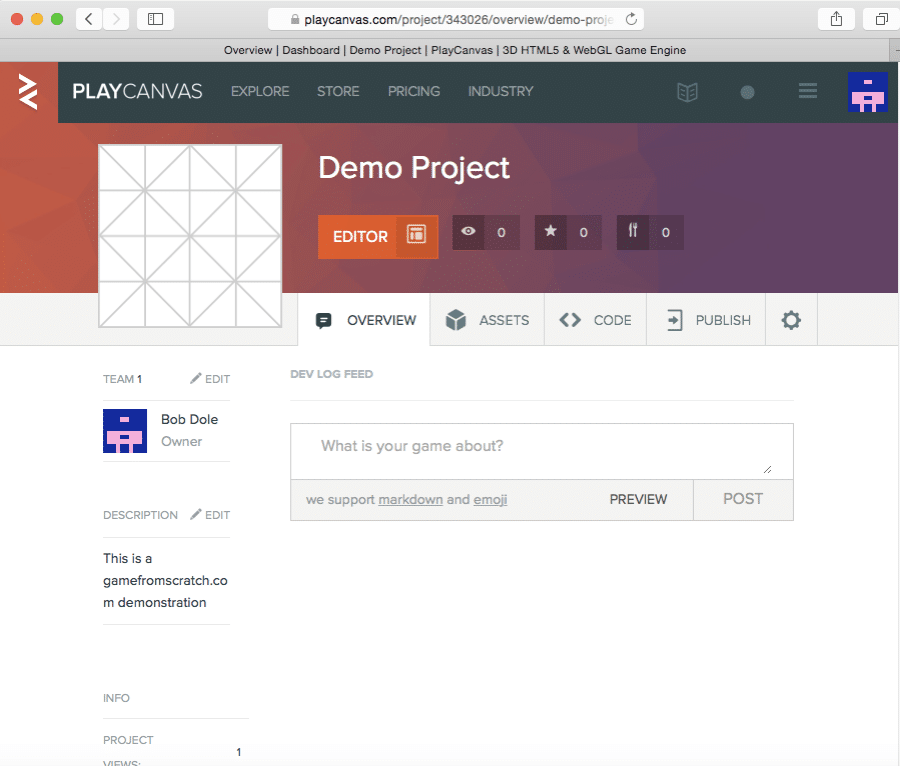
You will now be brought to the project management page.
Click the editor button and you will be brought to the guts of PlayCanvas, where you will be doing the majority of your work. Click this button:
The Editor
There are actually two editors currently available, the classic editor and a new beta editor. You can toggle between them by selecting the Settings gear icon and choosing Use New Editor:
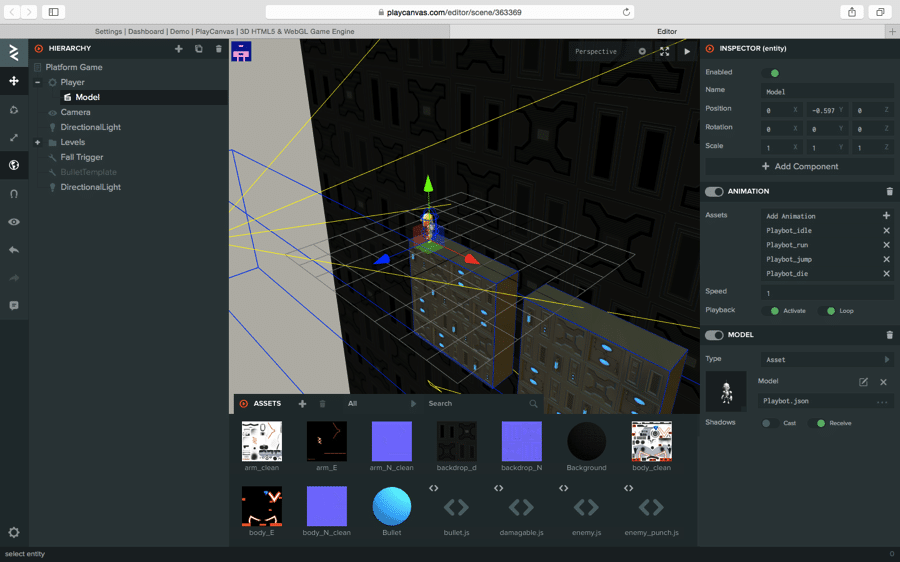
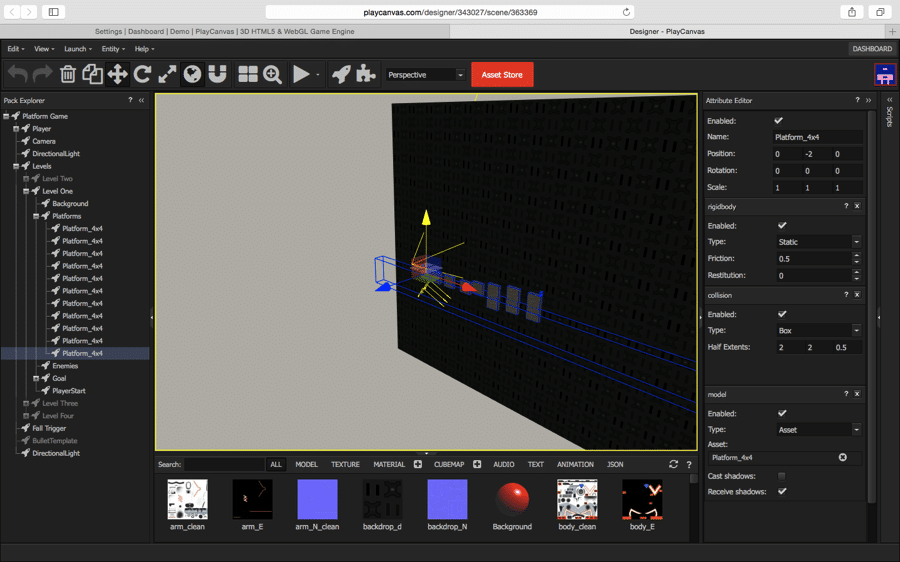
Here are the two different editors.
New Beta Editor
Classic Editor
For this post I am going to stick with the standard production editor.
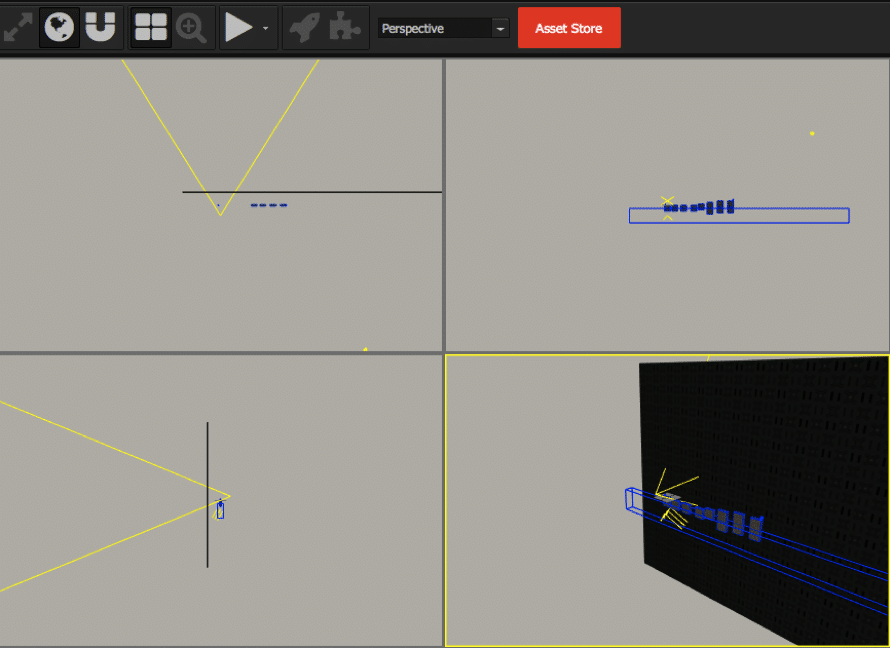
The layout has your scene graph/tree on the left hand side, your palette of assets across the bottom, and your properties/components across the right. In the middle of course is your 3D Scene view. If you prefer, you can switch to a traditional quad view mode:
Obviously in the 3D view you can zoom, orbit and pan the camera, select and edit objects, etc. You compose a scene by dragging it in from the Pack Explorer. In addition to the Packs Explorer you see here, there is also an assets and a scripts one as well.
Press the Play icon and your game should start. Below is an embed of the project ( after Publish from the Dashboard ):
Click the mouse to focus, used arrow keys to navigate and spacebar to jump.
So that’s creating an initial project… now let’s take a look at the developer experience.
Importing a 3D Model
This is always one of the most challenging aspects of working with a 3D engine… getting your content in it. PlayCanvas makes it pretty simple, but I did run into some small hiccups.
First author your 3D object in your modelling app of choice. Personally I am using Blender. They supports FBX, COLLADA and 3DS formats, although FBX is highly recommended. There are a few limits as well. You need to embed textures in with your model ( or manually add them later, as we will see ), you have a 256 bone and 64K vertices limit per mesh.
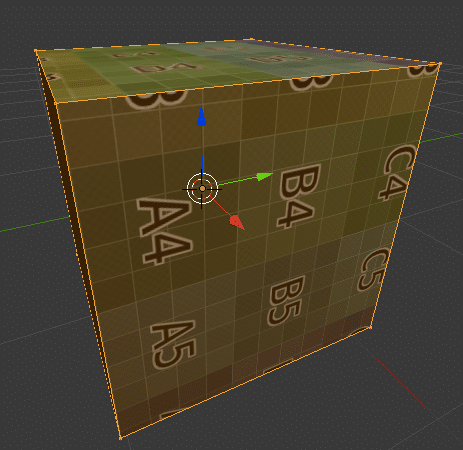
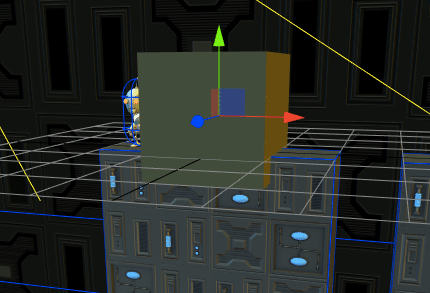
I am going to create a very simple textured cube in Blender, like so:
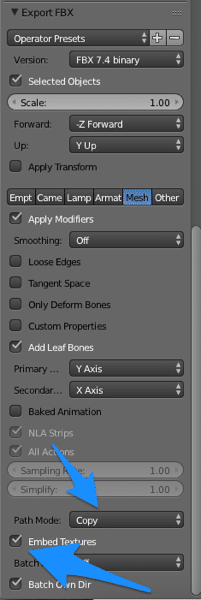
And then export as an FBX using the following settings, the important ones highlighted:
Now the we have an FBX, we need to import it to PlayCanvas. Next in the dashboard, go to the assets section and click New Asset:
Then simply drag the FBX file from finder/explorer to the appropriate spot.
Now if you look at the palette portion of the editor ( hit the refresh button top right corner of panel ) you should now see your object. Simply drag one into the scene:
And tada:
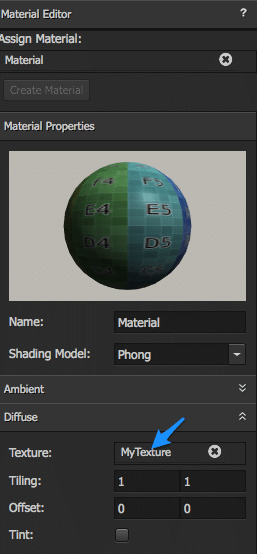
In my case however, the texture is always missing. I’ve tried different formatting options, going through FBX exporter and never had any luck. It is however easily fixed. Instead import your texture as an asset. Then in 3D view, click your object so it is selected, click again so Material is selected in the Material Editor, select diffuse and assign your texture:
I have to assume this is a bug, either in Blender’s FBX import, or the PlayCanvas Import, but it’s extremely simply fixed by manually assigning the material so no big deal.
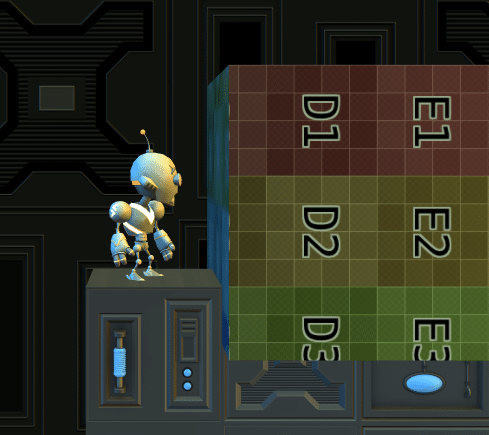
Now you will see your object renders properly in the scene:
Components
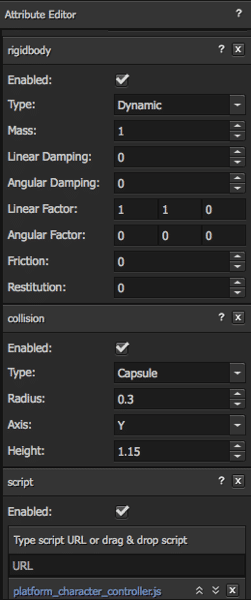
Like most modern popular engines, PlayCanvas is component based. Basically you add functionality to game entities by attaching components. Let’s take a look at the main character and how it’s composed. This can be seen by selecting the Player in the Pack Explorer then looking at the Attribute editor:
As you can see out Player is composed of a rigidbody, collision and script component. Additionally you can see it’s got a child entity named model. Model in turn has a animation and model component attached. It is through this parenting and composition you make the objects that composed your game.
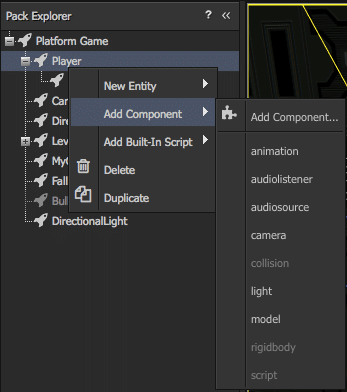
Adding a component to an entity is as simple as right clicking it and choosing Add Component:
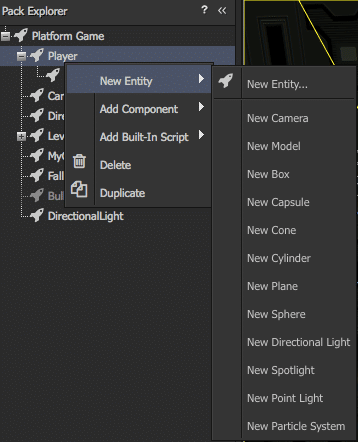
You can similarly add a New Entity the same way, but instead choosing New Entity.
You can of course create your own components and entities as well, but that goes way beyond what I intend to cover here. You may have noticed the script component attached to the Player… that segues nicely to…
Coding
As you probably expected, the coding language behind PlayCanvas is JavaScript. Scripts are attached to entities as a component. Here for example is code for input in the Player from the platform example:
// Player Input // Handle input from a keyboard // Requires: // - The entity must also have the platform_character_controller script attached pc.script.create('player_input', function (context) { var PlayerInput = function (entity) { this.entity = entity; }; PlayerInput.LEFT = "left"; PlayerInput.RIGHT = "right"; PlayerInput.JUMP = "jump"; PlayerInput.prototype = { initialize: function () { // Create a pc.input.Controller instance to handle input context.controller = new pc.input.Controller(document); // Register all keyboard input context.controller.registerKeys(PlayerInput.LEFT, [pc.input.KEY_A, pc.input.KEY_Q, pc.input.KEY_LEFT]) context.controller.registerKeys(PlayerInput.RIGHT, [pc.input.KEY_D, pc.input.KEY_RIGHT]) context.controller.registerKeys(PlayerInput.JUMP, [pc.input.KEY_W, pc.input.KEY_SPACE, pc.input.KEY_UP]) // Retrieve and store the script instance for the character controller this.playerScript = this.entity.script.platform_character_controller; }, // Check for left, right or jump and send move commands to the controller script update: function (dt) { if ( context.controller.isPressed(PlayerInput.LEFT) ) { this.playerScript.moveLeft(); } else if ( context.controller.isPressed(PlayerInput.RIGHT) ) { this.playerScript.moveRight(); } if (context.controller.wasPressed(PlayerInput.JUMP)) { this.playerScript.jump(); } } }; return PlayerInput; });
As you can see, the code is also very modular in nature as well. It’s clean and fairly well documented, we will get to that shortly.
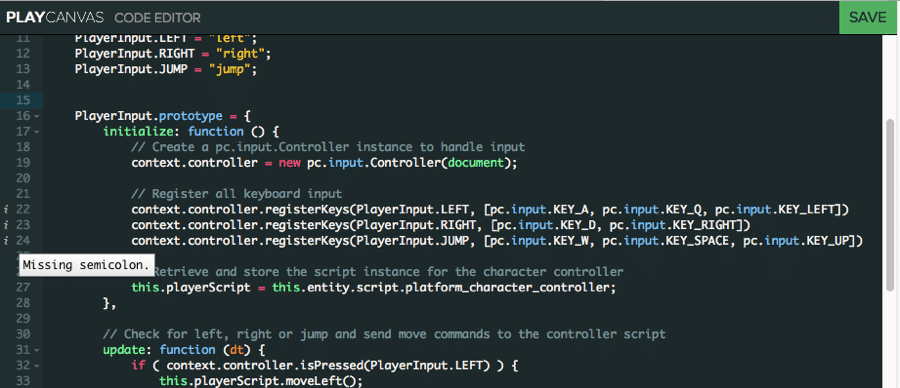
As I mentioned earlier, there are a couple of approaches to code editing. You can host your code in a Bitbucket or Github respiratory, edit using your editor of choice then sync it back. Otherwise you can use the built-in code editor. Let’s take a look at it:
It has some of the features you would expect. There is syntax highlighting, code folding and warning hints. What however there is not is code completion… that’s a glaring missing feature IMHO. It’s been requested and hopefully will be added soon.
The API is clean enough, the editor works, although for a large scale project you will most certainly want to use your own editor, I would certainly. Although if they added intellisense/code competition, I would spend a lot more time in the web based editor instead of my own IDE.
Documentation
This is an area that can make or break a project. I will say that PlayCanvas has very solid documentation. As you saw above, there are two starter projects to get you going, a Platformer and 3D model viewer.
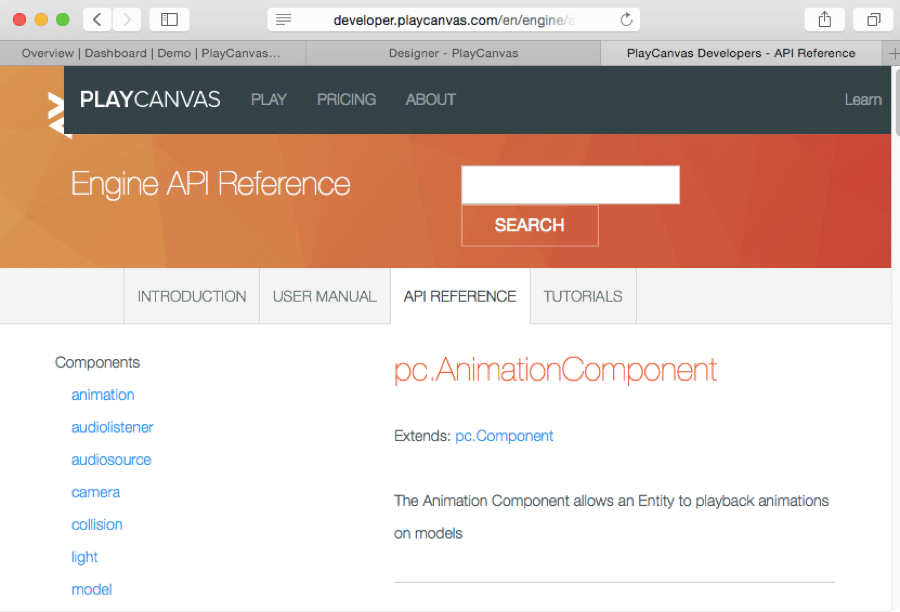
The documentation is entirely online including a User Manual, Reference and Tutorials:
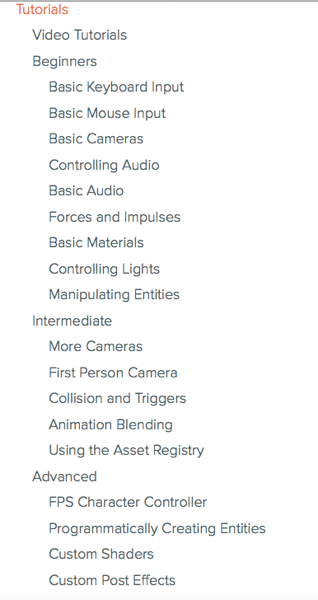
The documentation is clean, professional and for the most part as shown what I needed when I needed it. The User Manual covers common concepts like importing models, etc… but could certainly use a bit more depth. There is a pretty solid collection of tutorials available:
All told, documentation is a definite plus of this project. Some quick links if you want to check it out:
The Video Version
Conclusion
PlayCanvas is an impressive 3D engine for those looking to work in HTML5. The tools are comprehensive, the documentation is quite good, the pricing structure is reasonable and the code seems clean. Let me know if this is an engine you want to see additional coverage of here on gamefromscratch.com.

