In our previous tutorial in the BabylonJS Tutorial Series we covered positioning a camera in our world. There were still a few fundamental components missing, the top of which is lighting which we are going to cover today. Lights are used to, predictably enough, illuminate your scene. They interact with the color and materials on your various entities that compose your scene. There are multiple different light types available in BabylonJS including the Point Light, Directional Light, Spot Light and Hemispherical light. A point light is a single light source that radiates in all directions, like a naked lightbulb for example. A directional light in a radiates just in the direction it is pointed and it goes on forever with no fall off basically illuminating everything in its path regardless to distance. A spot light is similar to a directional light but it does fall off over a given distance and is cone shaped. A flashlight is a classic example of a spot light, as of course is a spot (or search) light!. A hemispherical light is generally used to represent an ever present ambient light source, the sun being perhaps the most common example. You can also emit light from textures using their emission property, but we will cover that at a later point. In this tutorial we are going to implement a point and a spot light.
There is an HD video version of this tutorial available here.
Let’s start with a point light. It’s a simple light that radiates from a single point (thus the name) in all directions.
<!DOCTYPE html> <html lang="en"> <head> <meta charset="UTF-8"> <title>Title</title> <script src="../Common/Lib/babylon.max.js"></script> <style> #canvas { width:100%; height:100%; } </style> </head> <body> <canvas id="canvas"></canvas> <script> window.addEventListener('DOMContentLoaded', function(){ var canvas = document.getElementById('canvas'); var engine = new BABYLON.Engine(canvas, true); var createScene = function(){ var scene = new BABYLON.Scene(engine); scene.clearColor = new BABYLON.Color3.White(); var box = BABYLON.Mesh.CreateBox("Box",4.0,scene); var camera = new BABYLON.ArcRotateCamera("arcCam", BABYLON.Tools.ToRadians(45), BABYLON.Tools.ToRadians(45), 10.0,box.position,scene); camera.attachControl(canvas,true); var light = new BABYLON.PointLight("pointLight",new BABYLON.Vector3( 0,10,0),scene); light.diffuse = new BABYLON.Color3(1,0,0); scene.actionManager = new BABYLON.ActionManager(scene); scene.actionManager.registerAction( new BABYLON.ExecuteCodeAction({ trigger: BABYLON.ActionManager.OnKeyUpTrigger, parameter: " " }, function () { light.setEnabled(!light.isEnabled()); } )); return scene; } var scene = createScene(); engine.runRenderLoop(function(){ var light = scene.getLightByName("pointLight"); light.diffuse.g += 0.01; light.diffuse.b += 0.01; scene.render(); }); }); </script> </body> </html>
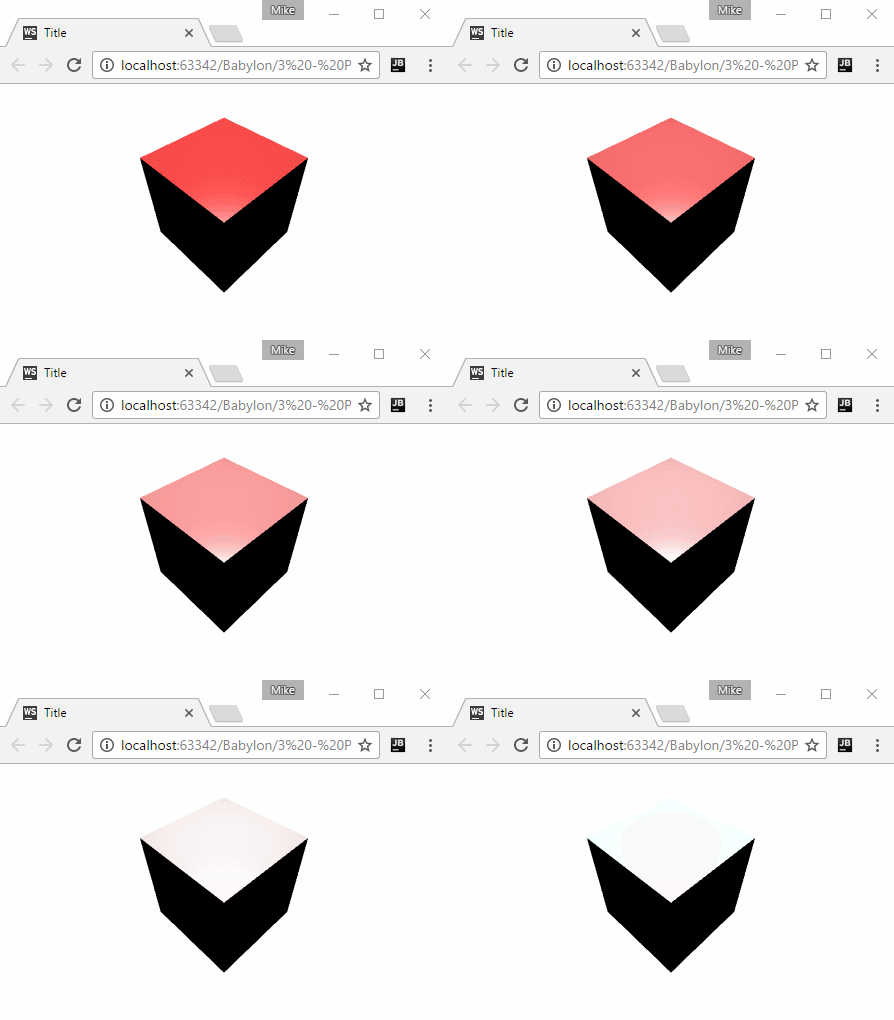
There are a couple things illustrated in this example. Creating a point light is done by calling new BABYLON.PointLight(), passing in the ID of the light, the position of the light in the world and finally the scene in which the light exists. You can set the color of the light by setting it’s diffuse property, in this case we set it to full red only. You will notice this example also shows a new concept in BabylonJS, the ActionManager. This is a way of wiring code to specific events. In this case we add some code that will be fired when the space key is pressed. That function simply turns off and on the light source by calling setEnabled() passing a true or false value. In the render loop we also slowly increase the lights green and blue components, so you can see the effect of diffuse lighting on the scene. When you run this code you should see:
Lights are implemented as part of the GLSL shader process and the active lights in the scene are passed to each StandardMaterial in the scene. By default the standard material is limited to a maximum of four active lights. This value can be overridden using the maxSimultaneousLights property of the StandardMaterial, although this may have some impact on performance, especially on mobile targets.
Next lets look at implementing a spot light. As with all things BabylonJS, the process is quite similar:
<script> window.addEventListener('DOMContentLoaded', function(){ var canvas = document.getElementById('canvas'); var engine = new BABYLON.Engine(canvas, true); var createScene = function(){ var scene = new BABYLON.Scene(engine); scene.clearColor = new BABYLON.Color3.White(); var box = BABYLON.Mesh.CreateBox("Box",4.0,scene); var camera = new BABYLON.ArcRotateCamera("arcCam", BABYLON.Tools.ToRadians(45), BABYLON.Tools.ToRadians(45), 10.0,box.position,scene); camera.attachControl(canvas,true); var light = new BABYLON.SpotLight("spotLight",new BABYLON.Vector3(0, 10,0),new BABYLON.Vector3(0,-1,0), BABYLON.Tools.ToRadians(45), // degrees the light fans out 0.1, // falloff/decay of the light over distance scene); return scene; } var scene = createScene(); engine.runRenderLoop(function(){ var light = scene.getLightByName("spotLight"); light.position.y -= 0.01; scene.render(); }); }); </script>
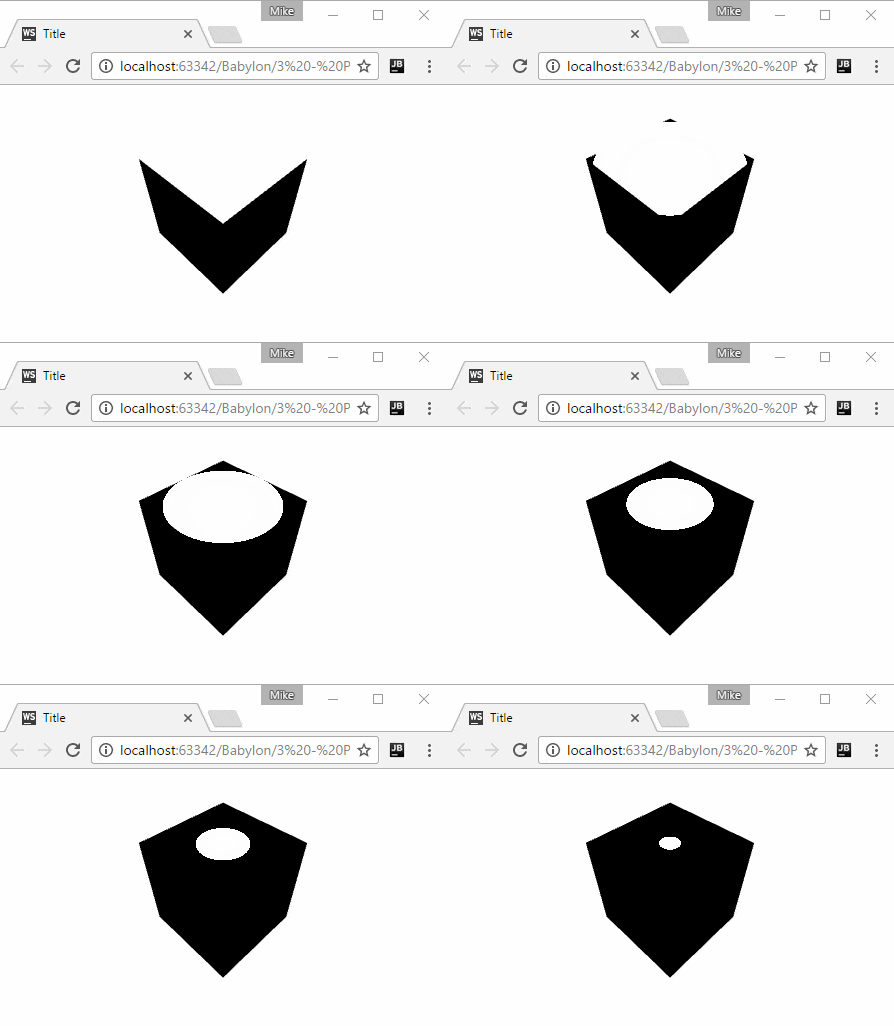
In this example we create the spot light with a call to new BABYLON.SpotLight, passing in the id, position, direction vector, the degrees or arc of the light cone, the rate the light falls off over distance and finally the scene to create the light in. In this example instead of changing the color of the light each frame, we instead move it slightly. Run this code and you should see:
As the light is pulled back the fall off cone is quite prominently displayed. Of course the lack of textures makes this example more than a bit stark, so that is what we will cover in the next tutorial.
The Video


