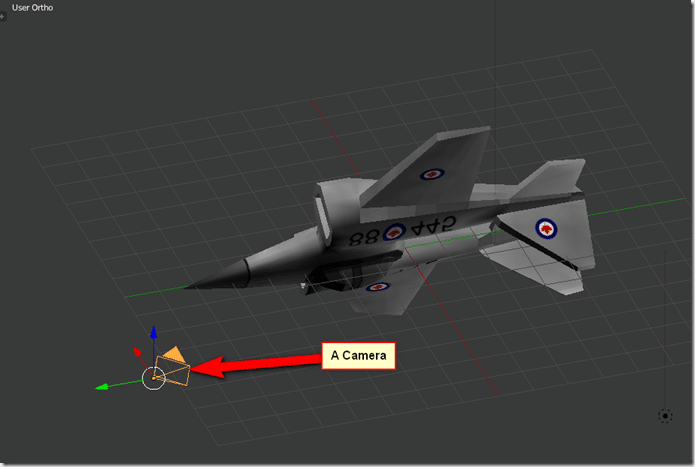
Now we are going to look at how you use the Blender camera. If you look at your existing scene, you will probably see a camera object available somewhere:
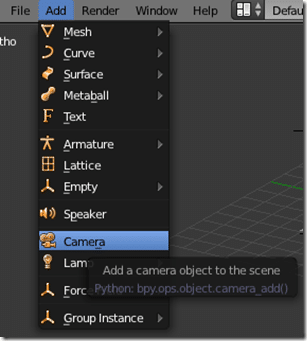
If you want to render a scene, you need to have at least one camera. If you don’t have a camera, no worries, they are easy enough to add, simply go to the Add menu and select camera:
Once the camera icon is selected you can perform any of the common Blender transformations on it, translate, rotate or scale. That said, scaling simply increases the size of the icon and has no other effect. Moving the camera will change it’s position in the world, while rotating it will change where it is pointed at.
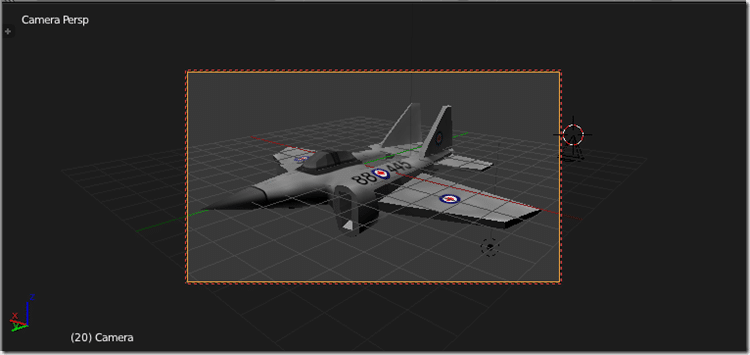
You can set the current 3D view to look through the camera by pressing 0 on the numberpad. If for some reason you don’t have a numberpad, you can in user settings enable numberpad emulation, making the top number keys work in their place. You can also accomplish most of these tasks using the View menu in 3D View. However you switch to camera mode, your view should change like:
The yellow dashed line represents the clipping area of the camera. All of the details in the dark area are outside of the cameras field of view and wont be rendered.
If you have multiple cameras in your scene, you can set the active camera by selecting the camera you want to make active in 3D view or Outliner and press CTRL + 0.
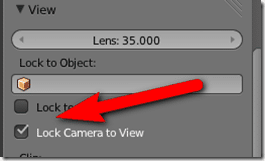
I personally like to lock the camera to the view. This can be done by clicking Lock Camera to View in the 3D View Properties panel.
Once the camera is the selected view ( you pressed 0 ) and Lock Camera to View is enabled, you can control it using familiar controls. Zooming in and out is accomplished with the scroll wheel or using CTRL + MMB. Rotating is done using the MMB and panning is down with SHIFT + MMB. If you don’t set Lock Camera to View you either need to manipulate the camera widget in a separate 3D View, or by learning a new set of hotkeys ( mostly a combination of the normal G(rab) and R(otate) hotkeys. Personally I find that option annoying you YMMV.
Of course there is one other option for setting the camera. You can use a 3D view like normal, then when you’ve got an angle you like simply press CTRL + ALT + 0 and the camera will snap to match your current viewpoint. This will make Camera the active view type however. Switching out of camera view is as simple as selecting a different view, either with the numberpad or using the View menu.
Fine tuning the camera
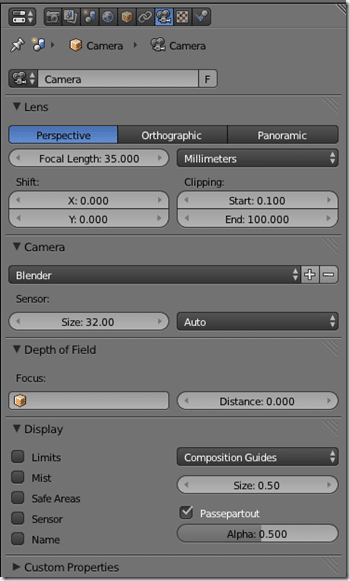
Once you’ve got the camera selected you have a range of options available in the Properties window. You should now see a camera tab available:
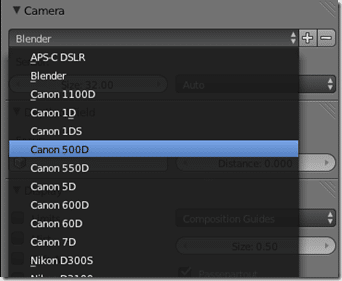
If you pull down the Camera list box, you can choose to emulate a series of existing real world camera:
Additionally, you can set depth of field or the focal point for the shot, the focal length of the lens and most importantly, toggle between perspective, orthographic or panoramic. Personally, even though I own an DSLR camera I know almost nothing about the subject. For you photography buffs though, I imagine you will get a great deal of enjoyment out of this. Remember the location of the Orthographic toggle though, we will need that shortly!
Oh and something else I haven’t mentioned before
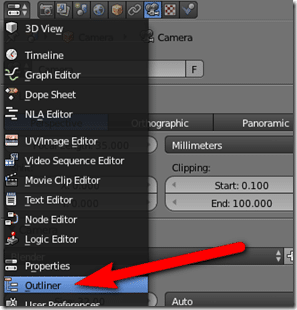
Throughout this entire tutorial series, there is a very handy window that I haven’t mentioned. It doesn’t really belong here either, but I feel it’s something you should really know about if you don’t already, which is the Outliner I mentioned briefly above.
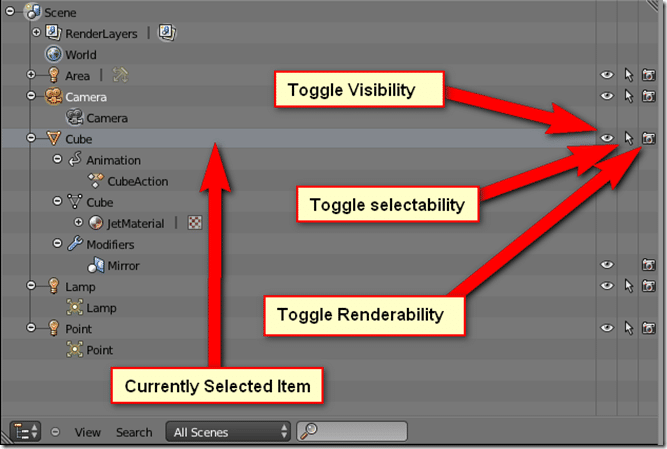
During modelling when we only had a single object, the Outliner utility is limited, but once we start dealing with multiple object in a scene it becomes invaluable.
This gives you a hierarchical view of your entire scene graph, including as you can see, the components that make up your objects ( such as the animations, textures and modifiers attached to our model ). Left click an item on the left and it will become the selected item. Right click brings up a menu of options allowing you to do such tasks as rename, delete or select that item, As you can see in the image above, you can also make it so an item is unselectable ( except in the Outliner ), so it will be invisible during the rendering process or to hide/unhide it in the 3D view. As your scene gets more complex, the Outliner becomes more and more handy.
Next up, we will take a look at lighting… almost done!
Click here for the Next Part

