So a lot has happened in the land of SFML since I created my SFML tutorial series and I decided to check out what’s new. I happen to be on my Macbook, so Visual Studio wasn’t an option. Time for a bit of a confession… I hate Xcode, especially for C++ development. I just find it to be a downright unpleasant, disorganized, unintuitive mess and C++ is a third class citizen. The alternatives such as Code::Blocks never really appealed to me, and Qt Creator always seems to make you jump through half a hundred extra steps.
Thankfully CLion, a cross platform C++ IDE from JetBrains, the makers of IntelliJ, was recently released. So I decided to kill two birds with one stone… check out what’s new with SFML and evaluate CLion all at the same time. This involves setting up the development environment and probably the area where most new C++ game developers fall flat on their faces.
So, if you are interested in developing using SFML on Mac using CLion… this post is for you! We are going to walk through installing SFML and configuring your very first project.
Installing SFML
First we need to download and install SFML. There are two ways to go about this… first you can head to SFML downloads page, download the Mac OS zip package, extra it, and copy the files to the locations specified in the readme file…
… or you can use homebrew. This is what I did. Assuming you have homebrew installed, at a terminal simply type:
brew update
brew install sfml
In theory this will download and install all the requisite parts of SFML. In theory. If it fails, go back to the manual process.
Creating a new project in CLion
I’m going to assume at this point you’ve already got CLion installed. If not, it’s available here and can be installed as a 30 day trial.
Once installed, fire up CLion, it’s time for us to create a new project.
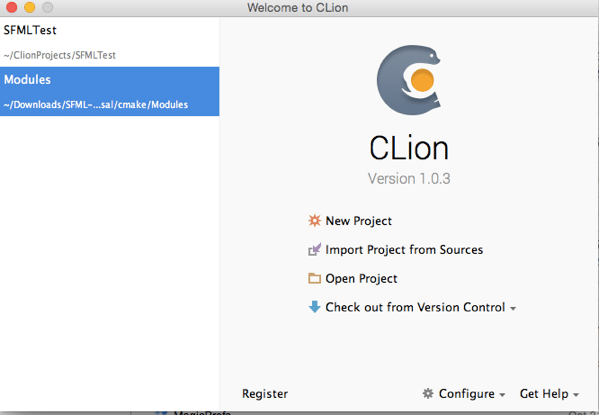
Select new Project
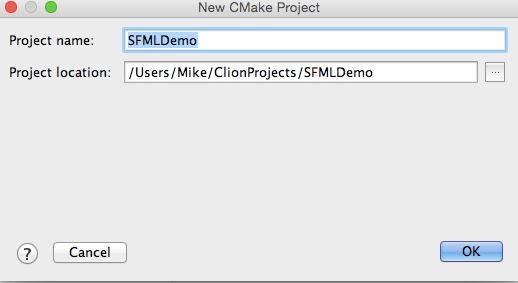
Name however and wherever you wish, just be sure to remember the location.
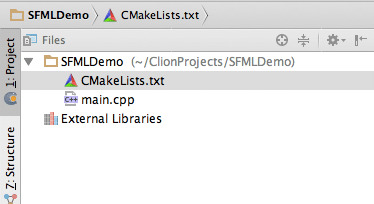
In the Project panel, locate CMakeList.txt and double click it. This file is basically your CMake based project file, which CLion uses for it’s project format, as does SFML.
CMakeList.txt will open in the editor, replace with the follow text:
cmake_minimum_required(VERSION 3.2) project(SFMLDemo) set(CMAKE_CXX_FLAGS "${CMAKE_CXX_FLAGS} -std=c++11") set(SOURCE_FILES main.cpp) add_executable(SFMLDemo ${SOURCE_FILES}) set(CMAKE_MODULE_PATH "${CMAKE_CURRENT_LIST_DIR}/cmake_modules") find_package(SFML REQUIRED system window graphics network audio) if (SFML_FOUND) include_directories(${SFML_INCLUDE_DIR}) target_link_libraries(SFMLDemo ${SFML_LIBRARIES}) endif()
If you’re going to screw up, this is the part you will screw up. Let me point out the critical portions here.
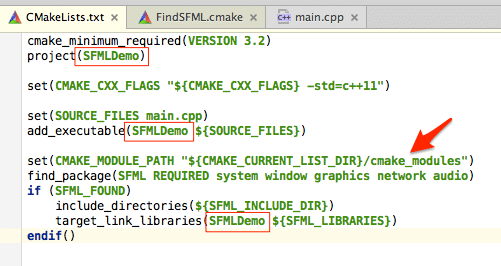
Make sure your project name is set correctly everywhere I boxed in red. Also make sure your cmake_modules directory is set right…
Oh yeah, about that… make a directory called cmake_modules. We need to copy this file (FindSFML.cmake) into that folder. Be sure you save as Raw if downloading from Github and make sure the extension stays cmake, not cmake.txt as Mac OS is found of doing. Or you could just create a new file called FindSFML.cmake in CLion and copy/paste the contents. The choice is yours, but in the end your project should look like:
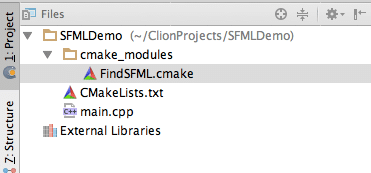
Creating a Run Configuration
Now we are ready to run our application. Select the menu Run->Edit Configuration…
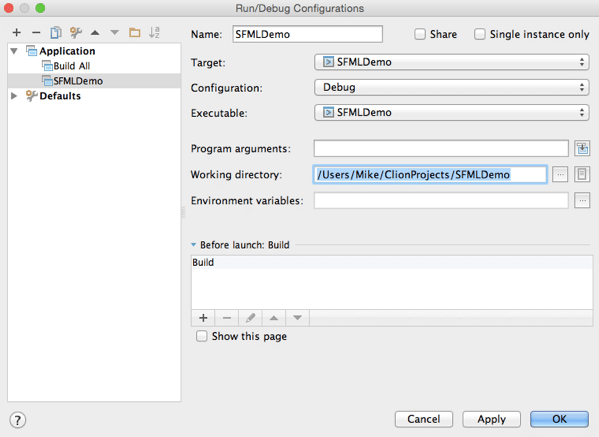
Be sure to set the working directory to you project folder ( or wherever you are going to put assets ), and chose your project as the executable, then hit Apply/OK.
You should now be able to run your application using the pulldown at the top of CLion, like so:

Use the play icon to run, the bug icon to debug.
The default application should run and we should see:

Now let’s try with some actual SFML code. Replace the contents of main.cpp with the following:
#include <SFML/Graphics.hpp>
int main() {
    sf::RenderWindow window(sf::VideoMode(640,480,32),"Hello SFML");
    sf::Font font;
    font.loadFromFile("OpenSans-Bold.ttf");
    sf::Text text("Hello World",font,11);
    text.setCharacterSize(32);
    text.setPosition(window.getSize().x/2 - text.getGlobalBounds().width/2,
                     window.getSize().y/2 - text.getGlobalBounds().height/2);

    while(window.isOpen()){
        sf::Event event;
        while(window.pollEvent(event)) {
            if(event.type == sf::Event::Closed){
                window.close();
            }
            window.clear(sf::Color::Black);
            window.draw(text);
            window.display();
        }
    }
    return 0;
}
Finally we need the rtf file used in this example, I downloaded it from right here, and copied the file OpenSans-Bold.ttf to the root of our project directory. It is important this matches the run directory you specified earlier. When run you should now see:
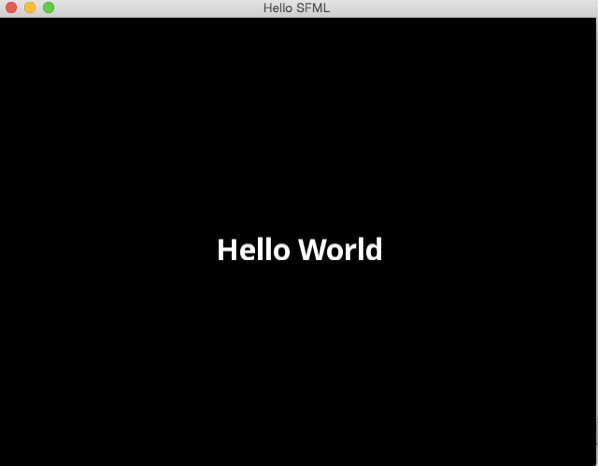
There you go, a fully configured, really to run SFML project on MacOS, without an Xcode in sight! There is one thing to be aware of though… right now the line:
find_package(SFML REQUIRED system window graphics network audio)
Is linking in every single SFML module, needed or not.
