This tutorial is available in video form here or embedded below.
Now might be a good time to pause and look at the life cycle of a typical program, as this can be a bit confusing with Godot yet is something you really need to understand. Every non-trivial game has a game loop somewhere. This is the code that runs after a program starts and is basically the heart of your application. In pseudo code, it might look something like this:
main() {
   setupApplication()
   scene = createScene()
   while(!quit){
      get_input()
      update_physics()
      scene.updateAllChildren()
      scene.render()
   }
}
At it’s heart it’s a glorified loop that runs over and over, checking for input, updating the scene and rendering the results until told to stop.
Godot of course is no exception, although by default this behavior is hidden from you as is the norm with game engines. Instead the object that owns your scene is a SceneTree which itself inherits the MainLoop, which provides the above functionality. A default one is provided for you, but if you wish you can implement your own, more on that below.
What you should however realize is that this SceneTree is the beating heart of your application. Every frame it calls it’s active scene passing in all the input that has occurred, as well as updating nodes that request updating. We will look at this process now. One important thing to be aware of… Nodes can access the SceneTree using the method .get_tree().
Updating a Node every frame
Ok, so that’s the basics of how program execution flows, now let’s take a look at a more practical example. Let’s say for example we have a Sprite that we want to update every frame. How do we tell our MainLoop that we want or Node to be updated? Fortunately it’s quite simple.
Create a Sprite node, add a graphic, position it on the screen then add a new script to it. All of this was covered in the previous tutorial if you are unsure how to proceed.
Now that we have a Script attached, first we need to tell it we want to receive updates. That is, every iteration of the main loop, we want our script to be called. This is a two part process, pun not intended… much. First, in your _ready function, you tell Godot you want to receive updates by called set_process(true). Then you override the virtual function _process().
Let’s take a look at a simple sprite that moves right until it hits the edge of the screen, at which point it wraps around.
extends Sprite
func _ready():
   self.set_process(true)
func _process(delta):
   var cur_pos = self.get_pos()
   cur_pos.x += 100 * delta
   # wrap around screen
   if(cur_pos.x > self.get_viewport_rect().size.width + self.get_item_rect().size.width/2):
      cur_pos.x = -self.get_item_rect().size.width/2
   self.set_pos(cur_pos)
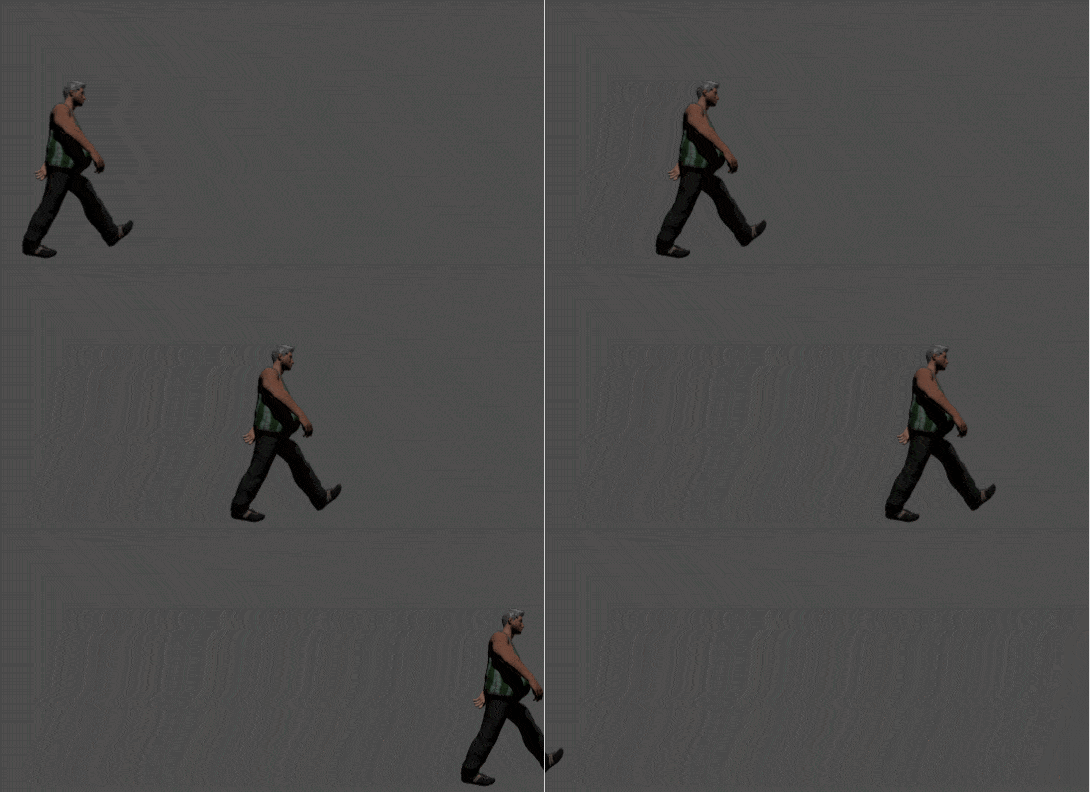
set_process tells Godot to call this nodes _process() function. The value passed in, delta, is the elapsed amount of time since the last time _process was called. As you can see in the above example, this value can be used to animate at a constant rate. The above example will update the X value by 100 pixels per second. Your end result should look something like this:

So, in a nutshell, if your want to handle updates in your Node derived object, you simply call set_process(true) and provide a _process(float) override.
Handling Input by Polling
That moves us on to handling input. You will notice that Input and Process handling are very similar. There are a couple ways you can handle input in Godot. Let’s start with the easiest, polling.
You can poll input at any time using the global object Input, like so:
func _process(delta):
   if(Input.is_key_pressed(KEY_ESCAPE)):
      if(Input.is_key_pressed(KEY_SHIFT)):
         get_tree().quit()
This checks first if the ESCAPE key, then if the SHIFT key (is also!) pressed. If so we tell the SceneTree to exit the application. As I said earlier, a node can access it’s SceneTree using get_tree().
In addition to polling for keyboard, there are also methods is_joy_button_pressed(), is_mouse_button_pressed() and is_action_pressed() which will make more sense in the near future. You can also poll for status. For example, to check the mouse cursor or touch location you could:
func _process(delta):
   if(Input.is_mouse_button_pressed(BUTTON_LEFT)):
      print(str("Mouse at location:",Input.get_mouse_pos(), " moving at speed: ", Input.get_mouse_speed()));
There are other inputs you can poll as well, mostly mobile based, but they all use a very similar interface. I will cover mobile specific controls at a later point in this series.
Handling Input as Event Driven
You can also have Godot hand your application all the Input events as they occur and choose what to process. Just like handling updates, you have to register to receive input events, like so:
func _ready():
   set_process_input(true)
Then you override the function _input, which takes an InputEvent as a parameter.
func _input(event):
   # if user left clicks
   if(event.type == InputEvent.MOUSE_BUTTON):
      if(event.button_index == 1):
         self.set_pos(Vector2(event.x,event.y))

   # on keyboard cursor key
   if(event.type == InputEvent.KEY):
      var curPos = self.get_pos()

      if(event.scancode == KEY_RIGHT):
         curPos.x+= 10
         self.set_pos(curPos)

      if(event.scancode == KEY_LEFT):
         curPos.x-= 10
         self.set_pos(curPos)
The above example handles a couple different scenarios. First if the user clicks the left button, we set the position to the mouse’s current x and y location, as passed in by the InputEvent class. Notice in this case I tested for button by index instead of the define BUTTON_LEFT like earlier. There should be no functional difference, although this would allow you to test for buttons for which a mapping isn’t defined, such as one of those insane 12 button mouse. Next we check to see if the event is a KEY event and if it is we check which key. In the event of the right or left arrow, we update our position accordingly.
Sometimes however when you handle an event you want it done and gone. By default all events will continue to be broadcast to all event receivers. When you don’t want this behavior, it’s fairly simple to tell Godot that an event is handled. From the above example, let’s swallow the event in the case of it being an InputEvent.KEY. This means only this class will have access to keyboard events ( well… and GUI controls, which actually get their crack at the events earlier on ).
   # on keyboard cursor key
   if(event.type == InputEvent.KEY):
      self.get_tree().set_input_as_handled()
      var curPos = self.get_pos()
Calling set_input_handled() will cause the InputEvent to propagate no further.
Finally it’s possible you want to do a catch all. Perhaps you want to log all of the unhandled input events that occurred. This can also be done and you also have to register for this behavior, like so:
func _ready():
   set_process_unhandled_input(true)
Then you simply override the corresponding function:
func _unhandled_input(event):
   print(str("An event was unhandled ",event))
In this case we simply log the event out to the console. Warning though, there will be A LOT of them. Just no keyboard events, since we are now eating those!
Input Maps
Quite often you want several commands to perform the same action. For example you want pushing right on the controller d-pad to perform the same action as pushing the right arrow key. Or perhaps you want to let the user define their own controls? In both of these cases and input alias system is incredibly useful… and thankfully Godot has one built in… InputMaps.
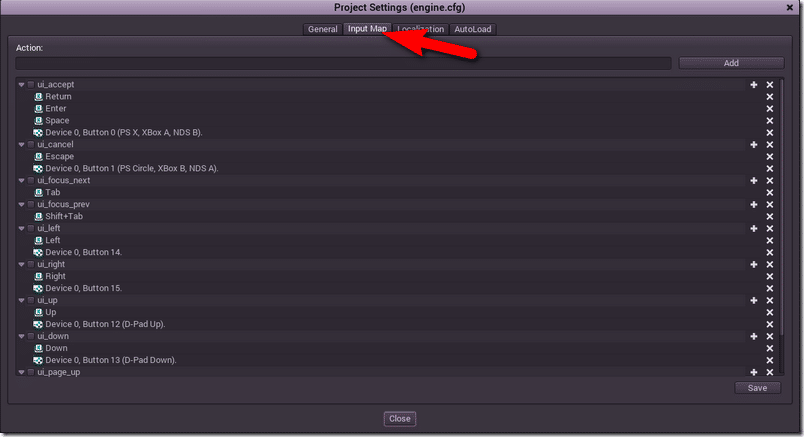
You may have noticed the InputMap tab when we were in Project Settings earlier… if not open up Project Settings now…

Here you can see a number of mappings have already been defined for UI actions. Lets go ahead and create a map of our own, MOVE_RIGHT.
At the top in Action enter MOVE_RIGHT

Then click Add

A new entry will be added to the bottom of the page, like so:

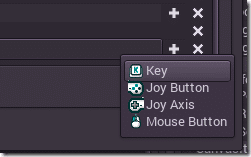
Click the + icon and add a new mapping of type Key

You will then be prompted to press a key:

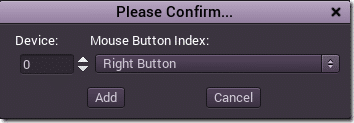
Repeat this process and instead select another device… im going to also map the right mouse button, like so:

Your Input Map should now look something like this:

Now click the Save button and close the dialog.
Now in code you can easily check activity using the input map, like so:
func _process(delta):
   if(Input.is_action_pressed("MOVE_RIGHT")):
      var cur_pos = self.get_pos()
      cur_pos.x += 1
      self.set_pos(cur_pos)
This code will run if either condition is true… the Right key is pressed or the Right mouse button is. The above example is polled, but it’s just as easy to use an InputMap with event driven code, like so:
func _input(event):
   if(event.is_action("MOVE_RIGHT")):
      self.set_pos(Vector2(0,0))
One warning here however… Actions are more states ( as in On or Off ) than they are Events, so it probably makes a great deal more sense dealing with them the former ( polling ) than the later ( event driven ).
A Peek Behind the Curtain
If you are like me, you probably aren’t content with not knowing exactly what is going on behind the scenes. Black boxes just aren’t my thing and this is one of the great things about Godot being open-source, there are no black boxes! So if you want to understand exactly how program flow works, it helps to jump into the source code.
THIS IS COMPLETELY OPTIONAL!
I figured I would bold that. The following information is just for people that want to understand a bit more what is happening behind the scenes… We are going to hunt down the actual main loop in the source code, and essentially it’s right here in the function main/main.cpp. Specifically the method iteration() is effectively the main loop:
bool Main::iteration() {

   uint64_t ticks=OS::get_singleton()->get_ticks_usec();
   uint64_t ticks_elapsed=ticks-last_ticks;

   frame+=ticks_elapsed;

   last_ticks=ticks;
   double step=(double)ticks_elapsed / 1000000.0;

   float frame_slice=1.0/OS::get_singleton()->get_iterations_per_second();

   if (step>frame_slice*8)
      step=frame_slice*8;

   time_accum+=step;

   float time_scale = OS::get_singleton()->get_time_scale();

   bool exit=false;


   int iters = 0;

   while(time_accum>frame_slice) {

      uint64_t fixed_begin = OS::get_singleton()->get_ticks_usec();

      PhysicsServer::get_singleton()->sync();
      PhysicsServer::get_singleton()->flush_queries();

      Physics2DServer::get_singleton()->sync();
      Physics2DServer::get_singleton()->flush_queries();

      if (OS::get_singleton()->get_main_loop()->iteration( frame_slice*time_scale )) {
         exit=true;
         break;
      }

      message_queue->flush();

      PhysicsServer::get_singleton()->step(frame_slice*time_scale);
      Physics2DServer::get_singleton()->step(frame_slice*time_scale);

      time_accum-=frame_slice;
      message_queue->flush();
      //if (AudioServer::get_singleton())
      // AudioServer::get_singleton()->update();

      fixed_process_max=MAX(OS::get_singleton()->get_ticks_usec()-fixed_begin,fixed_process_max);
      iters++;
   }

   uint64_t idle_begin = OS::get_singleton()->get_ticks_usec();

   OS::get_singleton()->get_main_loop()->idle( step*time_scale );
   message_queue->flush();

   if (SpatialSoundServer::get_singleton())
      SpatialSoundServer::get_singleton()->update( step*time_scale );
   if (SpatialSound2DServer::get_singleton())
      SpatialSound2DServer::get_singleton()->update( step*time_scale );


   if (OS::get_singleton()->can_draw()) {

      if ((!force_redraw_requested) && OS::get_singleton()->is_in_low_processor_usage_mode()) {
         if (VisualServer::get_singleton()->has_changed()) {
            VisualServer::get_singleton()->draw(); // flush visual commands
            OS::get_singleton()->frames_drawn++;
         }
      } else {
         VisualServer::get_singleton()->draw(); // flush visual commands
         OS::get_singleton()->frames_drawn++;
         force_redraw_requested = false;
      }
   } else {
      VisualServer::get_singleton()->flush(); // flush visual commands
   }

   if (AudioServer::get_singleton())
      AudioServer::get_singleton()->update();

   for(int i=0;i<ScriptServer::get_language_count();i++) {
      ScriptServer::get_language(i)->frame();
   }

   idle_process_max=MAX(OS::get_singleton()->get_ticks_usec()-idle_begin,idle_process_max);

   if (script_debugger)
      script_debugger->idle_poll();


   // x11_delay_usec(10000);
   frames++;

   if (frame>1000000) {

      if (GLOBAL_DEF("debug/print_fps", OS::get_singleton()->is_stdout_verbose())) {
         print_line("FPS: "+itos(frames));
      };

      OS::get_singleton()->_fps=frames;
      performance->set_process_time(idle_process_max/1000000.0);
      performance->set_fixed_process_time(fixed_process_max/1000000.0);
      idle_process_max=0;
      fixed_process_max=0;

      if (GLOBAL_DEF("debug/print_metrics", false)) {

         //PerformanceMetrics::print();
      };

      frame%=1000000;
      frames=0;
   }

   if (OS::get_singleton()->is_in_low_processor_usage_mode() || !OS::get_singleton()->can_draw())
      OS::get_singleton()->delay_usec(25000); //apply some delay to force idle time
   else {
      uint32_t frame_delay = OS::get_singleton()->get_frame_delay();
      if (frame_delay)
         OS::get_singleton()->delay_usec( OS::get_singleton()->get_frame_delay()*1000 );
   }

   int taret_fps = OS::get_singleton()->get_target_fps();
   if (taret_fps>0) {
      uint64_t time_step = 1000000L/taret_fps;
      target_ticks += time_step;
      uint64_t current_ticks = OS::get_singleton()->get_ticks_usec();
      if (current_ticks<target_ticks) OS::get_singleton()->delay_usec(target_ticks-current_ticks);
      current_ticks = OS::get_singleton()->get_ticks_usec();
      target_ticks = MIN(MAX(target_ticks,current_ticks-time_step),current_ticks+time_step);
   }

   return exit;
}
If you take a good look at that code, you’ll notice beyond the complexity it’s actually remarkably close to the pseudo code I started this post with. As I said, most game loops start looking pretty same-y over time. Now looking at the code you will notice a number of calls like this:
OS::get_singleton()->get_main_loop()->iteration( frame_slice*time_scale ))
These are callbacks in to the MainLoop we mentioned earlier. By default Godot implements one in C++ you can access here in core/os/main_loop.cpp:
#include "main_loop.h"
#include "script_language.h"

void MainLoop::_bind_methods() {

   ObjectTypeDB::bind_method("input_event",&MainLoop::input_event);

   BIND_CONSTANT(NOTIFICATION_WM_FOCUS_IN);
   BIND_CONSTANT(NOTIFICATION_WM_FOCUS_OUT);
   BIND_CONSTANT(NOTIFICATION_WM_QUIT_REQUEST);
   BIND_CONSTANT(NOTIFICATION_WM_UNFOCUS_REQUEST);
   BIND_CONSTANT(NOTIFICATION_OS_MEMORY_WARNING);

};

void MainLoop::set_init_script(const Ref<Script>& p_init_script) {

   init_script=p_init_script;
}

MainLoop::MainLoop() {
}


MainLoop::~MainLoop()
{
}


void MainLoop::input_text( const String& p_text ) {


}

void MainLoop::input_event( const InputEvent& p_event ) {

   if (get_script_instance())
      get_script_instance()->call("input_event",p_event);

}

void MainLoop::init() {

   if (init_script.is_valid())
      set_script(init_script.get_ref_ptr());

   if (get_script_instance())
      get_script_instance()->call("init");

}
bool MainLoop::iteration(float p_time) {

   if (get_script_instance())
      return get_script_instance()->call("iteration",p_time);

   return false;

}
bool MainLoop::idle(float p_time) {

   if (get_script_instance())
      return get_script_instance()->call("idle",p_time);

   return false;
}
void MainLoop::finish() {

   if (get_script_instance()) {
      get_script_instance()->call("finish");
      set_script(RefPtr()); //clear script
   }


}
The default main loop in turn is mostly a set of callbacks into the active script. You can easily replace this MainLoop implementation with your own, either in GDScript or C++. Simply pass your class name in the to main_loop_type value in Project Settings:

Granted, very few people are actually going to need to do this… mostly the people that want to live entirely in C++ land. I do however think it’s extremely valuable to understand what is going on behind the scenes in a game engine!
