No, you aren’t in a time machine and we didn’t just warp back to 1995.
You may notice that I make use of animated gifs quite often for demonstrating things that require motion, or to illustrate my games in action. Although the world has mostly left them behind, there are still some advantageous to using animated gifs, they can actually be quite small, work on a ton of environments including iOS ( where Flash obviously won’t ), they are faster for many browsers to load than videos and frankly they embed better.
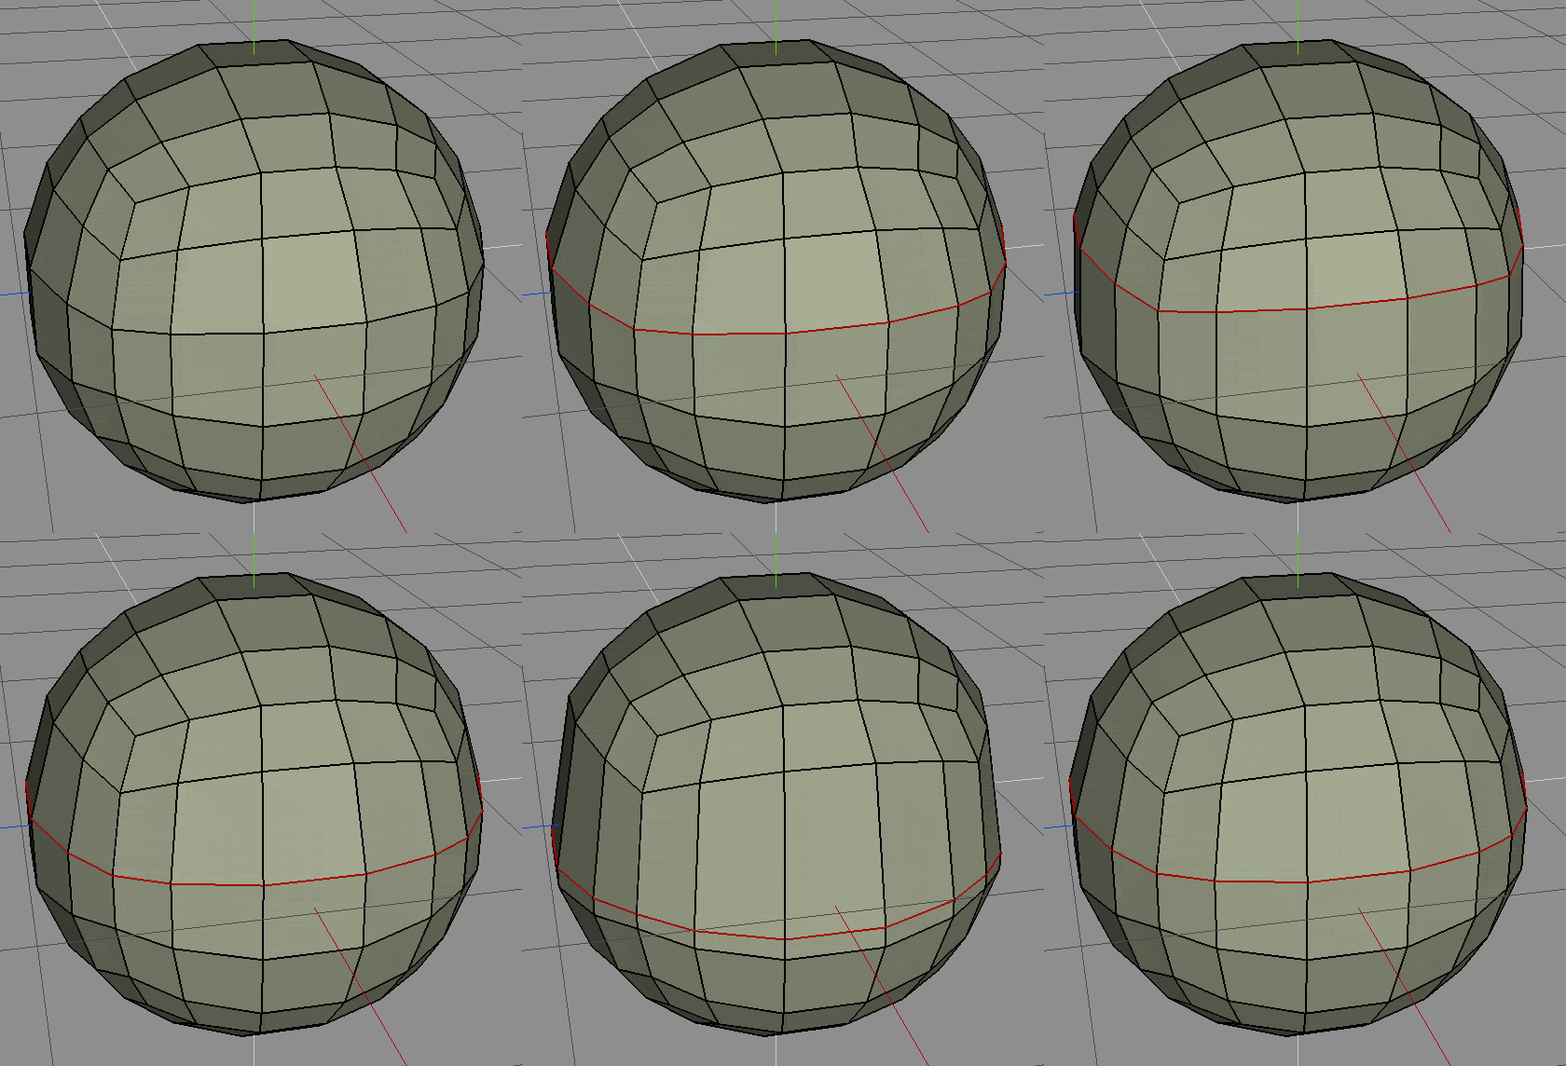
Here is one such example animated gif, illustrating the use of Edge sliding in Wings 3D.
I’ve been asked a couple times how it is I create them, so I figured I would put together this quick tutorial on the subject. True, it’s not really game development related, but hopefully you will find it useful or at least interesting.
Before getting started, you are going to need a few applications. These applications are:
The Gimp is doing the heavy lifting, while IrFan is what we use to capture our images in the first place.
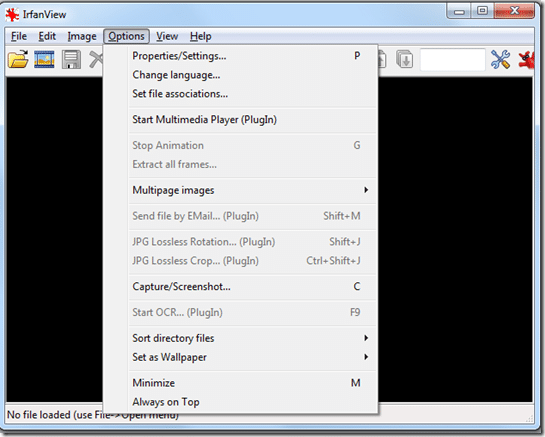
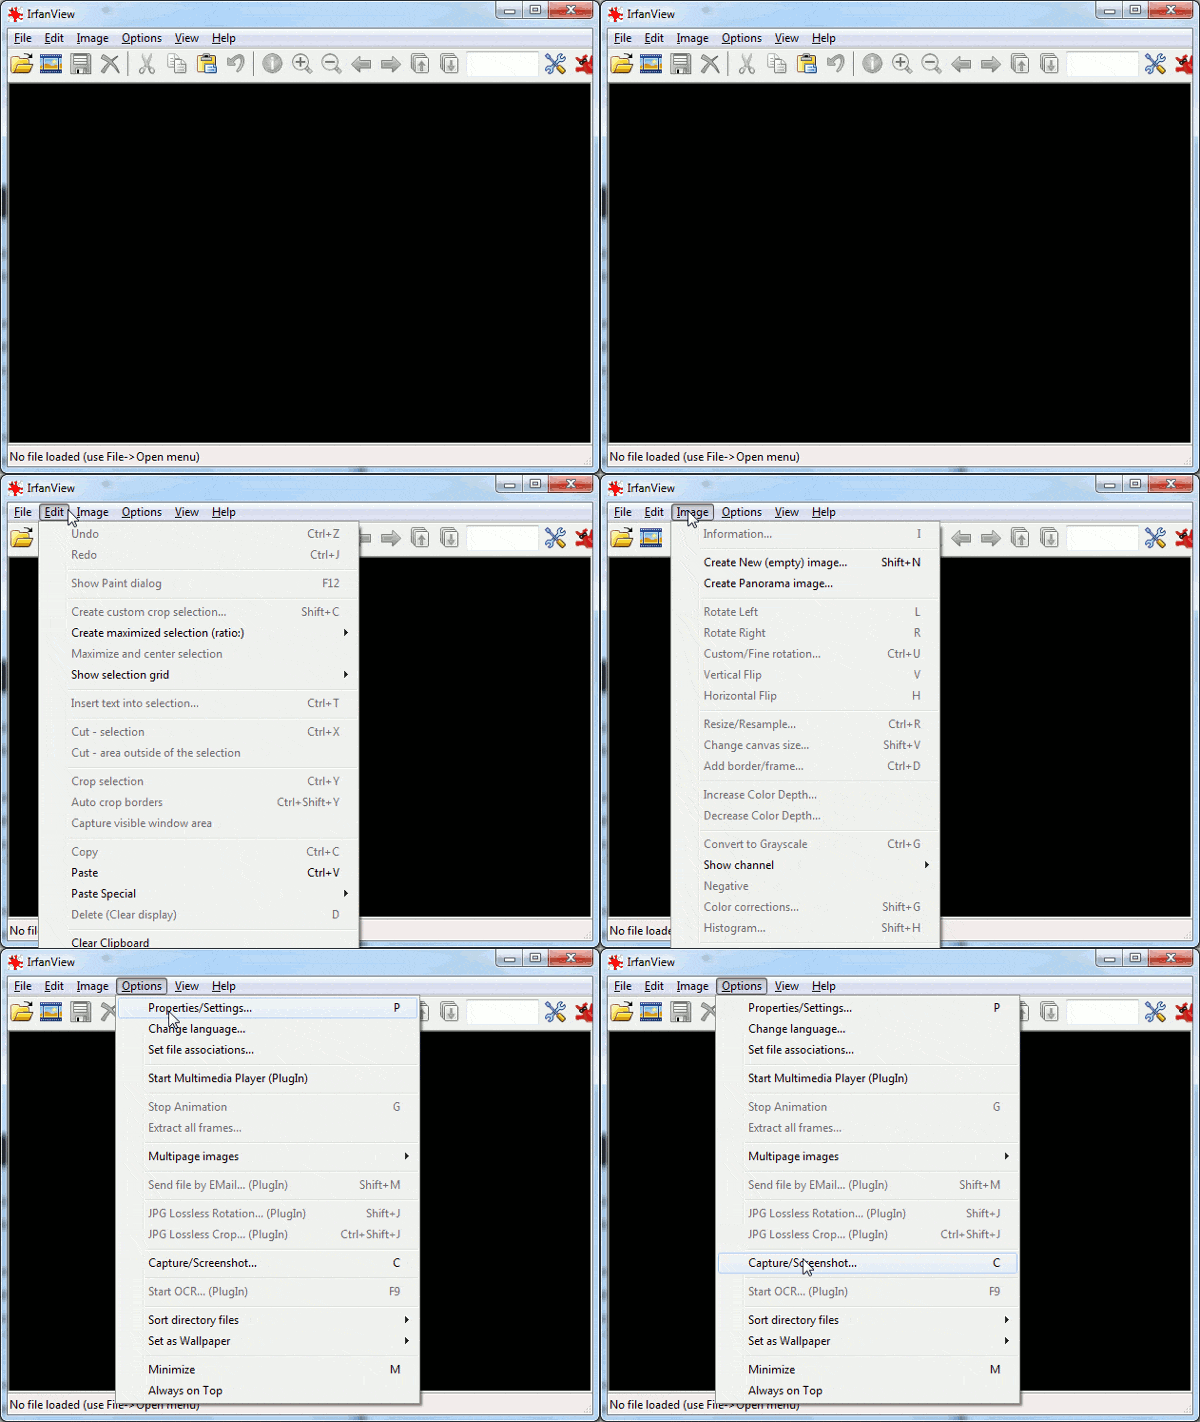
First load up IrFan, open the Options menu and select Capture, like such:
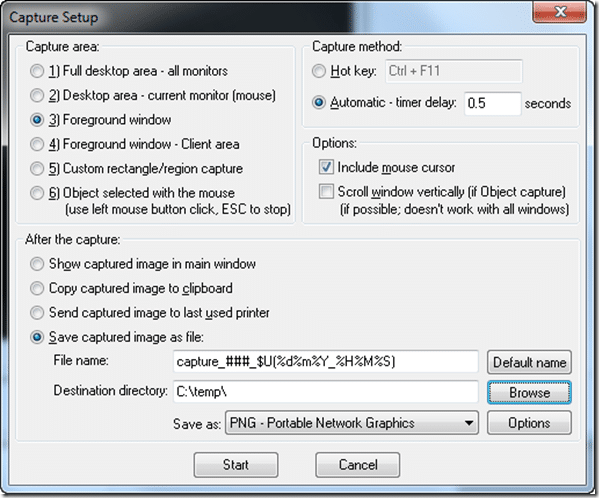
Set the capture settings up as follows. Set it to Foreground Window, so it will only capture the currently focused application. If you want to capture the entire screen or a sub-rectangle of the screen do it here. Then under Capture method, set it to Automatic – timer delay and put how often you want to take a screenshot. Too fast and your computer may have trouble keeping up, too slow you will not capture enough detail. Finally set to Save captured image as file and pick a directory. As soon as you press start, it will start taking screenshots. To stop, you need to focus IrFan again, selections Options->Capture or press C. This is what it should look like:
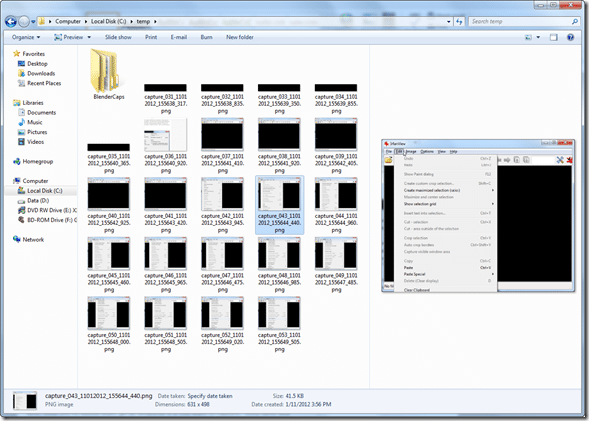
Now, once you’ve clicked start, go do whatever it is you want to capture, it will ding each time it saves an image. Once done and you’ve turned capturing back off, go to your destination directory and you should have a series of screen captures, like this:
Each frame will compose one frame in our animation. Delete any images you don’t want. Often there will be a couple captures at the beginning and end that you won’t want as you were getting ready.
Now that we have our frames, load up The Gimp.
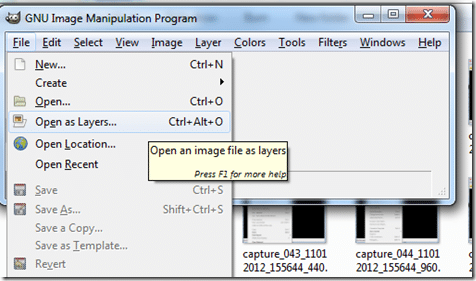
Select File->Open as Layers, like such:
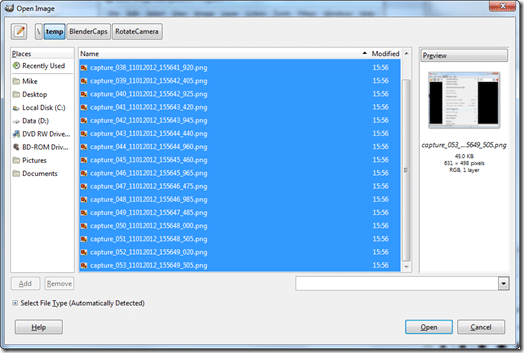
Now select all of your images, then click Open ( either shift click each, or CTRL + A ) like such:
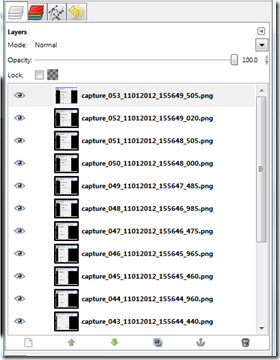
Now in the Gimp you will see your layers have been added, in chronological order, like so:
You can now delete frames if you wish, this is your last chance. Now we are going to turn it into an animated gif.
Select File->Save As. In the dialog that pops up, this part is very imported. Make sure you specify your name as ending in .gif, like this:
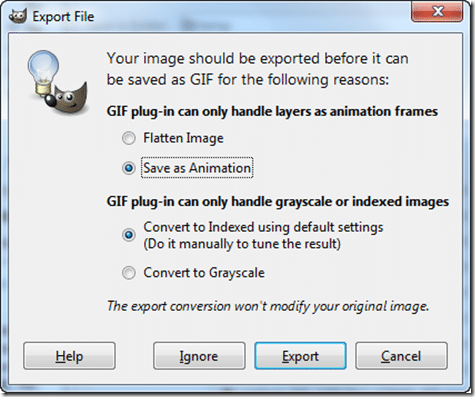
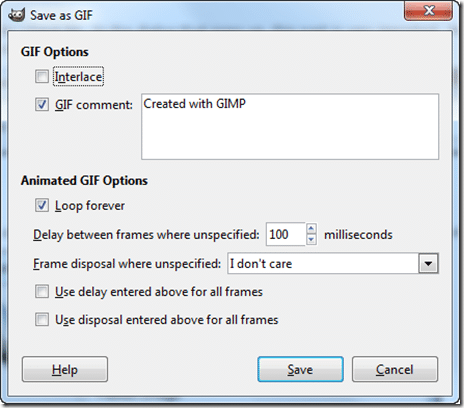
So long as you ended your name with gif, when you press save, this dialog will pop up:
Make sure you have selected “Save as Animation”, then click Export. Then one more dialog will pop up:
The two most important settings are “Loop Forever” and “Delay between frames when unspecified”. Loop will cause the image created to start over once it stops playing ( or not ). The delay is the default amount of time each image will be shown for. At 100ms, we will playback at 10FPS. Once done, click Save. This part could take a few moments.
You will now have an animated gif, like this:
This is good, but has a few limitations. First off, its probably GIGANTIC. Second, it’s probably bigger ( dimensions ) than you wanted it to be. Finally, it’s possible you don’t want all pictures shown at the same speed.
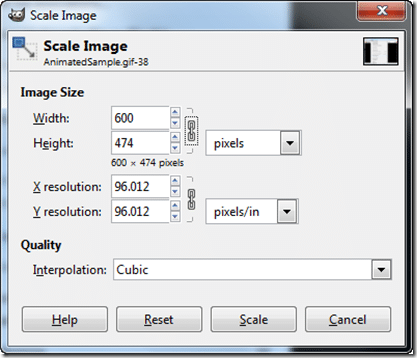
First, lets make it smaller in physical size, this change will actually help with the file size as well. In the GIMP, simply select Image->Scale Image… from the menu. Then the scale image dialog will pop up:
Pick your new dimensions and click Scale.
Now that your image has been scaled, lets make the file size smaller. In the menu select Filters->Animation->Optimize (For GIF). GIMP will chug away for a few seconds then create a new image for you ( your old image will still be open too, in a different GIMP window, you can close it if you like ).
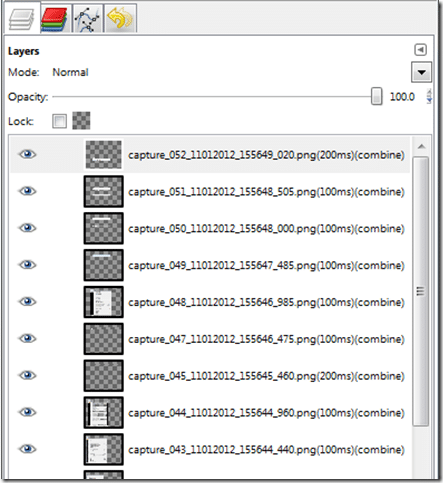
In your newly created image, you will notice something interesting in the Layers window:
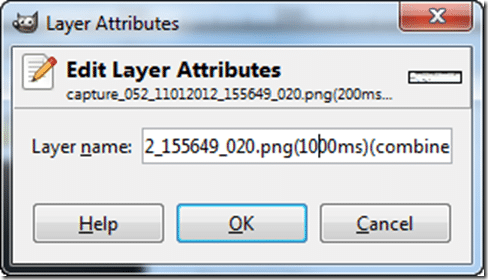
All of your layers have been renamed to include (100ms) in the name. If you want an individual frame to display longer, such as making the first frame last for 1 second, right click the layer you want to display longer and select Edit Layer Attributes… Then edit the name to represent the new time in ms that you want the image to last:
Do this for each layer you want to change the duration for. Now that you are done, save your image like you did before ( specifying a gif extension ).
Presto, a new animated GIF
This one however, is 1/3rd the size, at 129KB.
And that, is how I create animated gifs.
General Totally Off Topic

