Back in Tutorial 3 I created a simple animation using a Timer and setting the frame manually from a TextureAtlas. This is not the ideal way to perform animation using LibGDX and was done to illustrate how to use a TextureAtlas, not how to perform animation. Instead the better way to perform animations is using the Animation class. Here is an example using the same spritesheet from tutorial 3, remember you need to add it to the Android project assets folder.
package com.gamefromscratch;

import com.badlogic.gdx.ApplicationListener;
import com.badlogic.gdx.Gdx;
import com.badlogic.gdx.graphics.GL10;
import com.badlogic.gdx.graphics.g2d.Animation;
import com.badlogic.gdx.graphics.g2d.SpriteBatch;
import com.badlogic.gdx.graphics.g2d.TextureAtlas;

public class AnimationDemo implements ApplicationListener {
    private SpriteBatch batch;
    private TextureAtlas textureAtlas;
    private Animation animation;
    private float elapsedTime = 0;

    @Override
    public void create() {
        batch = new SpriteBatch();
        textureAtlas = new TextureAtlas(Gdx.files.internal("data/spritesheet.atlas"));
        animation = new Animation(1/15f, textureAtlas.getRegions());
    }

    @Override
    public void dispose() {
        batch.dispose();
        textureAtlas.dispose();
    }

    @Override
    public void render() {
        Gdx.gl.glClearColor(0, 0, 0, 1);
        Gdx.gl.glClear(GL10.GL_COLOR_BUFFER_BIT);

        batch.begin();
        //sprite.draw(batch);
        elapsedTime += Gdx.graphics.getDeltaTime();
        batch.draw(animation.getKeyFrame(elapsedTime, true), 0, 0);
        batch.end();
    }

    @Override
    public void resize(int width, int height) {
    }

    @Override
    public void pause() {
    }

    @Override
    public void resume() {
    }
}
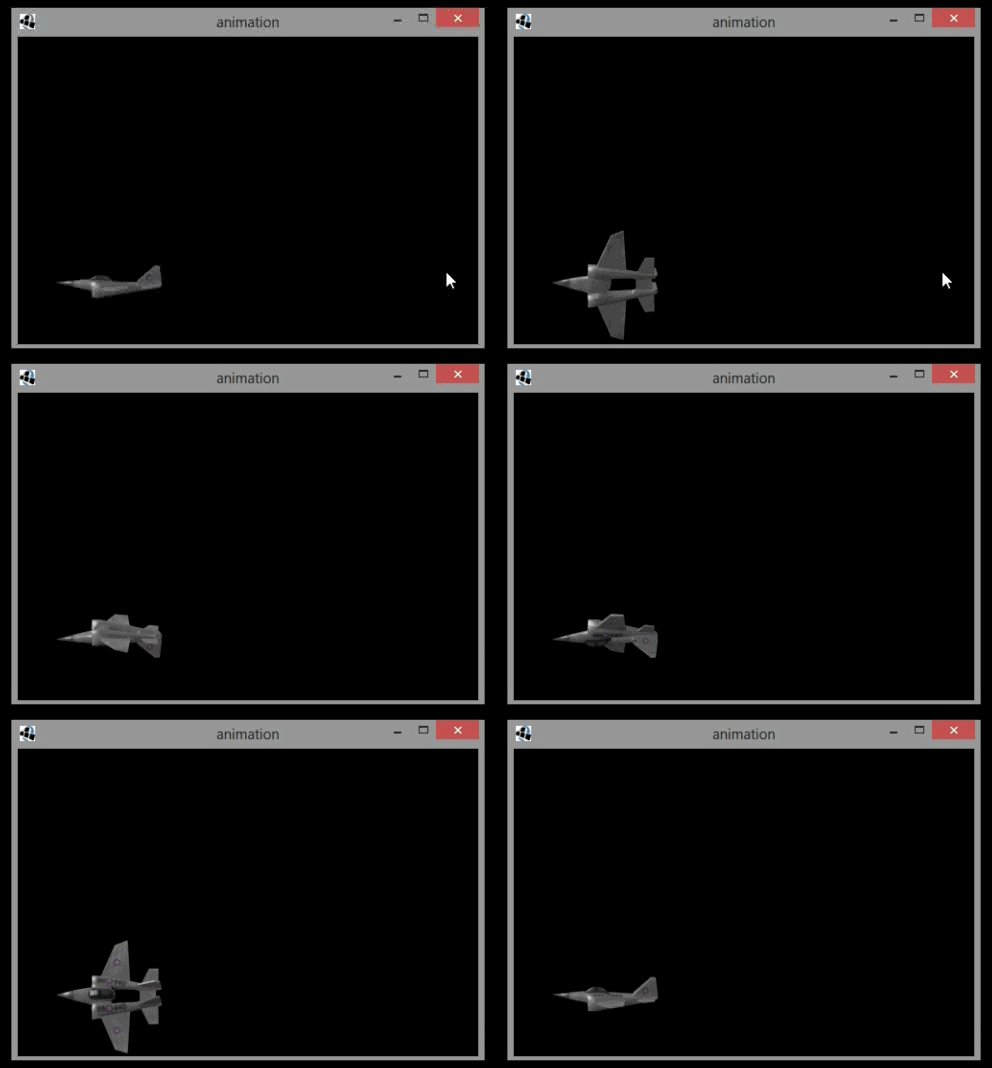
When you run it, you should see:

The key here is the Animation, created here:
animation = new Animation(1/15f, textureAtlas.getRegions());
When creating an animation you pass in the amount of time per frame ( 15 frames per second in this case ) and an array of TextureRegions. These represent the individual frames of animation within the TextureAtlas. In this particular example we are simply using all of the frames available within the Atlas as a single animation. The next key change is:
elapsedTime += Gdx.graphics.getDeltaTime();
batch.draw(animation.getKeyFrame(elapsedTime, true), 0, 0);
Here we are simply drawing the current frame from the animation to the screen. We pass in the amount of time that has elapsed so the animation knows where it is in the sequence. The true parameter is telling it to loop the animation.
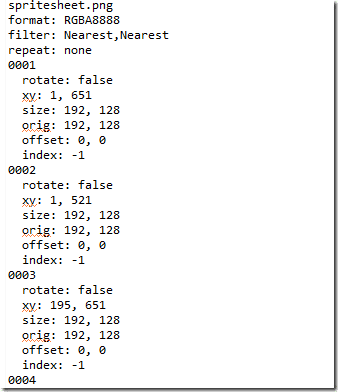
Of course, you can have multiple animations from a single texture Atlas. Consider the spritesheet we are currently working with. If you take a look at the .atlas file, you will see each individual frame is named:

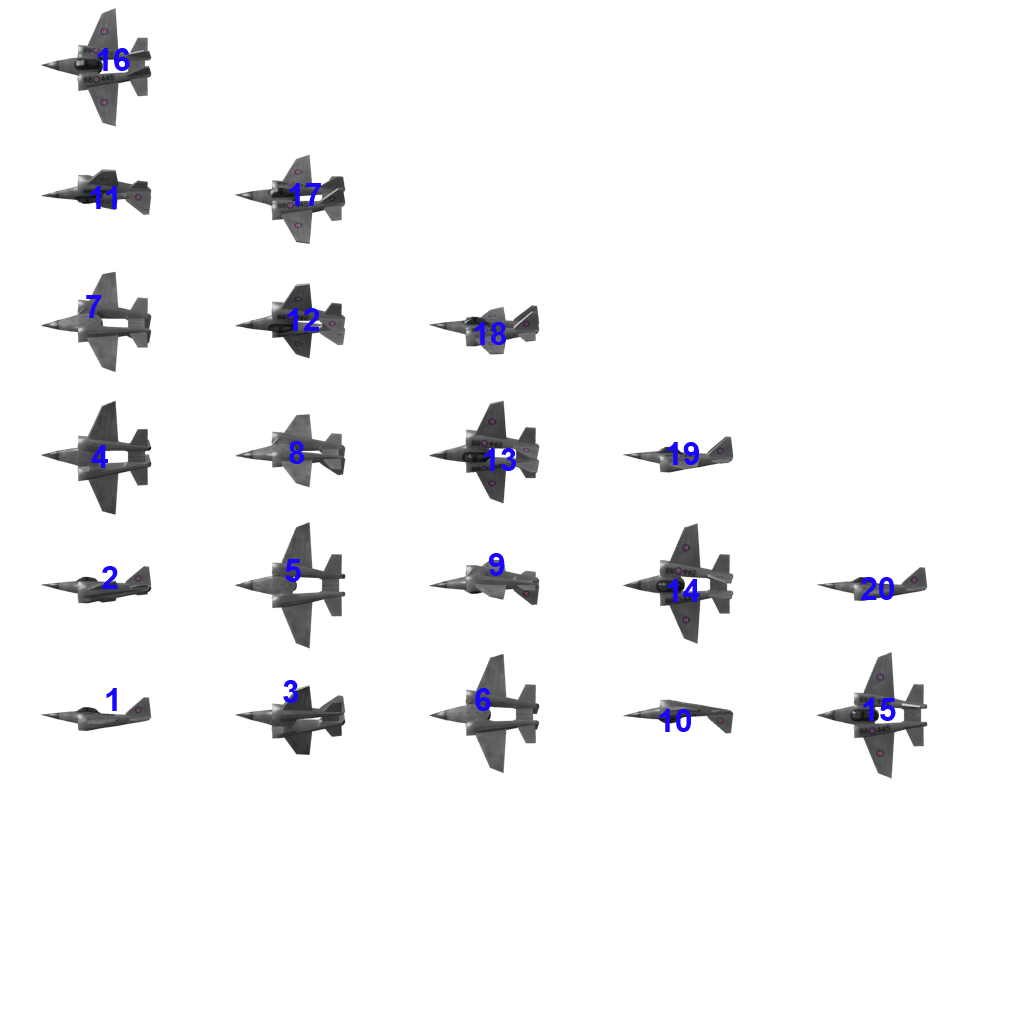
Looking at the spritesheet, you will see the animations are organized like such:

What we want to do is treat this as two sepeate animations. Frames 1 through 10 represent an upward roll, while 11-20 are a downward roll. Let’s take a look at how we do that:
public void create() {
    batch = new SpriteBatch();
    textureAtlas = new TextureAtlas(Gdx.files.internal("data/spritesheet.atlas"));

    TextureRegion[] rotateUpFrames = new TextureRegion[10];

    // Rotate Up Animation
    // Create an array of TextureRegions
    rotateUpFrames[0] = (textureAtlas.findRegion("0001"));
    rotateUpFrames[1] = (textureAtlas.findRegion("0002"));
    rotateUpFrames[2] = (textureAtlas.findRegion("0003"));
    rotateUpFrames[3] = (textureAtlas.findRegion("0004"));
    rotateUpFrames[4] = (textureAtlas.findRegion("0005"));
    rotateUpFrames[5] = (textureAtlas.findRegion("0006"));
    rotateUpFrames[6] = (textureAtlas.findRegion("0007"));
    rotateUpFrames[7] = (textureAtlas.findRegion("0008"));
    rotateUpFrames[8] = (textureAtlas.findRegion("0009"));
    rotateUpFrames[9] = (textureAtlas.findRegion("0010"));

    rotateUpAnimation = new Animation(0.1f,rotateUpFrames);

    // Rotate Down Animation
    // Or you can just pass in all of the regions to the Animation constructor
    rotateDownAnimation = new Animation(0.1f,
            (textureAtlas.findRegion("0011")),
            (textureAtlas.findRegion("0012")),
            (textureAtlas.findRegion("0013")),
            (textureAtlas.findRegion("0014")),
            (textureAtlas.findRegion("0015")),
            (textureAtlas.findRegion("0016")),
            (textureAtlas.findRegion("0017")),
            (textureAtlas.findRegion("0018")),
            (textureAtlas.findRegion("0019")),
            (textureAtlas.findRegion("0020")));

    Gdx.input.setInputProcessor(this);
}
As you can see, it’s easy to create multiple animations from a single TextureAtlas. Keep in mind, when creating a TextureAtlas using TexturePacker, it was the filename that you passed in that created the region names. So what you would generally do is name your separate animations accordingly, such as WalkLeft, WalkRight, etc.
