In this part of the LibGDX tutorial series we are going to take a look at using GLSL shaders. GLSL standards for OpenGL Shader Language and since the move from a fixed to programmable graphics pipeline, Shader programming has become incredibly important. In fact, every single thing rendered with OpenGL has at least a pair of shaders attached to it. It’s been pretty transparent to you till this point because LibGDX mostly takes care of everything for you. When you create a SpriteBatch object in LibGDX, it automatically creates a default vertex and fragment shader for you. If you want more information on working with GLSL I put together the OpenGL Shader Programming Resource Round-up back in May. It has all the information you should need to get up to speed with GLSL. For more information on OpenGL in general, I also created this guide.
Render Pipeline Overview
To better understand the role of GL shaders, it’s good to have a basic understanding of how the modern graphics pipeline works. This is the high level description I gave in PlayStation Mobile book, it’s not plagiarism because I’m the author. 🙂
A top-level view of how rendering occurs might help you understand the shader process. It all starts with the shader program, vertex buffers, texture coordinates, and so on being passed in to the graphics device. Then this information is sent off to a vertex shader, which can then transform that vertex, do lighting calculations and more (we will see this process shortly). The vertex shader is executed once for every vertex and a number of different values can be output from this process (these are the out attributes we saw in the shader earlier). Next the results are transformed, culled, and clipped to the screen, discarding anything that is not visible, then rasterized, which is the process of converting from vector graphics to pixel graphics, something that can be drawn to the screen.
The results of this process are fragments, which you can think of as “prospective pixels,” and the fragment are passed in to the fragment shader. This is why they are called fragment shaders instead of pixel shaders, although people commonly refer to them using either expression. Once again, the fragment shader is executed once for each fragment. A fragment shader, unlike a vertex shader, can only return a single attribute, which is the RGBA color of the individual pixel. In the end, this is the value that will be displayed on the screen. It sounds like a horribly complex process, but the GPUs have dedicated hardware for performing exactly such operations, millions upon millions of times per second. That description also glossed over about a million tiny details, but that is the gist of how the process occurs.
So basically shaders are little programs that run over and over again on the data in your scene. A vertex shader works on the vertices in your scene ( predictably enough… ) and are responsible for positioning each vertex in the world. Generally this is a matter of transforming them using some kind of Matrix passed in from your program. The output of the Vertex shader is ultimately passed to a Fragment shader. Fragment shaders are basically, as I said above, prospective pixels. These are the actual coloured dots that are going to be drawn on the users screen. In the fragment shader you determine how this pixel will appear. So basically a vertex shader is a little C-like program that is run for each vertex in your scene, while a fragment shader is run for each potential pixel.
There is one very important point to pause on here… Fragment and Vertex shaders aren’t the only shaders in the modern graphics pipeline. There are also Geometry shaders. While vertex shaders can modify geometry ( vertices ), Geometry shaders actually create new geometry. Geometry shaders were added in OpenGL 3.2 and D3D10. Then in OpenGL4/D3D11 Tessellation shaders were added. Tessellation is the process of sub-dividing a surface to add more detail, moving this process to silicon makes it viable to create much lower detailed meshes and tessellate them on the fly. So, why are we only talking about Fragment and Vertex shaders? Portability. Right now OpenGL ES and WebGL do not support any other shaders. So if you want to support mobile or WebGL, you can’t use these other shader types.
SpriteBatch and default Shaders
As I said earlier, when you use SpriteBatch, it provides a default Vertex and Fragment shader for you. Let’s take a look at each of them now. Let’s do it in the order they occur, so let’s take a look at the vertex shader first:
attribute vec4 a_position;
attribute vec4 a_color;
attribute vec2 a_texCoord;

uniform mat4 u_projTrans;

varying vec4 v_color;
varying vec2 v_texCoords;

void main()
{
    v_color = a_color;
    v_color.a = v_color.a * (256.0/255.0);
    v_texCoords = a_texCoord + 0;
    gl_Position =  u_projTrans * a_position;
}
As I said, GLSL is a very C-like language, right down to including a main() function as the program entry point. There are a few things to be aware of here. First are attribute and uniform variables. These are variables that are passed in from your source code. LibGDX takes care of most of these for you, but if you are going to write your own default shader, LibGDX expects all of them to exist. So then, what is the difference between a uniform and attribute variable? A uniform stays the same for every single vertex. Attributes on the other hand can vary from vertex to vertex. Obviously this can have performance implications, so if it makes sense, prefer using a uniform. A varying value on the other hand can be thought of as the return value, these values will be passed on down the rendering pipeline ( meaning the fragment shader has access to them ). As you can see from the use of gl_Position, OpenGL also has some built in values. For vertex shaders there are gl_Position and gl_PointSize. Think of these as uniform variables provided by OpenGL itself. gl_Position is ultimately the position of your vertex in the world.
As to what this script does, it mostly just prepares a number of variables for the fragment shader, the color, the normalized ( 0 to 1 ) alpha value and the texture to bind to, in this case texture unit 0. This is set by calling Texture.Bind() in your code, or is called by LibGDX for you. Finally it positions the vertex in 3D space by multiplying the vertices position by the transformation you passed in as u_projTrans.
Now let’s take a quick look at the default fragment shader:
#ifdef GL_ES
#define LOWP lowp
    precision mediump float;
#else
    #define LOWP
#endif

varying LOWP vec4 v_color;
varying vec2 v_texCoords;

uniform sampler2D u_texture;

void main()
{
    gl_FragColor = v_color * texture2D(u_texture, v_texCoords);
}
As you can see, the format is very similar. The ugly #ifdef allows this code to work on both mobile and higher end desktop machines. Essentially if you are running OpenGL ES then the value of LOWP is defined as lowp, and precision is set to medium. In real world terms, this means that GL ES will run at a lower level of precision for internal calculations, both speeding things up and slightly degrading the result.
The values v_color and v_texCoords were provided by the vertex shader. A sampler2D on the other hand is a special glsl datatype for accessing the texture bound to the shader. gl_FragColor is another special built in variable ( like vertex shaders, fragment shaders have some GL provided variables, many more than Vertex shaders in fact ), this one represents the output color of the pixel the fragment shader is evaluating. texture2D essentially returns a vec4 value representing the pixel at UV coordinate v_texCoords in texture u_texture. The vec4 represents the RGBA values of the pixel, so for example (1.0,0.0,0.0,0.5) is a 50% transparent red pixel. The value assigned to gl_FragColor is ultimately the color value of the pixel displayed on your screen.
Of course a full discussion on GLSL shaders is wayyy beyond the scope of this document. Again if you need more information I suggest you start here. I am also no expert on GLSL, so you are much better off learning the details from someone else! 🙂 This does however give you a peek behind the curtain at what LibGDX is doing each frame and is going to be important to us in just a moment.
Changing the Default Shader
There comes a time where you might want to alter the default shader and replace it with one of your own. This process is actually quite simple, let’s take a look. Let’s say for some reason you wanted to render your game entirely in black and white? Here are a simple vertex and fragment shader combo that will do exactly this:
Vertex shader:
attribute vec4 a_position;
attribute vec4 a_color;
attribute vec2 a_texCoord0;

uniform mat4 u_projTrans;

varying vec4 v_color;
varying vec2 v_texCoords;

void main() {
    v_color = a_color;
    v_texCoords = a_texCoord0;
    gl_Position = u_projTrans * a_position;
}
Fragment shader:
#ifdef GL_ES
    precision mediump float;
#endif

varying vec4 v_color;
varying vec2 v_texCoords;
uniform sampler2D u_texture;
uniform mat4 u_projTrans;

void main() {
        vec3 color = texture2D(u_texture, v_texCoords).rgb;
        float gray = (color.r + color.g + color.b) / 3.0;
        vec3 grayscale = vec3(gray);

        gl_FragColor = vec4(grayscale, 1.0);
}
I saved each file as vertex.glsl and shader.glsl respectively, to the project assets directory. The shaders are extremely straight forward. The Vertex is in fact just the default vertex shader from LibGDX. Once again remember you need to provide certain values for SpriteBatch to work… don’t worry, things will blow up and tell you if they are missing from your shader! 🙂 The fragment shader is simply sampling the RGB value of the current texture pixel, getting the “average” value of the RGB values and using that as the output value.
Enough with shader code, let’s take a look at the LibGDX code now:
package com.gamefromscratch;

import com.badlogic.gdx.ApplicationAdapter;
import com.badlogic.gdx.Gdx;
import com.badlogic.gdx.graphics.GL20;
import com.badlogic.gdx.graphics.Texture;
import com.badlogic.gdx.graphics.g2d.Sprite;
import com.badlogic.gdx.graphics.g2d.SpriteBatch;
import com.badlogic.gdx.graphics.glutils.ShaderProgram;

public class ShaderTestApp extends ApplicationAdapter {
    SpriteBatch batch;
    Texture img;
    Sprite sprite;
    String vertexShader;
    String fragmentShader;
    ShaderProgram shaderProgram;

    @Override
    public void create () {
        batch = new SpriteBatch();
        img = new Texture("badlogic.jpg");
        sprite = new Sprite(img);
        sprite.setSize(Gdx.graphics.getWidth(), Gdx.graphics.getHeight());

        vertexShader = Gdx.files.internal("vertex.glsl").readString();
        fragmentShader = Gdx.files.internal("fragment.glsl").readString();
        shaderProgram = new ShaderProgram(vertexShader,fragmentShader);
    }

    @Override
    public void render () {
        Gdx.gl.glClearColor(1, 0, 0, 1);
        Gdx.gl.glClear(GL20.GL_COLOR_BUFFER_BIT);
        batch.begin();
        batch.setShader(shaderProgram);
        batch.draw(sprite,sprite.getX(),sprite.getY(),sprite.getWidth(),sprite.getHeight());
        batch.end();
    }
}
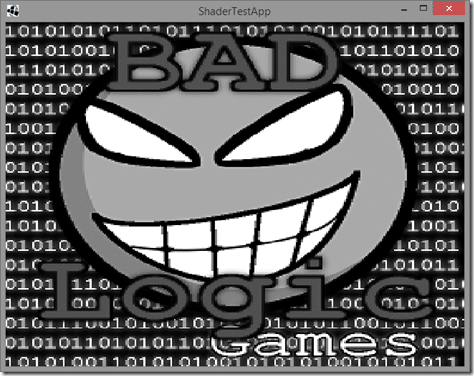
And when you run it:

Tada, your output is grayscale!
As to what we are doing in that code, we load each shader file as a string. When then create a new ShaderProgram passing in a vertex and fragment shader. The ShaderProgram is the class the populates all the various variables that your shaders expect, bridging the divide between the Java world and the GLSL world. Then in render() we set our ShaderProgram as active by calling setShader(). Truth is, we could have done this just once in the create method instead of once per frame.
Multiple Shaders per Frame
In the above example, when we set the shader program, it applied to all of the output. That’s nice if you want to render the entire world in black and white, but what if you just wanted to render a single sprite using your shader? Well fortunately that is pretty easy, you simply change the shader again. Consider:
package com.gamefromscratch;

import com.badlogic.gdx.ApplicationAdapter;
import com.badlogic.gdx.Gdx;
import com.badlogic.gdx.graphics.GL20;
import com.badlogic.gdx.graphics.Texture;
import com.badlogic.gdx.graphics.g2d.Sprite;
import com.badlogic.gdx.graphics.g2d.SpriteBatch;
import com.badlogic.gdx.graphics.glutils.ShaderProgram;

public class ShaderTest2 extends ApplicationAdapter {
    SpriteBatch batch;
    Texture img;
    Sprite leftSprite;
    Sprite rightSprite;
    String vertexShader;
    String fragmentShader;
    ShaderProgram shaderProgram;

    @Override
    public void create () {
        batch = new SpriteBatch();
        img = new Texture("badlogic.jpg");
        leftSprite = new Sprite(img);
        rightSprite = new Sprite(img);

        leftSprite.setSize(Gdx.graphics.getWidth()/2, Gdx.graphics.getHeight());
        leftSprite.setPosition(0,0);
        rightSprite.setSize(Gdx.graphics.getWidth()/2, Gdx.graphics.getHeight());
        rightSprite.setPosition(Gdx.graphics.getWidth()/2,0);

        vertexShader = Gdx.files.internal("vertex.glsl").readString();
        fragmentShader = Gdx.files.internal("fragment.glsl").readString();
        shaderProgram = new ShaderProgram(vertexShader,fragmentShader);
    }

    @Override
    public void render () {
        Gdx.gl.glClearColor(1, 0, 0, 1);
        Gdx.gl.glClear(GL20.GL_COLOR_BUFFER_BIT);

        batch.setShader(null);
        batch.begin();
        batch.draw(leftSprite, leftSprite.getX(), leftSprite.getY(), leftSprite.getWidth(), leftSprite.getHeight());
        batch.end();

        batch.setShader(shaderProgram);
        batch.begin();
        batch.draw(rightSprite, rightSprite.getX(), rightSprite.getY(), rightSprite.getWidth(), rightSprite.getHeight());
        batch.end();
    }
}
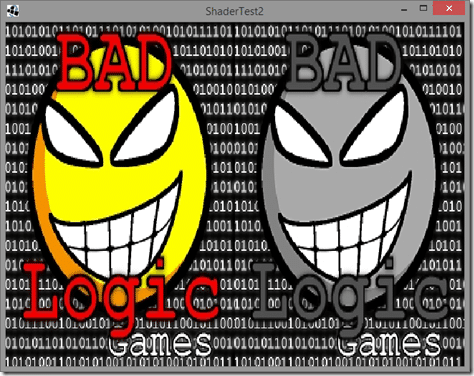
And when you run it:

One using the default shader, one sprite rendered using the black and white shader. As you can see, it’s simply a matter of calling setShader() multiple times. Calling setShader() but passing in null restores the default built-in shader. However, each time you call setShader() there is a fair amount of setup done behind the scenes, so you want to minimize the number of times you want to call it. Or…
Setting Shader on a Mesh Object
Each Mesh object in LibGDX has it’s own ShaderProgram. Behind the scenes SpriteBatch is actually creating a large single Mesh out of all the sprites in your screen, which are ultimately just textured quads. So if you have a game object that needs fine tune shader control, you may consider rolling your own Mesh object. Let’s take a look at such an example:
package com.gamefromscratch;

import com.badlogic.gdx.ApplicationAdapter;
import com.badlogic.gdx.Gdx;
import com.badlogic.gdx.graphics.*;
import com.badlogic.gdx.graphics.g2d.Sprite;
import com.badlogic.gdx.graphics.g2d.SpriteBatch;
import com.badlogic.gdx.graphics.glutils.ShaderProgram;

public class MeshShaderApp extends ApplicationAdapter {
    SpriteBatch batch;
    Texture texture;
    Sprite sprite;
    Mesh mesh;
    ShaderProgram shaderProgram;

    @Override
    public void create () {
        batch = new SpriteBatch();
        texture = new Texture("badlogic.jpg");
        sprite = new Sprite(texture);
        sprite.setSize(Gdx.graphics.getWidth(),Gdx.graphics.getHeight());

        float[] verts = new float[30];
        int i = 0;
        float x,y; // Mesh location in the world
        float width,height; // Mesh width and height

        x = y = 50f;
        width = height = 300f;

        //Top Left Vertex Triangle 1
        verts[i++] = x;   //X
        verts[i++] = y + height; //Y
        verts[i++] = 0;    //Z
        verts[i++] = 0f;   //U
        verts[i++] = 0f;   //V

        //Top Right Vertex Triangle 1
        verts[i++] = x + width;
        verts[i++] = y + height;
        verts[i++] = 0;
        verts[i++] = 1f;
        verts[i++] = 0f;

        //Bottom Left Vertex Triangle 1
        verts[i++] = x;
        verts[i++] = y;
        verts[i++] = 0;
        verts[i++] = 0f;
        verts[i++] = 1f;

        //Top Right Vertex Triangle 2
        verts[i++] = x + width;
        verts[i++] = y + height;
        verts[i++] = 0;
        verts[i++] = 1f;
        verts[i++] = 0f;

        //Bottom Right Vertex Triangle 2
        verts[i++] = x + width;
        verts[i++] = y;
        verts[i++] = 0;
        verts[i++] = 1f;
        verts[i++] = 1f;

        //Bottom Left Vertex Triangle 2
        verts[i++] = x;
        verts[i++] = y;
        verts[i++] = 0;
        verts[i++] = 0f;
        verts[i] = 1f;

        // Create a mesh out of two triangles rendered clockwise without indices
        mesh = new Mesh( true, 6, 0,
                new VertexAttribute( VertexAttributes.Usage.Position, 3, ShaderProgram.POSITION_ATTRIBUTE ),
                new VertexAttribute( VertexAttributes.Usage.TextureCoordinates, 2, ShaderProgram.TEXCOORD_ATTRIBUTE+"0" ) );

        mesh.setVertices(verts);

        shaderProgram = new ShaderProgram(
                Gdx.files.internal("vertex.glsl").readString(),
                Gdx.files.internal("fragment.glsl").readString()
                );
    }

    @Override
    public void render () {

        Gdx.gl20.glViewport(0, 0, Gdx.graphics.getWidth(), Gdx.graphics.getHeight());
        Gdx.gl20.glClearColor(0.2f, 0.2f, 0.2f, 1);
        Gdx.gl20.glClear(GL20.GL_COLOR_BUFFER_BIT);
        Gdx.gl20.glEnable(GL20.GL_TEXTURE_2D);
        Gdx.gl20.glEnable(GL20.GL_BLEND);
        Gdx.gl20.glBlendFunc(GL20.GL_SRC_ALPHA, GL20.GL_ONE_MINUS_SRC_ALPHA);

        batch.begin();
        sprite.draw(batch);
        batch.end();

        texture.bind();
        shaderProgram.begin();
        shaderProgram.setUniformMatrix("u_projTrans", batch.getProjectionMatrix());
        shaderProgram.setUniformi("u_texture", 0);
        mesh.render(shaderProgram, GL20.GL_TRIANGLES);
        shaderProgram.end();
    }
}
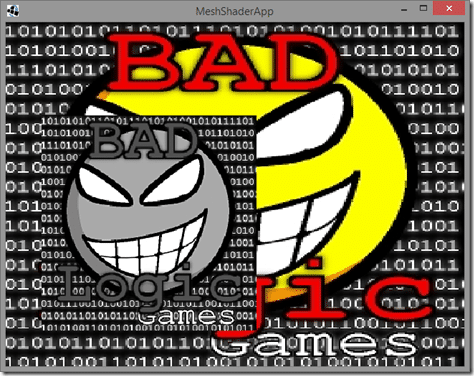
And when you run it:

This sample is long but fairly simple. In create() we create the geometry for a quad by defining 2 triangles. We then load our ShaderProgram just like we did in the earlier example. You may notice in creating the Mesh we define two VertexAttribute values and bind them to values within our ShaderProgram. These are the input values into the shader. Unlike with SpriteBatch and the default shader, you need to do a bit more of the behind the scenes work when rolling your own Mesh.
Then in render() you see we work with the SpriteBatch normally but then draw our Mesh object using Mesh.render, passing in the ShaderProgram. Texture.bind() is what binds the texture from LibGDX to texture unit 0 in the GLSL shader. We then pass in our required uniform values using setUniformMatrix and setUniformi ( as in int ). This is how you set up uniform values from the Java side of the fence. u_texture is saying which texture unit to use, while u_projTrans is the transformation matrix for positioning items within our world. In this case we are simply using the projection matrix from the SpriteBatch.
Using a Mesh instead of a Sprite has some disadvantages however. When working with Sprites, all geometry is batched into a single object and this is good for performance. More importantly, with Mesh you need to roll all the functionality you need from Sprite as you need it. For example, if you want to support scaling or rotation, you need to provide that functionality.
