Welcome to the very first tutorial in the Paradox Game Engine tutorial series, this section is going to cover installation and getting started. The process is in reality incredibly straight forward, so this should be fairly short. If you are unfamiliar with the Paradox Game Engine, consider starting here for an indepth review of Paradox’s functionality.
As with most tutorials on GameFromScratch, this one is also available as an HD video.
Getting Started
To get started, of course you are going to need download a few things.
Either version of Visual Studio will work. If you don’t have a license, remember the community edition is free for small teams and people who make less than $1million per year in revenue. You don’t specifically need to have Visual Studio installed, Paradox actually ships a copy of MSBuild and the .NET framework includes the C# compiler. If you want to instead use your favorite text editor, that is an option. These tutorials are all going to assume you are using Visual Studio however.
If you are going to be using Visual Studio, and don’t already have it installed, make sure it is installed before installing Paradox, as part of the Paradox installation will install a plugin to Visual Studio. I am not going to go through the Visual Studio installation process; however if you choose strictly default settings, it will work out just fine.
Once you have Visual Studio installed, make sure you run it at least once to allow it to do some late step configurations. This may not be strictly necessary, but better safe than sorry.
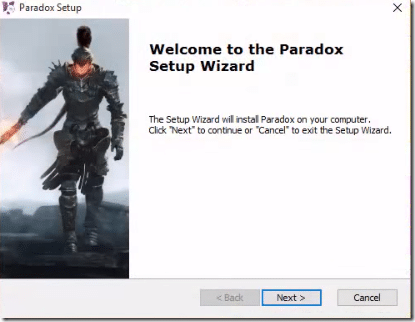
Next run the Paradox Installer you downloaded earlier.
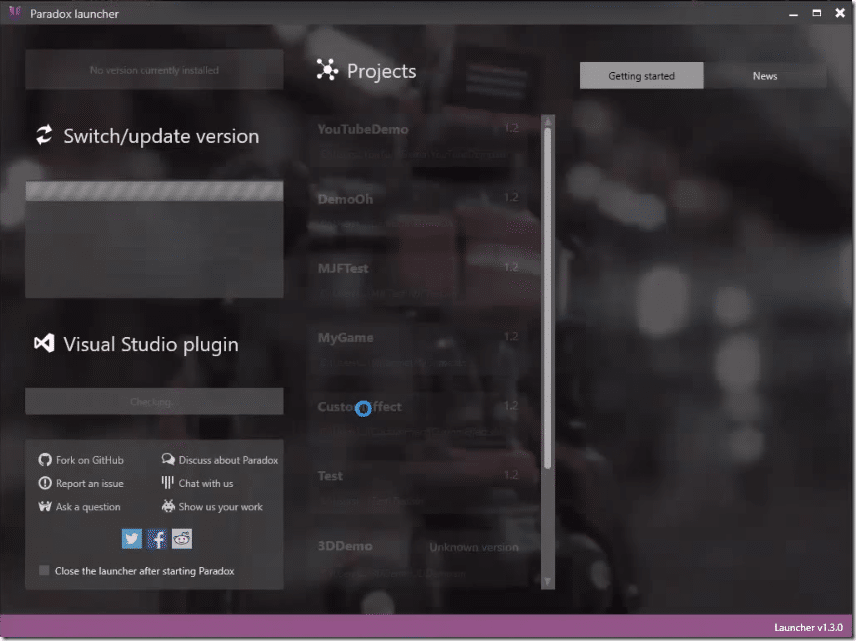
The install process is extremely straight forward, basically just asking you which shortcuts you wish to create. Once complete, the Paradox Launcher will be run. This is the application you use to create new or open existing Paradox projects, as well as managing which version of Paradox you have installed:
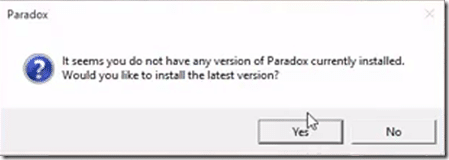
It will now detect that you don’t have an SDK installed ( assuming you don’t have a prior install ), when prompted, choose yes:
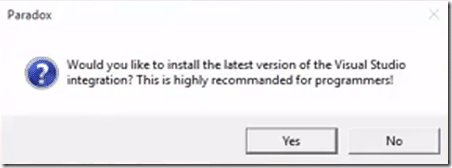
It will then ask if you wish to install the Visual Studio integration, again click yes:
Your Paradox install should now be complete.
Creating Your First Project
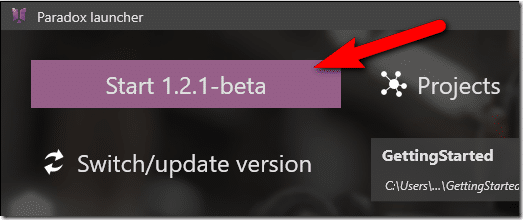
Now that Paradox is installed and configured, let’s create our first project. In the Launcher, click the big purple Start button, your actual version number could obviously differ from mine.
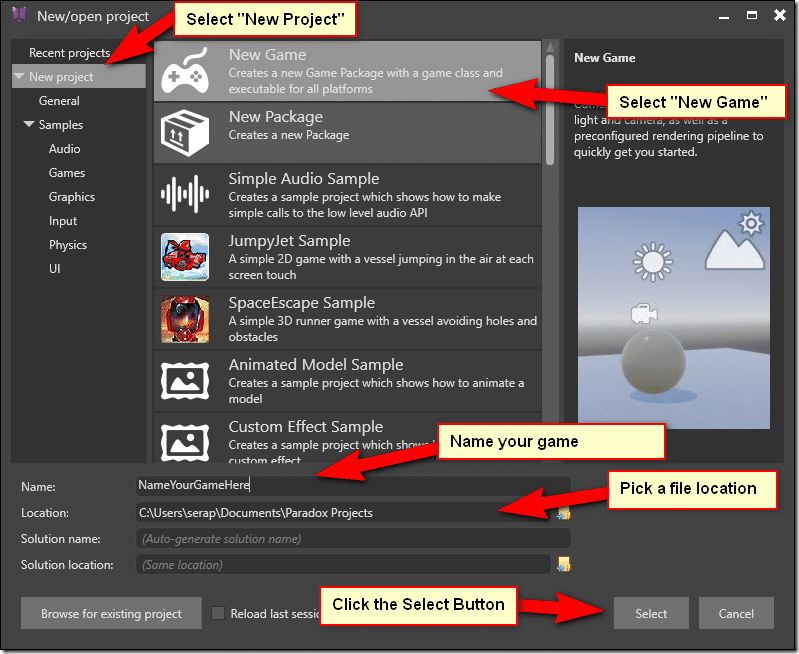
This will launch the New/Open Project dialog. You may notice there are several examples you can load. In this case we are going to create a new project instead.
The only thing to be aware of here is when naming your game, be sure to use a C# namespace friendly value. For example, Game3D works, but 3DGame will work here, but then blow up when you get to the project in Visual Studio. For a very detailed description of what’s allowed and what’s not in a C# variable see here. Simple rule of thumb however, don’t start with a number or punctuation other than an underscore and keep away from oddball characters and you should be good.
Once you click the Select button, you will be taken to another dialog:
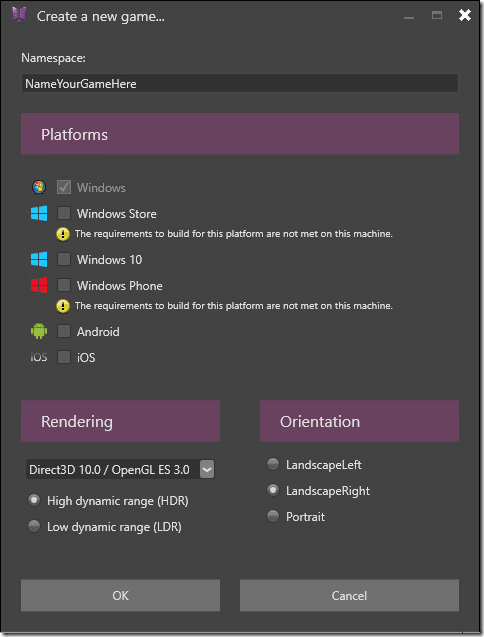
Here you can choose which platforms you want to support. You may notice that Windows Store and Windows Phone are both showing “The Requirements to build for this platform are not met on this machine”, that is because I do not have the proper signing keys configured. The value “Windows 10” might also be a bit confusing, as a normal “Windows” project will run just fine on a Windows 10 machine. In this case “Windows 10” refers to the now renamed Universal apps, that enable your code to run on desktop and mobile Windows platforms. It’s also important to note that Android and iOS development require a Xamarin license.
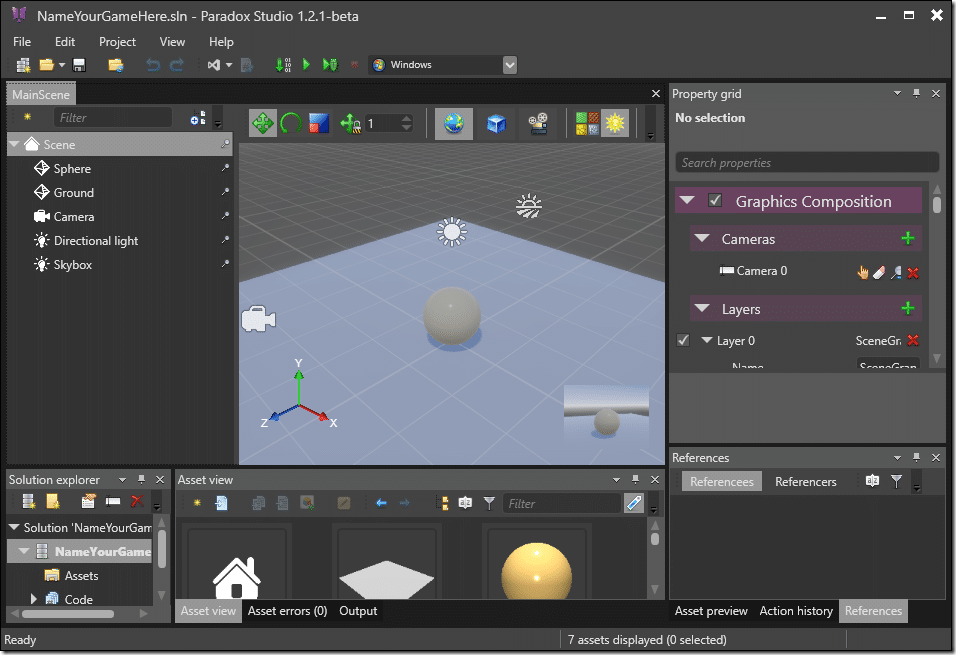
The final options are for configuring the starting graphics configuration as well as the starting orientation. Once done, click OK. This will then launch Paradox Studio:
Paradox creates a simple preconfigured scene for you. Most importantly it sets up all the graphics configuration for you. Feel free to delete everything from the scene, although I would recommend keeping at least the camera initially.
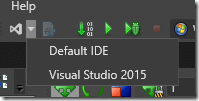
You can now test that your Visual Studio integration works properly. In the toolbar you should see this:
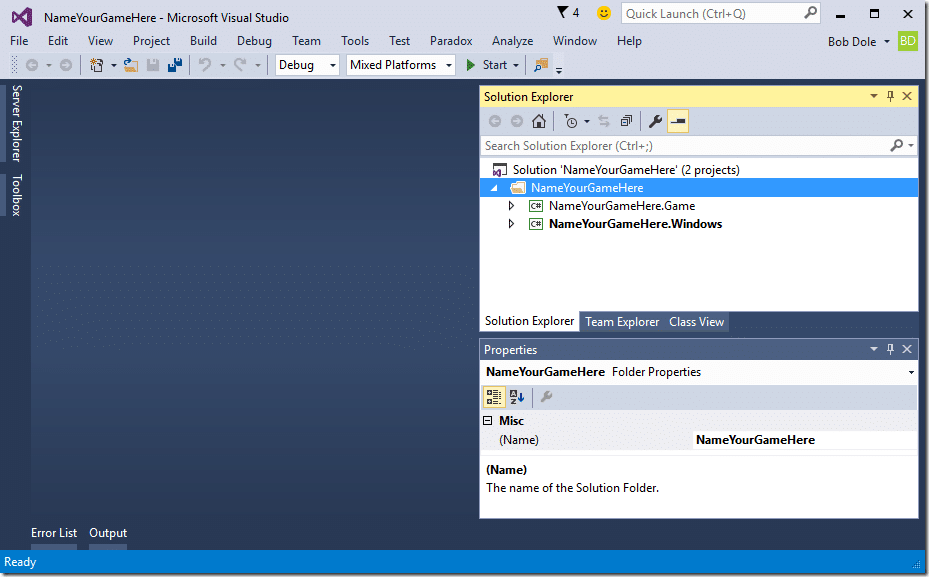
If you have multiple versions of Visual Studio installed, you should be able to select which one you wish to use. In my case I have only Visual Studio 2015 installed. Either click the version you want to run, or the toolbar Visual Studio icon for the default. Visual Studio should now open with your project displayed:
Looking in Solution Explorer you should see a project ending in .Game, as well as one project per platform you selected. The .Game project is where the majority of your game logic will go, while platform specific initialization code will go in each platform project, if required that is. You should also now see a new menu Paradox if you install completed correctly:
That’s it. Paradox is now up and running and you’ve created your first project. Stay tuned for the next part where we take a tour of Paradox Studio.
The Video

