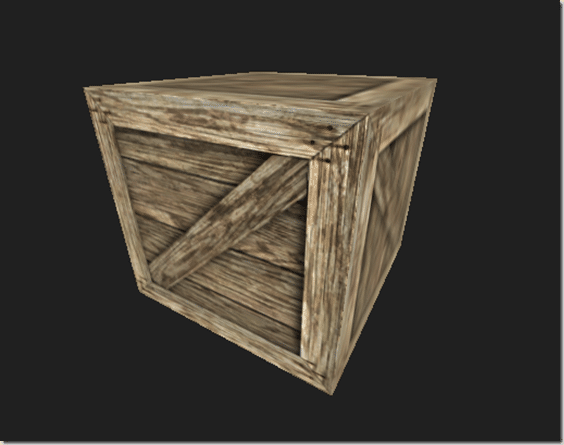
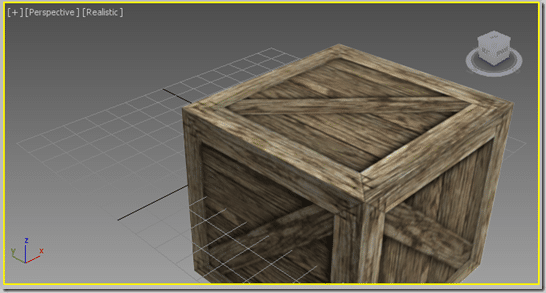
Even though Project Anarchy ships with a ton of assets, you are eventually going to want to add your own. In this tutorial we are going to do exactly that, by creating the Hello World of game modelling… a textured crate.
Ain’t she a beauty?
For this tutorial I am using the 30 day trial of 3D Max 2014, which you can download for free right here. Of course you can use any of the supported modelling programs if you already own one. This tutorial will not be teaching you how to model in any way, besides I suppose how to create a cube, which isn’t really all that exciting is it? In addition to Max 2014, the prior 4 versions are also supported, as well as multiple revisions of Maya and Softimage. Oddly, there is a plugin for Softimage, but no documentation… I’m not entirely certain of why.
In this tutorial we will cover:
- installing the Project Anarchy content tools
- creating and texturing a 3d crate in 3D Studio Max 2014
- exporting a model from 3D Studio Max to vForge
- attaching a model to an entity in vForge
Setup and Configuration
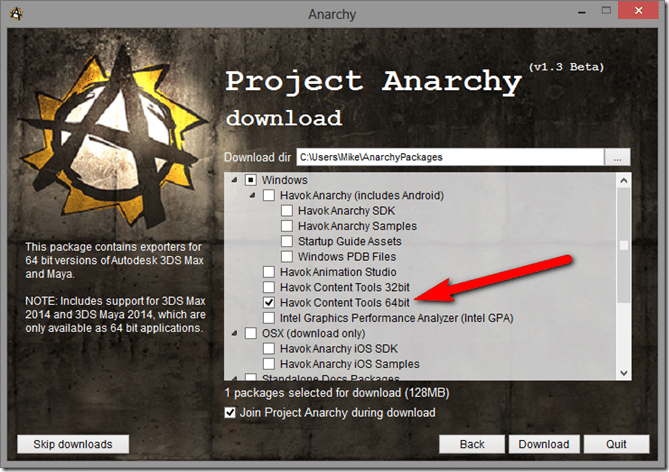
To continue if you haven’t already, install the 30 day trial of 3D Max 2014. Then run the Project Anarchy download manager again. Don’t worry, it will have locally cached all the install files if you ran it earlier. You want either the 32 or 64bit version of the Havok Content Tools, depending what version your 3D app is. In my case it’s 64bit I need. Select the one you need and click Download. If you’ve already downloaded everything, skip this step and jump ahead.
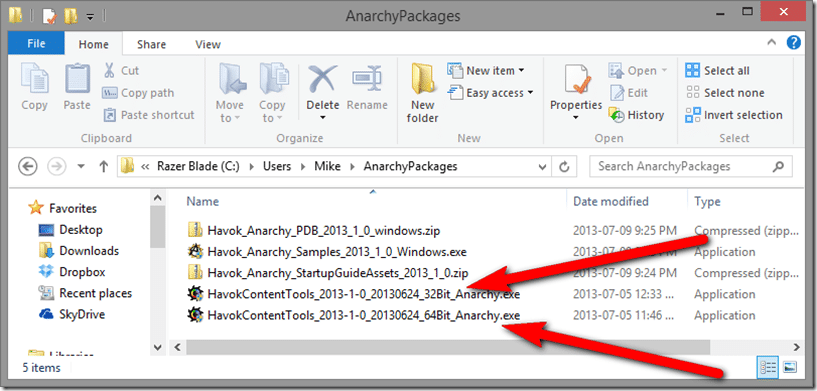
If you already downloaded everything, you can locate the installer in a sub-directory of your USER directory, in my case it was C:UsersMikeAnarchyPackages, like so:
The downloader should run the installer automatically, but otherwise you can run the one you need from this folder, select either the 32 or 64bit version of HavokContentTools and run it. Make sure that your 3D application and Havok are closed ( just in case ).
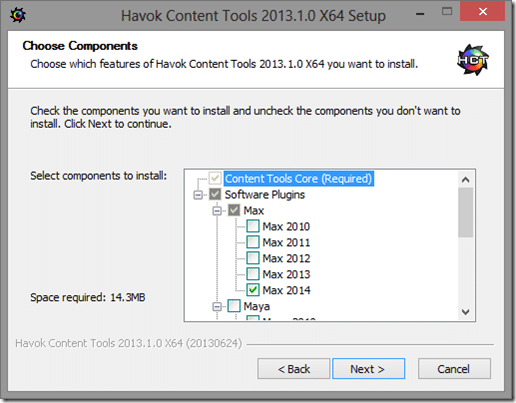
The installer should automatically determine which versions you have installed:
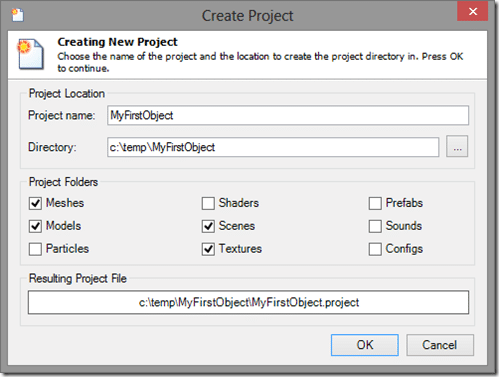
If you don’t already have a vForge project and scene configured, do so now. If you have no idea how, please refer to this earlier tutorial. I created a project using these settings:
Strangely, it didn’t make a textures folder. That’s it for the Havok stuff for now, let’s switch over to 3DS Max and create a simple textured crate.
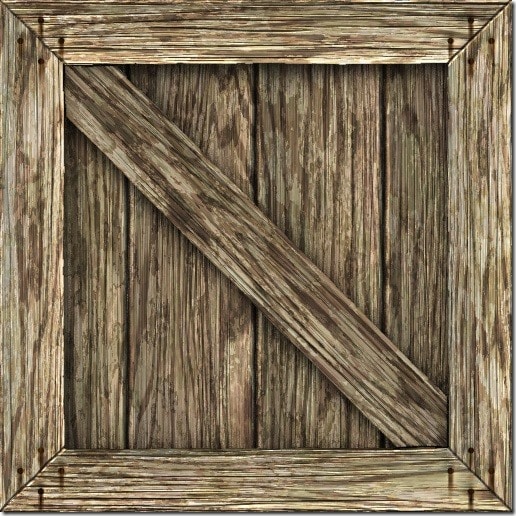
Oh yeah, the texture, I am using this one:
It’s a 512×512 texture I downloaded from the web… I did not create it, nor do I have any rights to it, so do not use in a commercial project! Now download this file and save in the root of your newly created project. ( C:tempMyFirstObject in my case ) as crate.jpg.
Creating a textured crate in 3DS Max 2014
If you’ve ever used 3D Max, just skip this part completely, its 101 stuff.
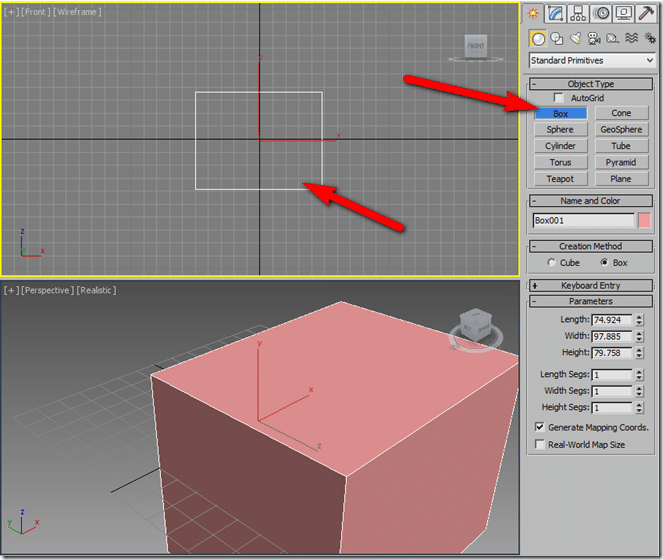
Once the installer finishes, the required plugins should now be installed. Fire up 3D Max 2014 ( or whatever app you are using ). In the Create Panel, left click Box icon. Now left click and drag to draw the rectangle you want in any viewport, then release the button. Now the next mouse movement will represent the depth of the object you are creating. Click when done and you should now have a 3D cube.
Press ‘Q’ to switch to selection mode and make sure that the cube is selected.
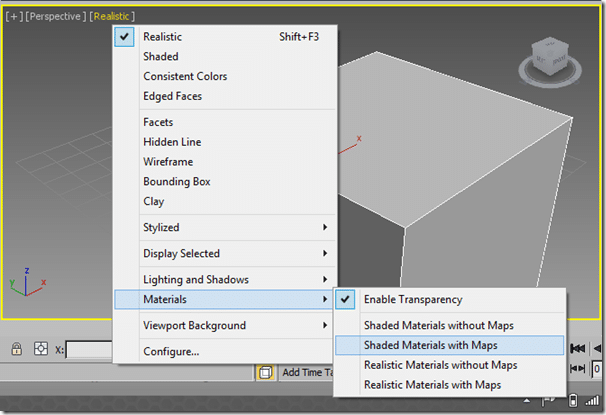
Now we want to texture it… first we need to turn texture display on so we can tell if our texture is working or not.
In the Perspective window, left click the word “Realistic” and set Materials to Shaded Materials with Maps.
Now the cube in this display will display your texture once assigned.
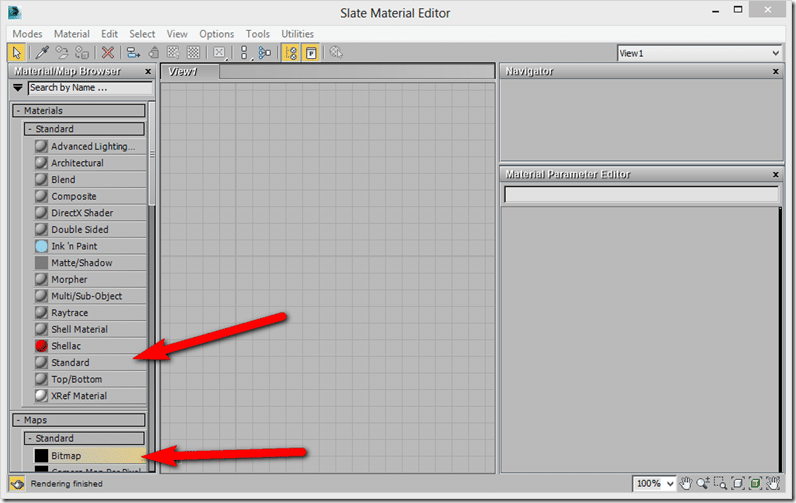
Now lets assign a texture. Press ‘M’ to bring up the Slate Material Editor. From the left hand panel, drag over a Standard material and a Bitmap map.
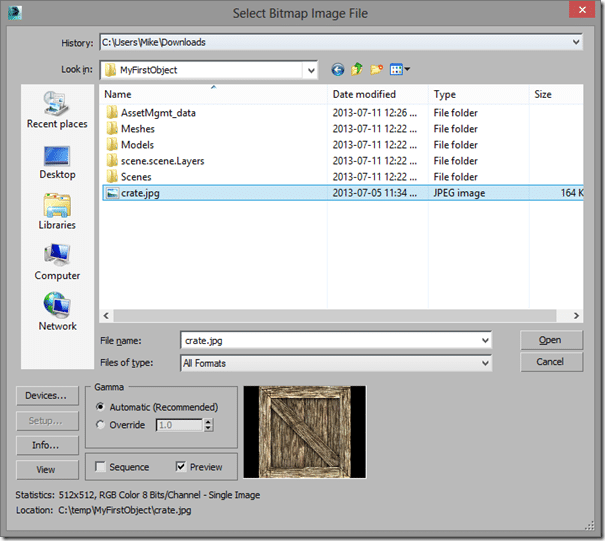
For the bitmap, you will be prompted for the texture to use. Select the crate.jpg at the root of your project.
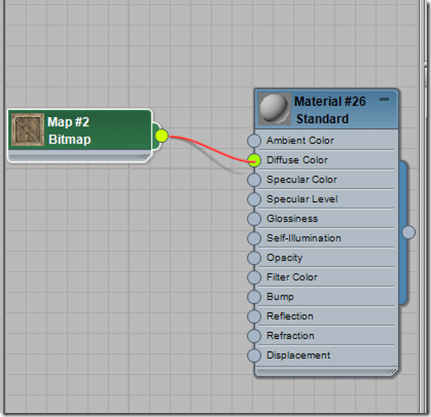
Now drag the connector on the right of the Bitmap to the Diffuse Color on the material.
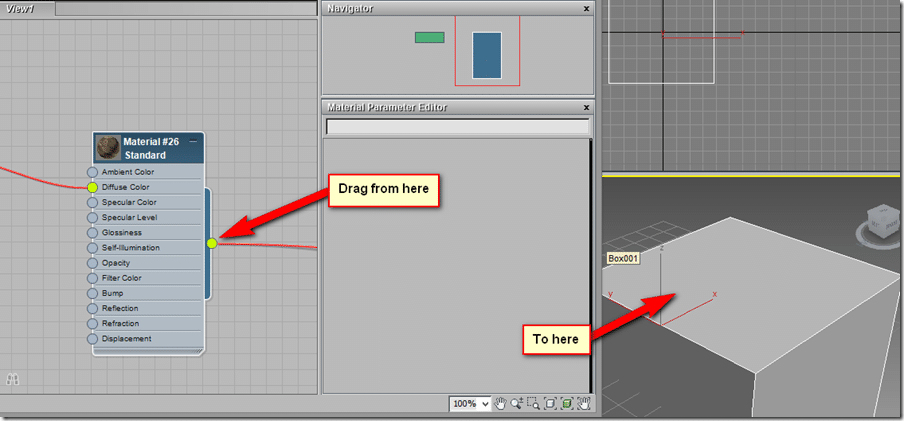
This assigns the bitmap texture to the diffuse channel of the material. Now drag the connector from the right side of the material to the cube in your scene.
You should now have a fully textured cube for exporting. If it doesn’t appear to be textured, make sure the the viewport is set to show texture maps.
Now save your scene. For the sake of ease, I am going to save to C:tempMyFirstObjectCrate.max.
Exporting to vForge
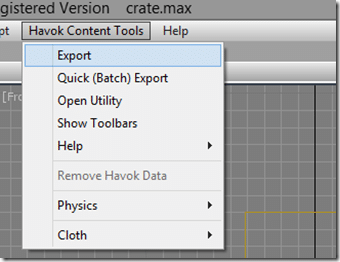
Assuming you have installed the Content Tools properly, you should have a menu in 3DS Max, Havok Content Tools
Select Havok Content Tools->Export:
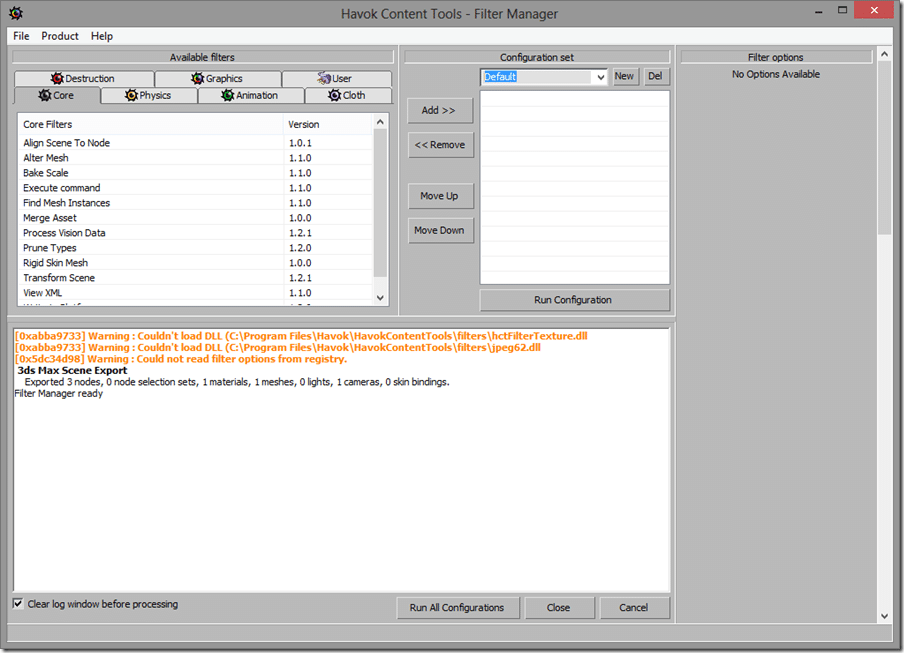
The following dialog will appear:
You may notice some error text about unloadable DLLs, this has no effect on the export process, you can read more about it here.
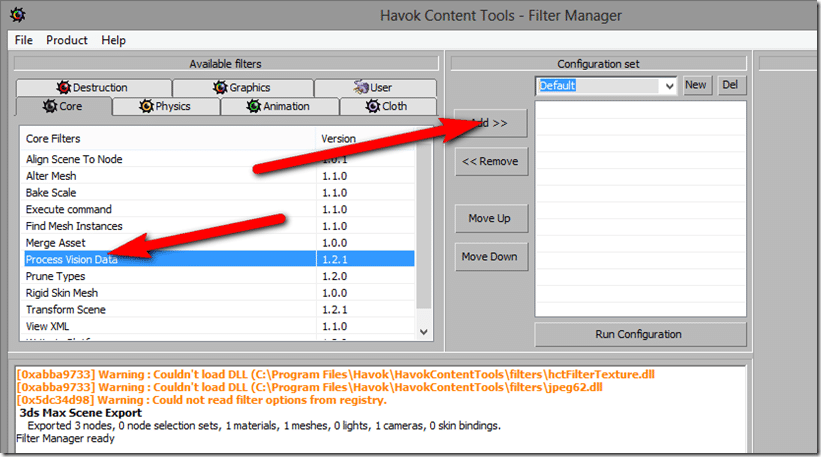
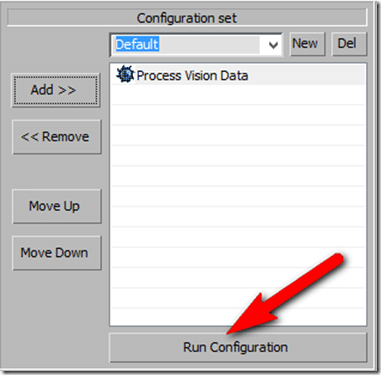
In the left hand side, highlight Process Vision Data, then on the right hand side, click Add >>
———————————!!Now make sure you have your project open in vForge before continuing!! ————————————————–
With your project open in vForge, click Run Configuration.
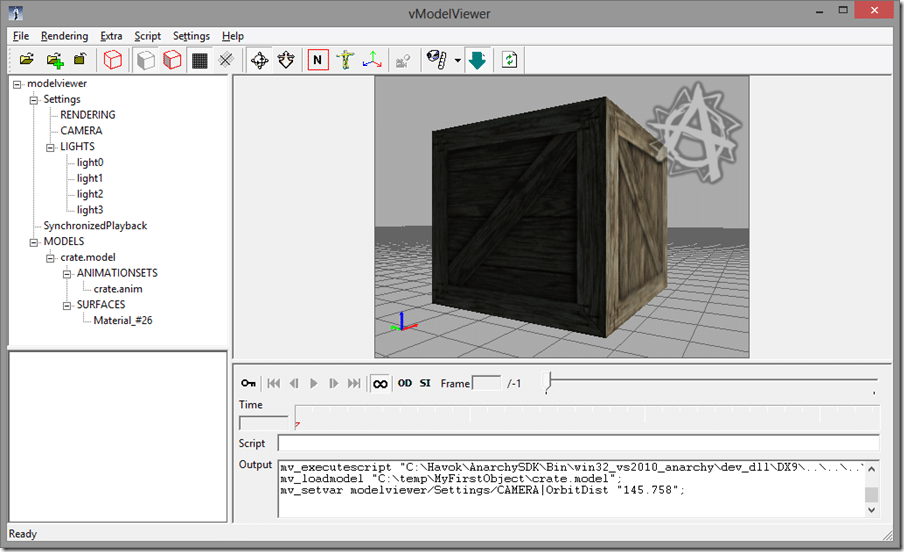
If everything goes according to plan, your model will appear in vModelViewer:
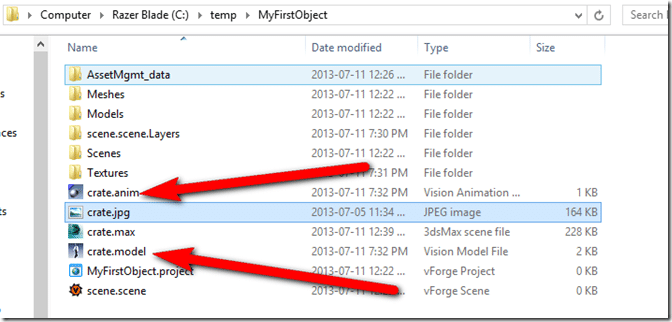
Now if you take a look at your project directory, you will see your newly exported .model ( and .anim ) files:
Congratulations! You just exported your first 3D model from 3D Studios Max to Project Anarchy!
Using the crate model in game
Now let’s make sure it worked.
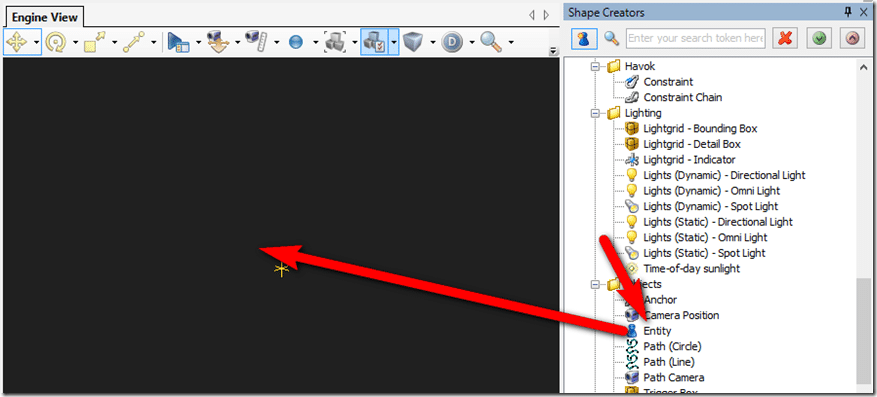
In vForge, drag an Entity from the Shape Creators panel to the Engine View:
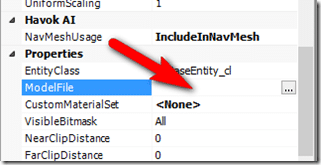
With your newly created entity selected, in the Properties panel locate Model File:
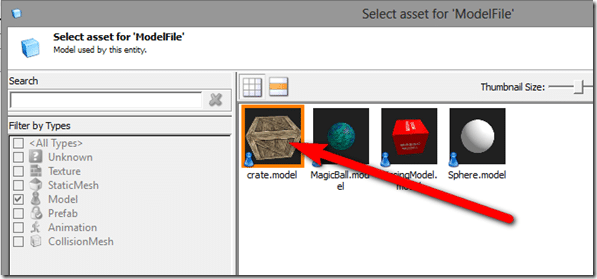
When you click the … button, you should now be able to select your crate model.
Select it and click OK.
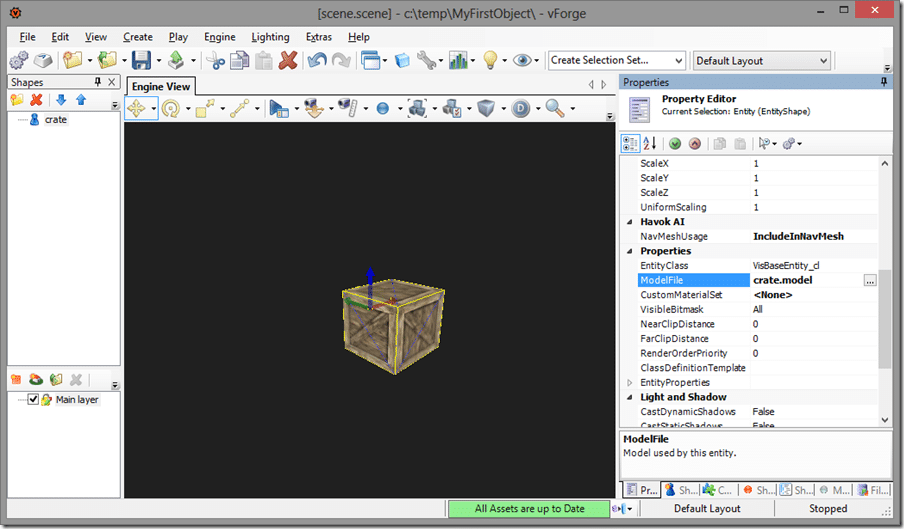
And voila! Your crate model in the game engine!
We will be making heavy use of our newly created um… crate in upcoming tutorials, so stay tuned.

