
Blender 3.2 was just released and among other features the ability to paint vertex directly in sculpt mode was just added. In this tutorial we are going to show how to use the new painting tools, how to configure EEVEE and Cycles to show the results then finally how to render vertex paint to texture for export to other tools or game engines. Let’s get started. There is an in-depth, step by step video version of this tutorial available here.
Sculpt Vertex Paint in Blender 3.2
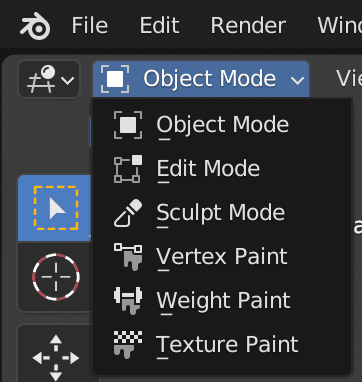
To get started with vertex painting in Blender, you are going to need an object with a sufficient number of vertices to paint on. The less vertices, the less detail you can paint, so plan accordingly. Make sure the object you want to paint is selected, then switch to Sculpt Mode:
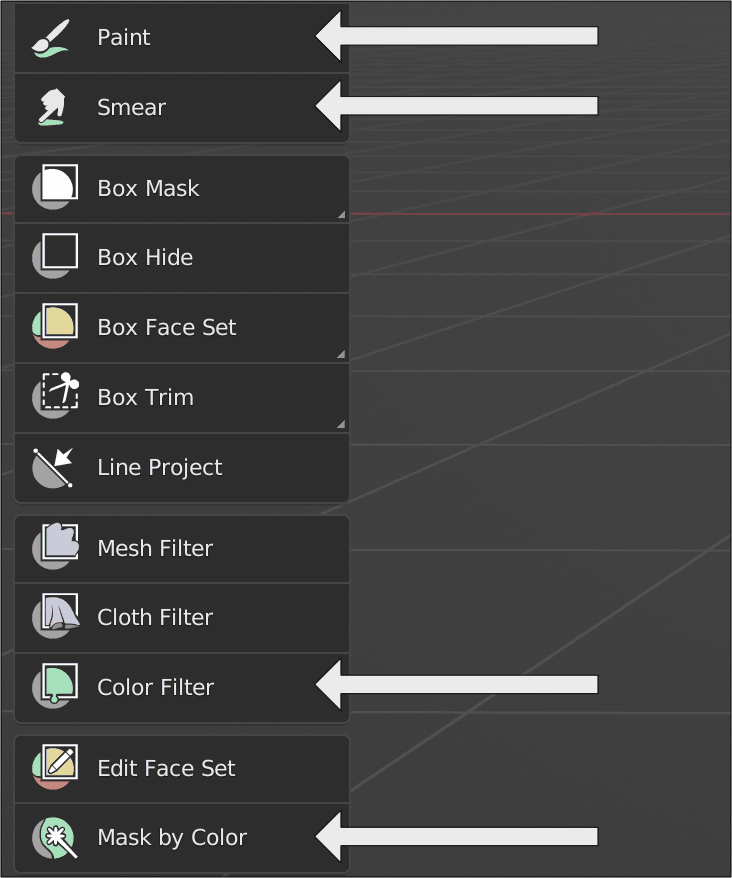
In Sculpt mode, the new paint tools are located in the toolbar:
Select the Paint option, then in the Tools menu (N hotkey), you will locate a variety of paint settings, such as the new Wetness and Brush tip controls.
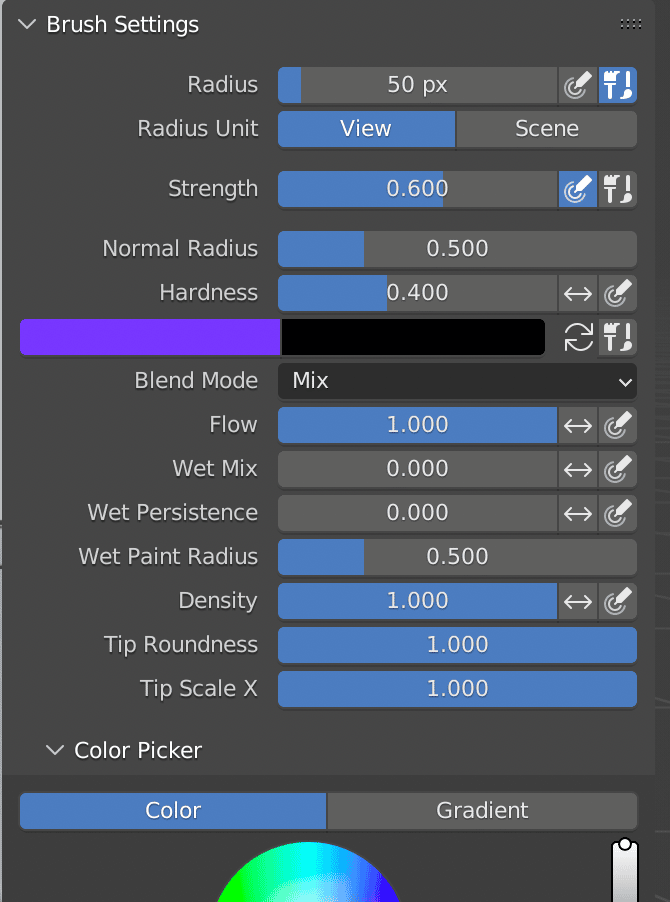
The next step is pretty straight forward… set the brush settings you wish, select a colour and paint on your object.
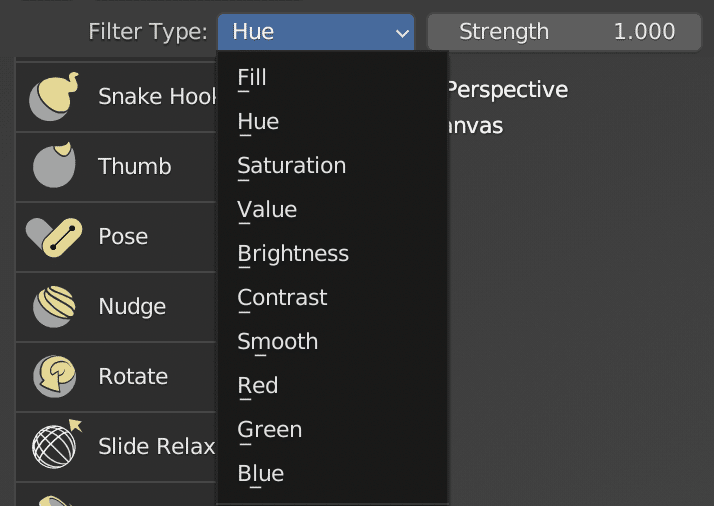
The Color Filter tool is a way of making adjustment to the entire image, minus whatever you currently have masked out. Select Color Filter, then you can select options such as Hue or Brightness, then move the mouse left or right to increase/decrease.
Rendering Vertex Color in EEVEE/Cycles
Now that you’ve painted your masterpiece, you may notice if you switch to textured or rendered mode, your masterpiece is gone! No worries, it’s simple enough to fix.
First select your object and add a material to it.
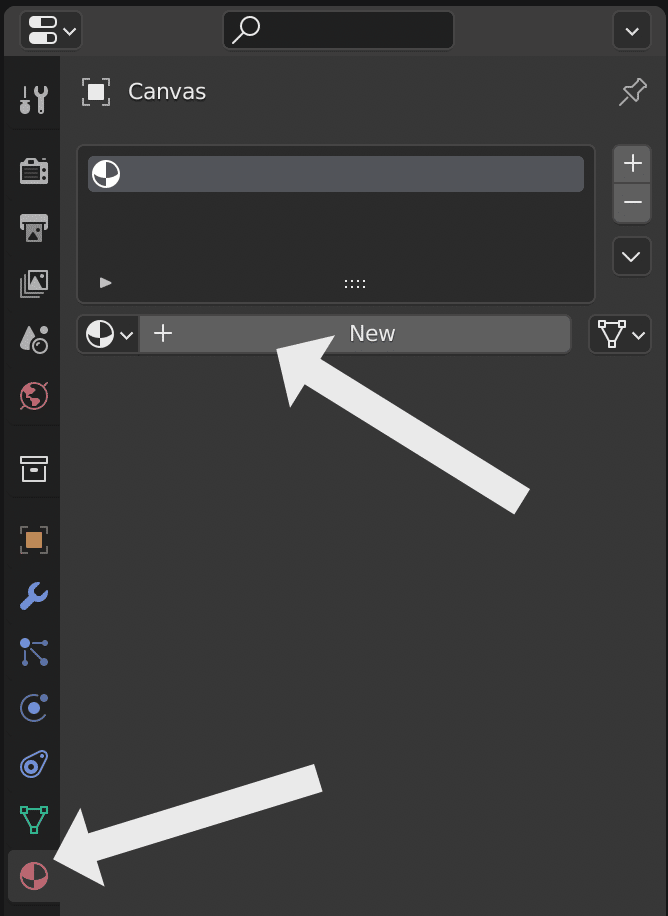
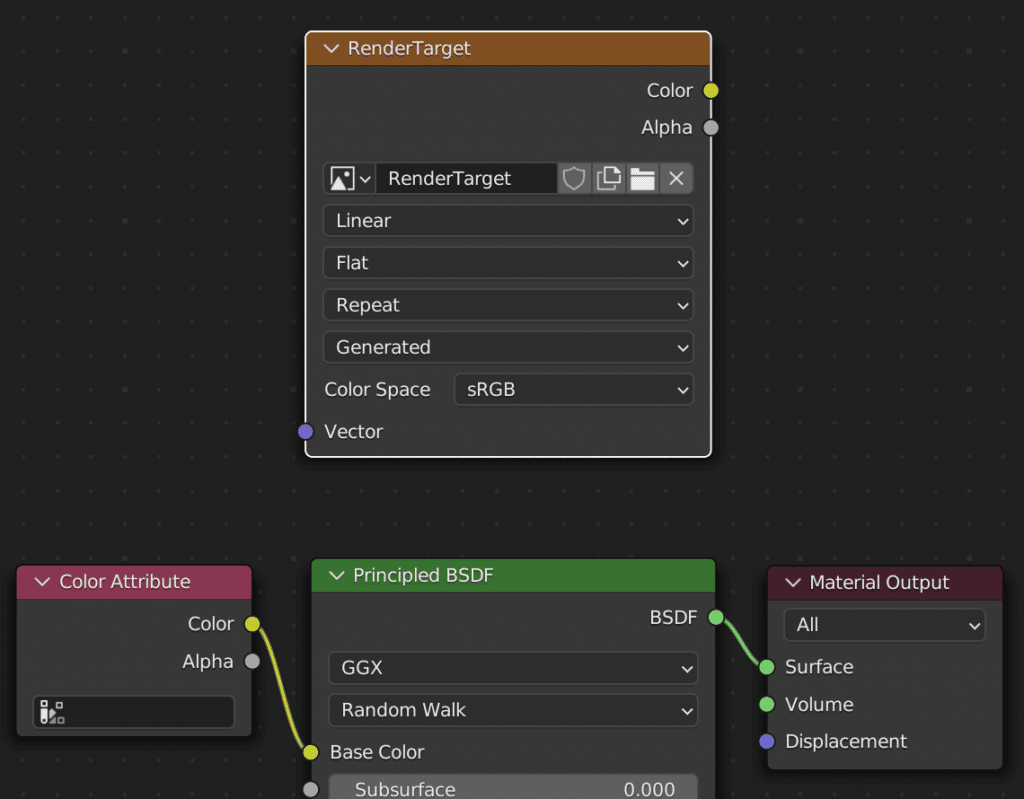
Now open up a Shader Editor window and set your material accordingly:
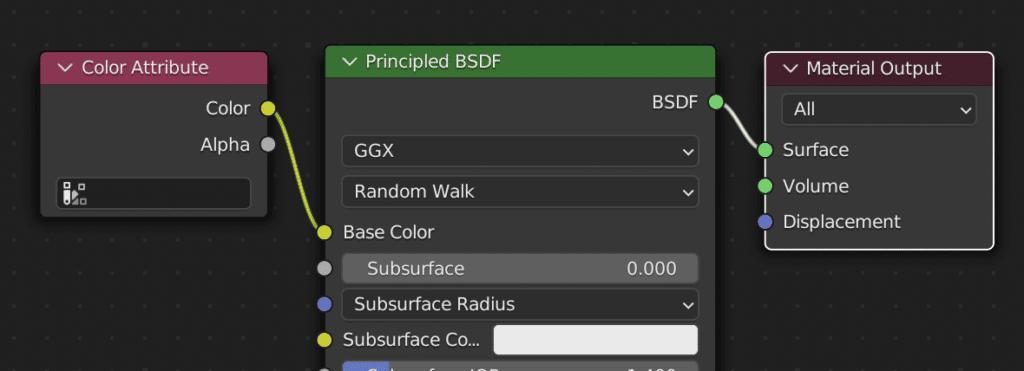
The Color Attribute is available in the Inputs category. Once hooked up, your results should now show up in textured and rendered modes.
Rendering Vertex Color To Texture
This next step is entirely optional, but if you are working with a game engine or another DCC tool that does not support vertex color information, it’s possible you may want to render to texture.
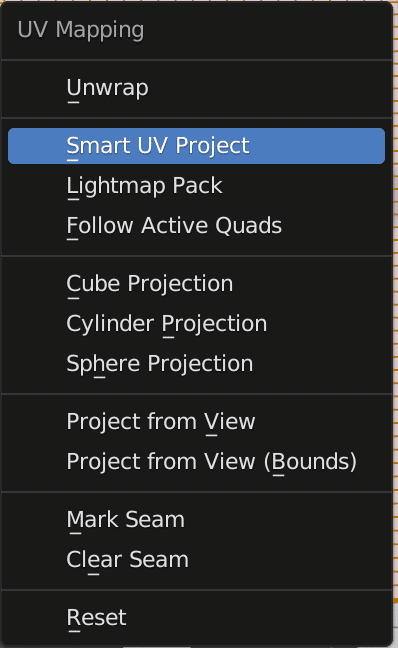
The first thing we need to do is apply a UVMap to our object. Select your painted object, switch to edit mode, select all the vertices (A key twice). Now hit the U Key, then select the Smart UV Project. The detail options are ok.
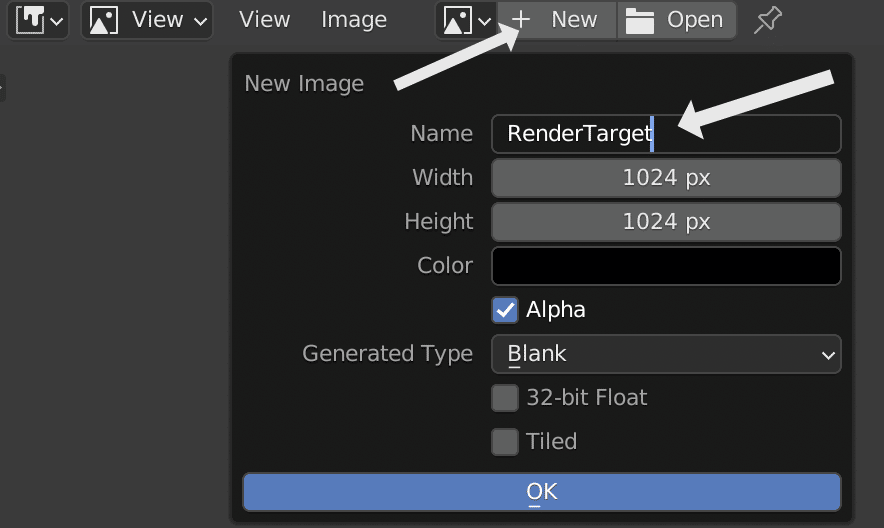
Next we need a texture target to render to. Open up the Image Editor, create a new Image, pick a resolution and name it:
Now we want to switch bad to the Shader Editor, with our object selected and add an image to our shader network. There is no need to connect the image to anything, just add Texture-> an Image Texture node and set it’s target to our newly created image.
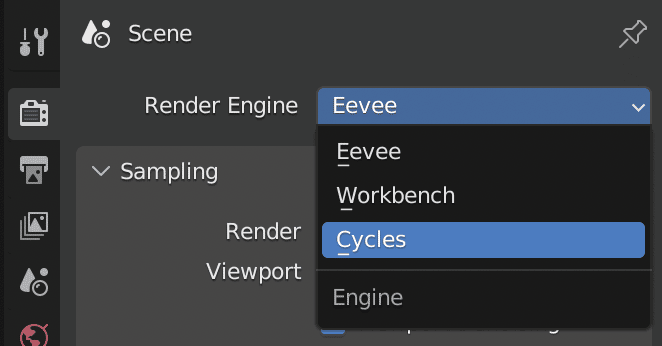
Now it’s finally time to render our vertex data to texture. Switch to the render tab, then Cycles mode:
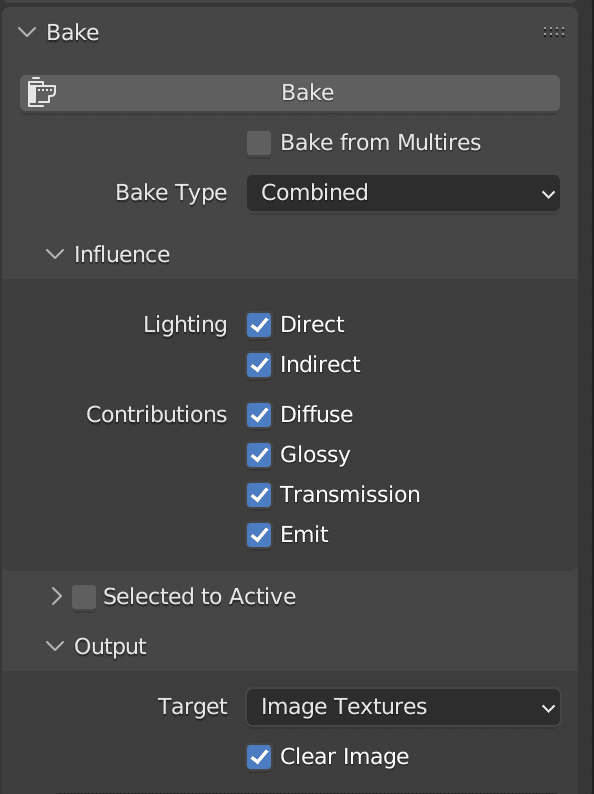
Now scroll down and locate the Bake section. Make sure Target is set to Image Texture, select the things you wish to bake, then click the Bake button.
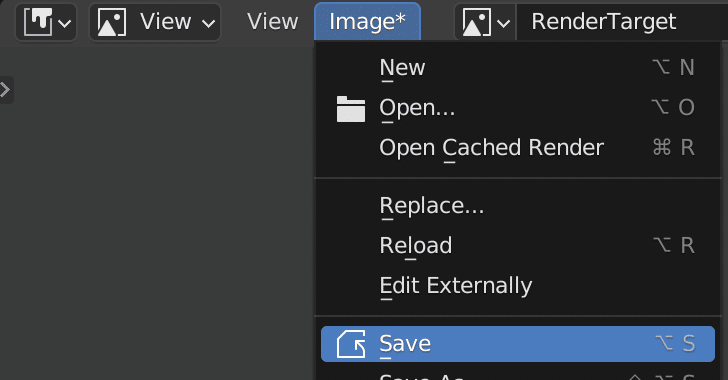
A progress bar will appear while rendering. Once complete, you should be able to switch over to the Image Editor and see the newly rendered texture. Don’t forget to save your newly generated texture to an image file on your file system.
And voila! You’re done!
You can see the entire process, step by step, of Blender 3.2 Sculpting painting to vertex, configuring the EEVEE and Cycles renderer to show your paint and finally, rendering the results to texture in the video below.