With the release of version 4.8 of Unreal Engine, playing audio actually became a great deal easier for 2D games with the addition of PlaySound2D. In this section we are going to learn how to import and play audio files in Unreal Engine. For the application controller I created a simple UI that fire off the playing of audio. If unfamiliar with creating a UI with UMG ( Unreal Motion Graphics ), be sure to read the previous tutorial.
As always there is an HD video version of this tutorial available right here.
We are going to be creating a simple UI to fire off audio events:
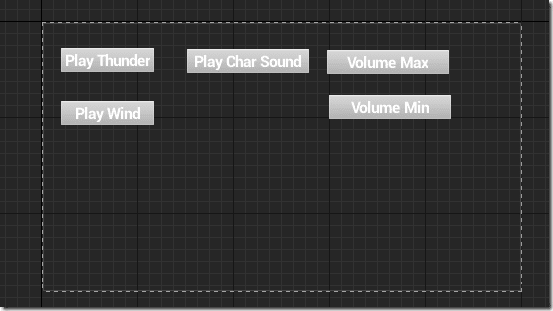
We will simply wire each button to fire off our examples. I also needed several audio samples. I personally downloaded each one from freesound.org.
Importing Audio Files
First we need some audio to work with. So then… what audio files work with Unreal Engine? Mp3, mp4, ogg? Nope… WAV. You can import your sound files in whatever format you want, so long as it’s wav. Don’t worry, this isn’t as big of a hindrance as it sounds, as Unreal simply takes care of the compression and conversion steps required for you. So the fact your soundtrack is 10MB in size isn’t as damning as it seems, as Unreal will take care of the required conversions for you. Being in an uncompressed source format enables Unreal to offer a lot of power as you will see shortly. Also it neatly steps around a number of licensing concerns, such as the patent minefield that is mp3. If you’re source files aren’t in wav format, you can easily convert using the freely available and completely awesome Audacity sound editor.
Your WAV files can be in PCM, ADPCM or DVI ADPCM format, although if using defaults you most likely don’t need to worry about this detail. They should be 16 bit, little endian (again… generally don’t worry) uncompressed format at any bitrate. 22khz and 44.1khz are recommended however, with the later being the bit rate CD quality audio is encoded at. Your audio files can be either mono (single channel) or stereo (dual channel), plus you can import up to 8 channels of audio ( generally 8 mono WAV files ) to encoded 7.1 surround sound. This is way beyond the scope of what we will be covering but more details about 7.1 encoding can be found here. Importing audio is as simple as using the Import button in the Content Browser, or simple drag and drop.
Once imported, you can double click your audio asset to bring up the editor.
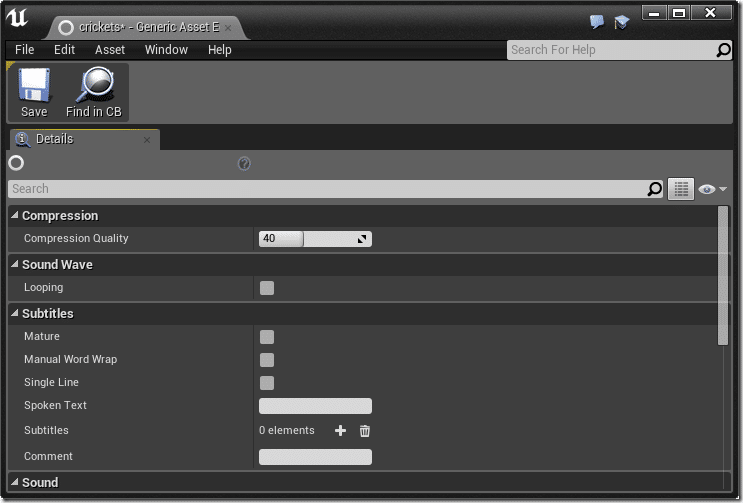
Here you can set a number of properties including the compression amount, wether to loop, the pitch, even add subtitle information. There isn’t anything we need to modify right now though. I have imported a couple different mono format wav files, like so:

And created a simple button to play the audio when pressed:
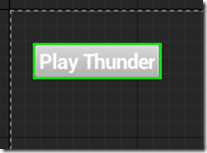
Playing Sounds
Now let’s wire up the OnClick event to play Thunder.wav, with the following blueprint:
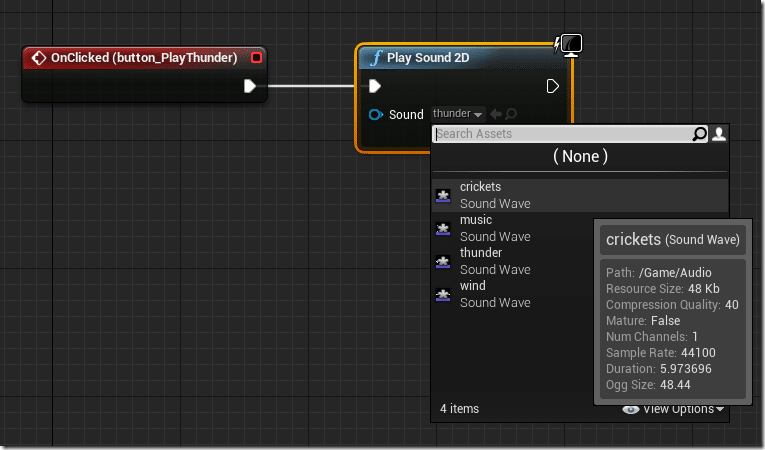
Yeah… that’s all you need to do, drop in a Play Sound 2D function, pick the Wave file to play and done. Before 4.8 the only option was Play Sound at Location, which is virtually identical but required a Position component as well. You can achieve the same effect this way:
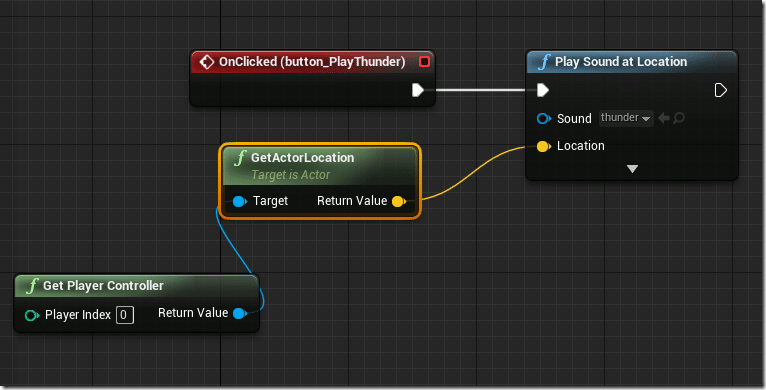
Both Play Sound at Location and Play Sound 2D are fire and forget, in that you have no control over them after the sound has begun to play (other than at a global level, like muting all audio ). Neither moves with the actor either.
What if you want the audio to come from or move with a node in the scene? This is possible too. First let’s create a Paper2D character to attach the audio component to. This process was covered in this tutorial in case you need a refresher. Don’t forget to create a GameMode as well and configure your newly created controller to be active.
Using the Audio Component
I created this hierarchy of a character:
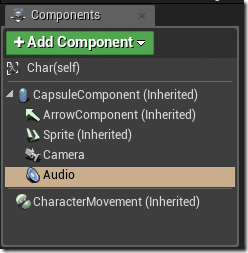
Notice the Audio component I’ve added? There are several properties that can be set in the Details panel for the audio component, but the most important is the sound.
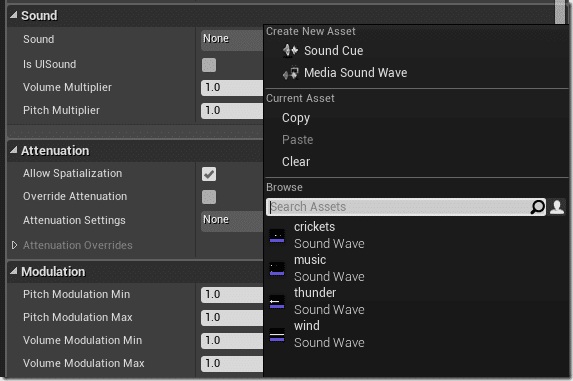
I went ahead and attached my “music” Sound Wave. You can set the music file to automatically play using the Activation property:

There is also an event available that will fire when your audio file has finished playing.

Unlike PlaySound2D, this sound isn’t fire and forget. It can also be changed dynamically using the following Blueprint:
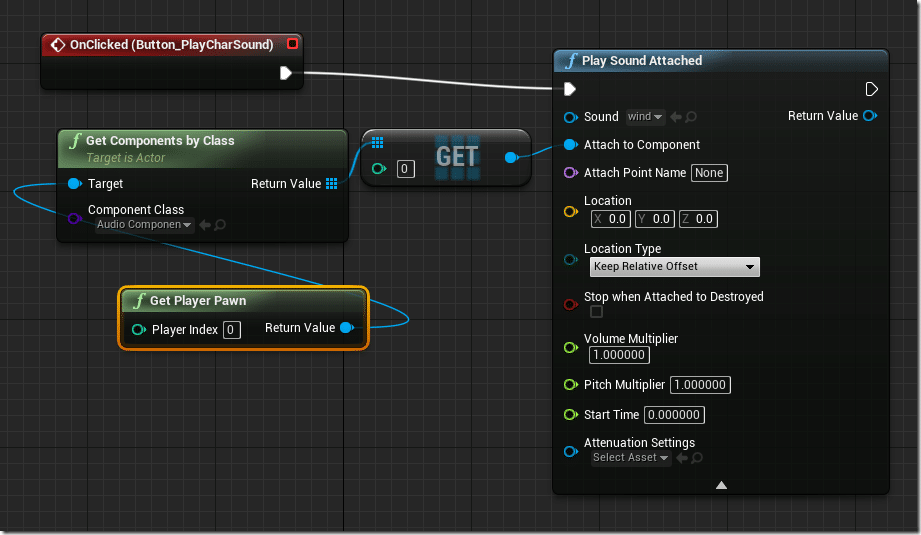
This blueprint finds the Audio component of our Pawn and then set’s it’s Sound using a call to Play Sound Attached. As you can see, there are several available properties to set and you can easily position the audio in the world.
As I mentioned earlier, you can also manipulate a running Sound wave when attached as an audio component, like so:
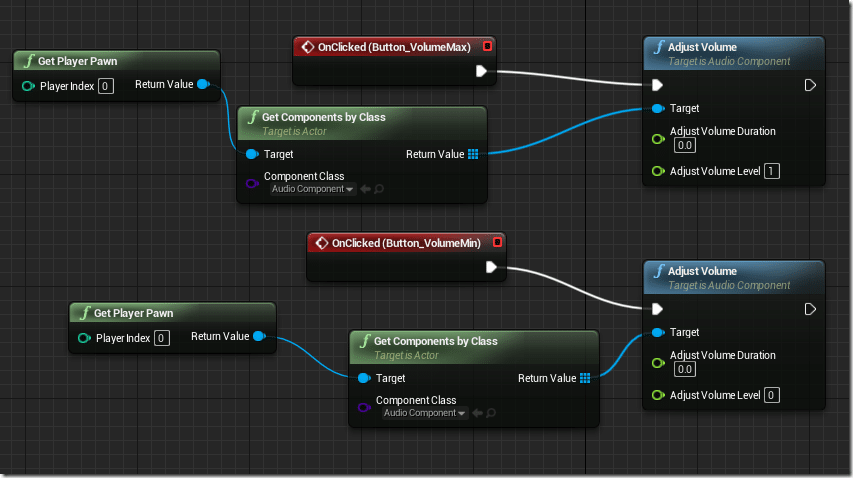
Paradoxically, there doesn’t actually seem to be a method to get the current volume. The obvious solution is to keep the volume as a variable and pass it to Adjust Volume Level.
Sound Cues
So far we’ve only used directly imported Sound Wave files, but every location we used a Wave, we could have also used a Cue. As you will see, Cues give you an enormous amount of control over your audio.
Start by creating a new Sound Cue object:
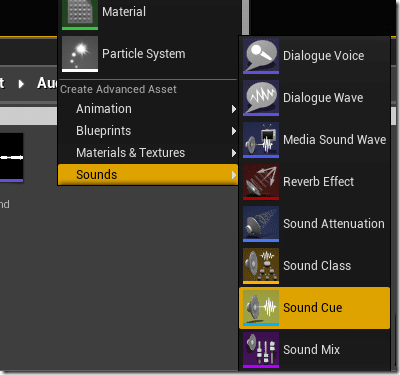
Name it then double click to bring up the Sound Que editor:
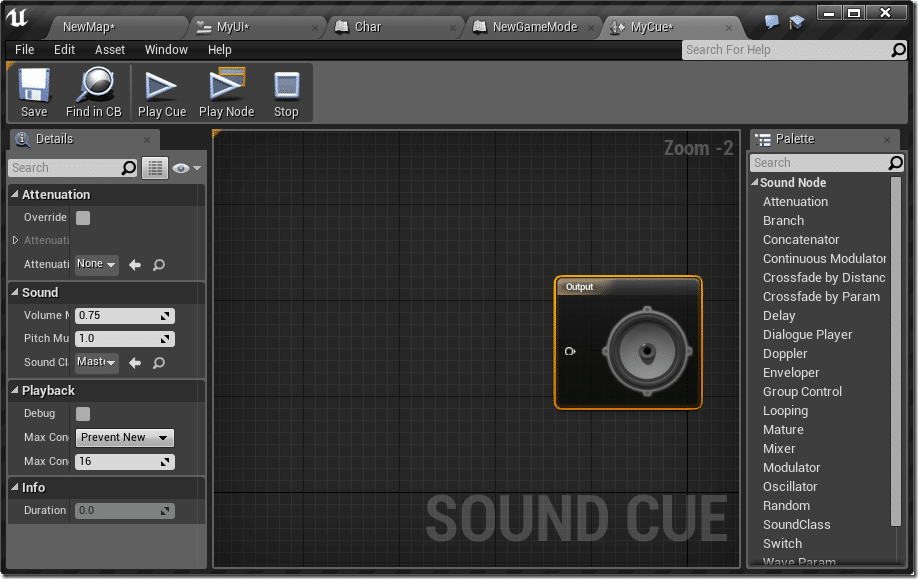
This is well beyond the scope of this tutorial, but you can essentially make complex sounds out of Sound nodes, like this simple graph mixing two sounds together:
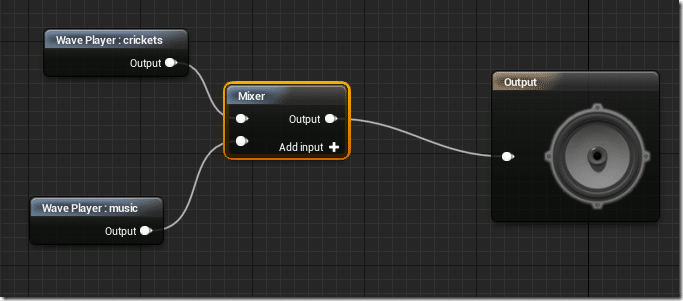
Again, any of the earlier functions such as Play Sound 2D will take a Cue in place of a Wave.
We have only scratched the very surface of audio functionality built into Unreal Engine, but this should be more than enough to get you started in 2D.
