Since picking up the Humble Bundle a few days back, I’ve been playing around with Stencyl ( expect more later ) a little bit. While Stencyl provides a drag and drop programming interface, it ultimately enables you to generate Haxe code ( more seamlessly than you probably expect ). My preferred Haxe editing environment is the IntelliJ IDE. This tutorial looks at configuring one to work with the other.
First go download and install the community version of IntelliJ IDEA if you haven’t already.
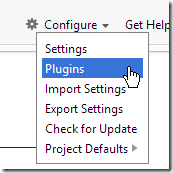
Next run IntelliJ, we need to configure the Haxe plugin. With IntelliJ loaded, select Configure->Plugins:
Click Browse Repositories
Type Haxe into the search field, select Haxe plugin and click Install plugin
Click yes when prompted, the plugin will be downloaded, then click Close/OK and let IntelliJ IDEA restart.
Now load Stencyl if you haven’t already. Click File->Preferences or Alt+Enter:
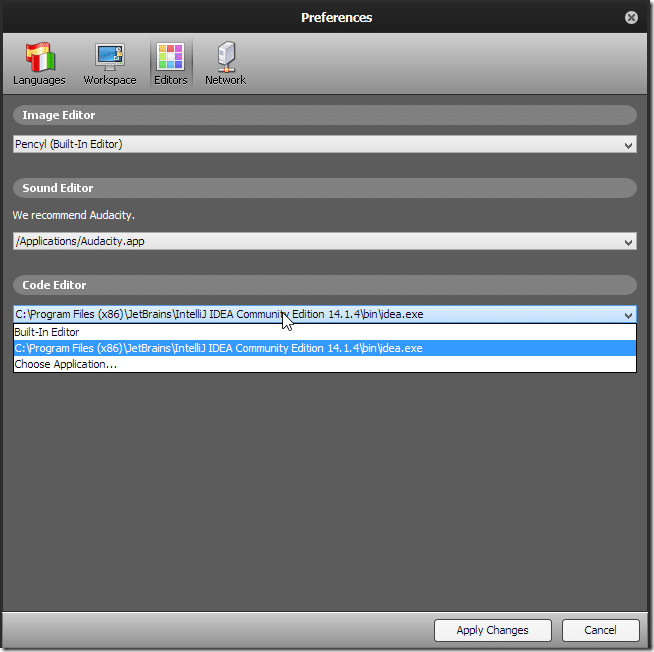
Click the Editors tab, drop down the combo under Code Editor and select Choose Application… and navigate to the idea.exe:
Next Apply Changes.
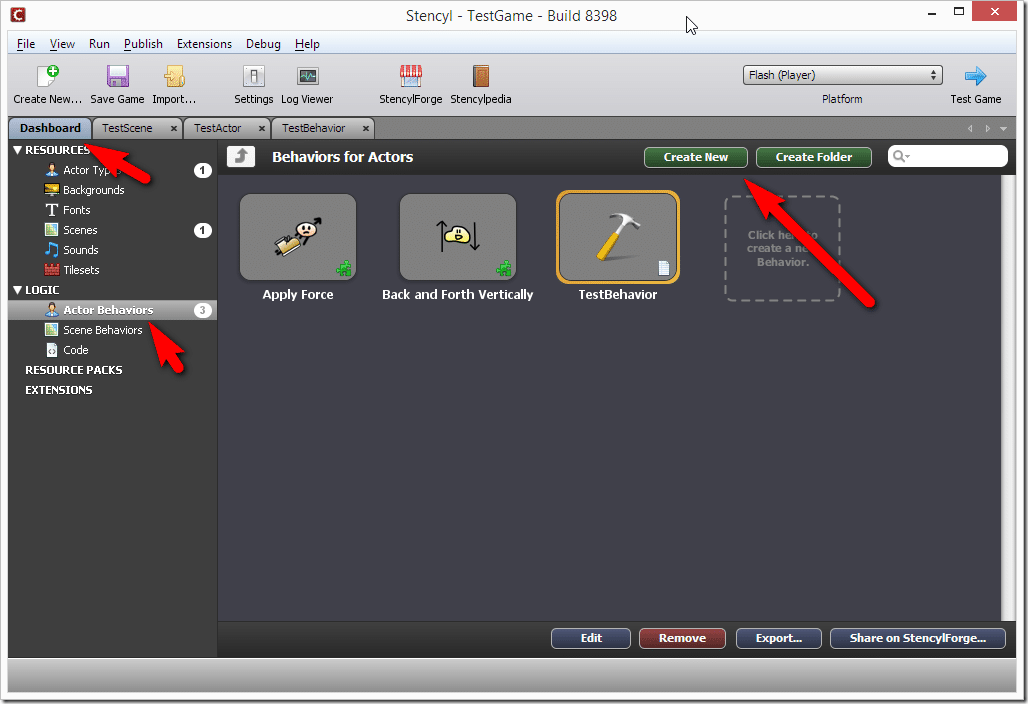
Next we need some code to edit. One easy way is to create a new Behavior. From the Dashboard, select Actor Behaviors, Create New
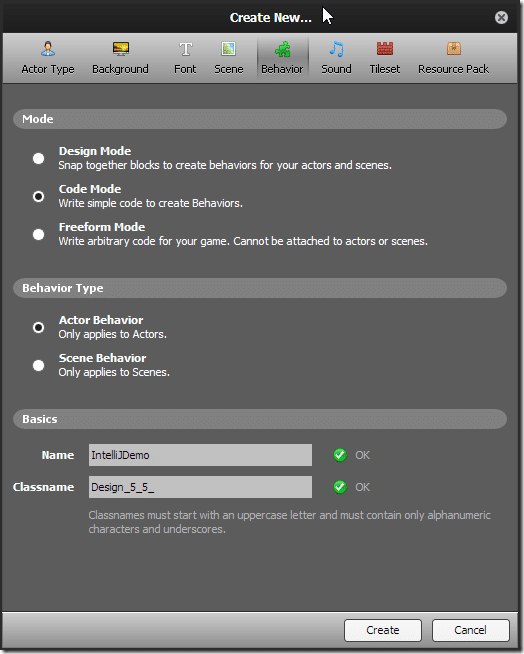
Fill in the resulting dialog like so (Select Code Mode and name it), then click Create:
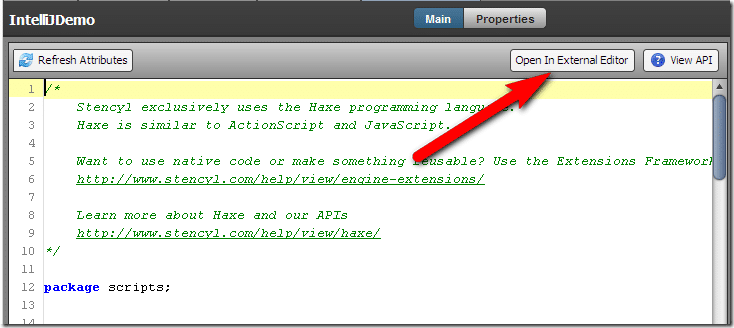
You new behavior will be created and opened in the built in code editor. Now click Open In External Editor:
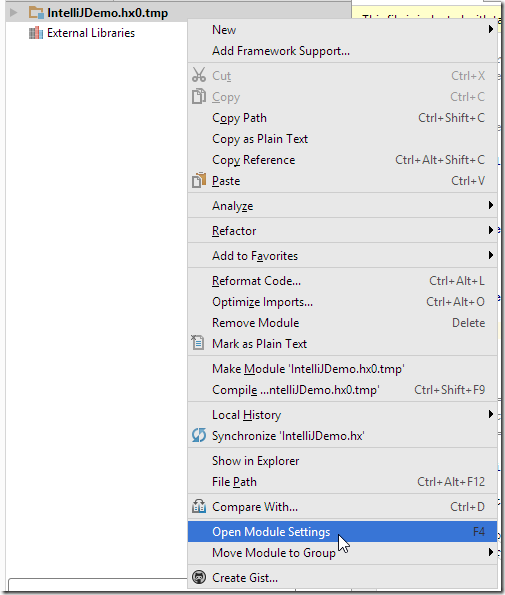
This will open in IntelliJ, but you wont have any code completion or intellisense. Let’s fix that now. To do this we need to configure the Haxe SDK. To do so, right click the generated project name and select Open Module Settings or hit F4 with the project selected.
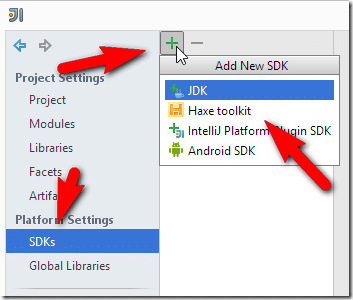
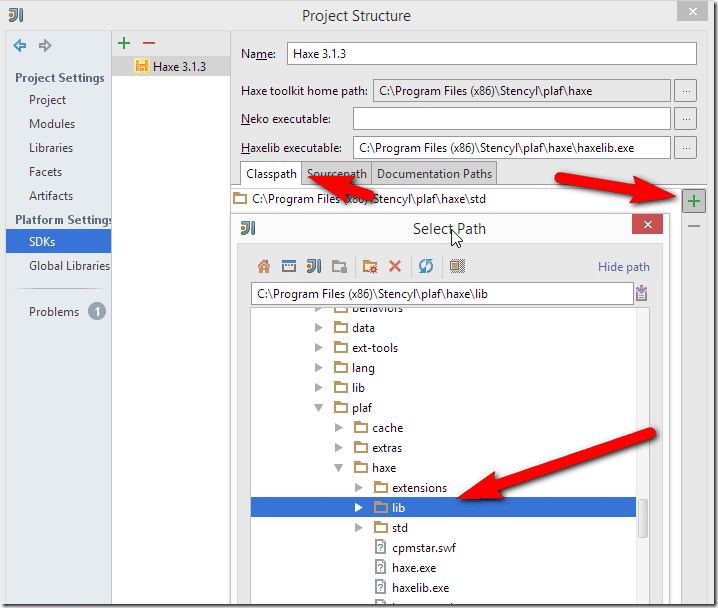
Click SDKs, then + then Haxe toolkit
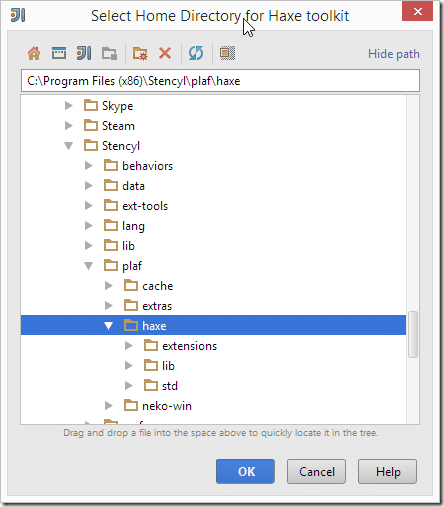
Then navigate to the Stencyl install directory, then plaf/haxe and click OK.
Finally we want to add the additional libraries so IntelliJ knows about them. Select ClassPath, then + and add /lib.
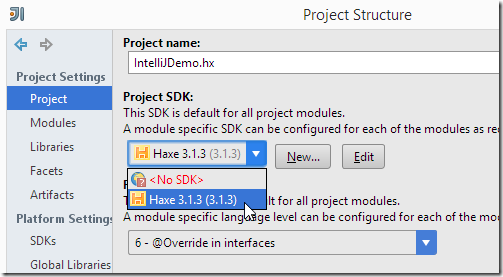
Finally we need to tell IntelliJ that this project is a Haxe project. Still in settings (F4 to go back if you’ve closed it), go to Project and select Haxe as SDK.
In the future, this last step should be the only one you have to perform, unless you change your Stencyl install.
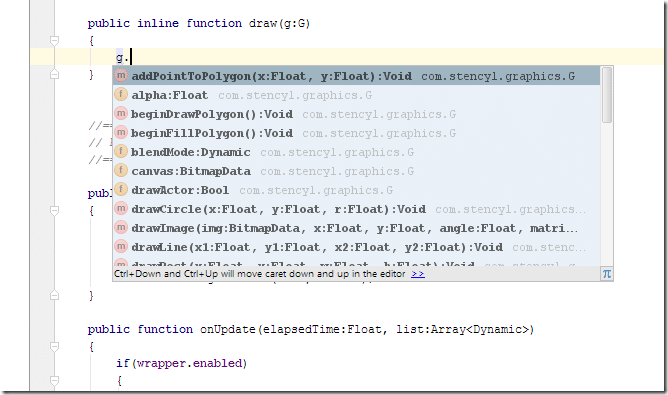
Now your code in IntelliJ should have full autocomplete:
Now when you save in IntelliJ, it will automatically sync in Stencyl.

