This tutorial is going to cover everything you need to know to get a PlayN project up and running using NetBeans. In the end you will know everything you need in order to be able to create and run the Java, Web and Android projects using PlayN 1.3. The iOS project should work as well, but I am not on a Mac.
I have come to a conclusion recently. I hate Eclipse, every time I work in it, I am fighting with the IDE more than anything else. More specifically, I hate the M2E maven plugin more than words can describe. I have attempted to create a series of beginner tutorials for PlayN and each and every time, I end up jumping through a half hour or more of hoops in order to get Eclipse to build my project. Not much point in making tutorials, if my readers can’t even get PlayN up and running, right? I don’t want to spend all of my time troubleshooting PlayN installs! It seems like 90% of the support issues you see with PlayN revolve around Eclipse and M2E problems.
So that is what this guide addresses. It is about getting a specific version of PlayN ( 1.3 ) running with a specific version of NetBeans ( 7.1.2 ), to the point you can run all of the different kinds of targets it supports. So if you want to get started with PlayN development, start here! It’s going to look long and daunting, but it really isn’t all that bad, I just go into a lot of detail. If you’ve already got Netbeans up and running, you can skip 80% of it!
What you need to get started
Before we go too far ahead, you are going to need to have downloaded and installed a Java JDK. Note, the JRE and JDK are different things, and you very much need a JDK installed. I recommend version 6 over 7 ( that link was to 6 ) at this point, but either *should* work. Additionally, if you are intending to do Android development, you will have to download and configure the Android SDK. Details on configuring the Android SDK are available here, just ignore all the Eclipse bits.
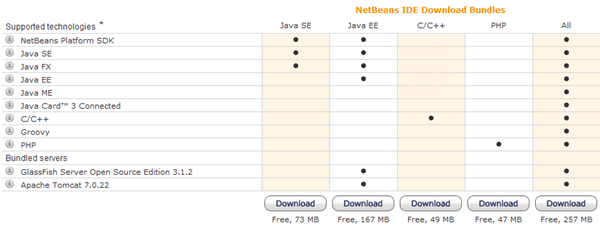
You are now going to need a version of Netbeans. Here you have a couple of choices:
You want either JavaSE or Jave EE. If you don’t care about HTML development, go with Java SE, otherwise go with EE. In this tutorial we are going to go with the Java SE version and add the bits as we need them. Download and install whichever version you choose now. Before you install, make sure you have a Java JDK installed already, you will be asked for the JDK path as part of the install process. Otherwise it’s just a next , I agree, next, I agree, click fest. Unless of course you are the type that reads EULAs… in which case, see you in a couple hours!
Configuring NetBeans’ required plugins
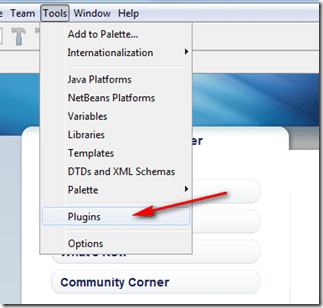
Now that you’ve installed Netbeans, fire it up. We need to configure a couple plugins right away. Select Tools->Plugins
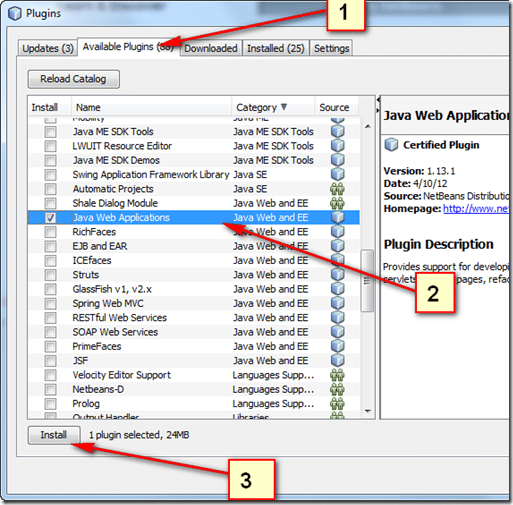
In the resulting dialog, select the Available Plugins tab, scroll down and check “Java Web Applications” then click Install. You can skip this part if you installed Netbeans EE.
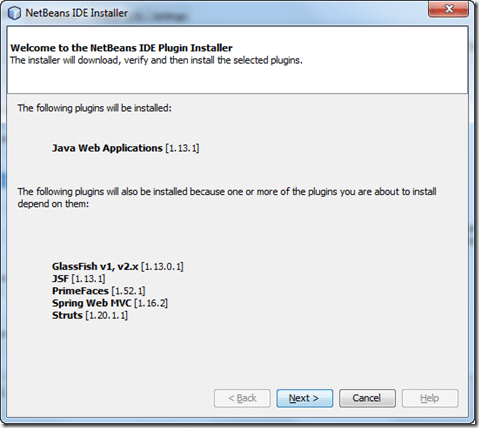
Dialog will appear, click Next
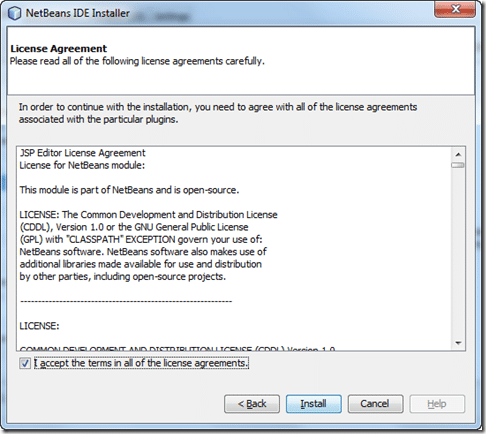
Agree to the license agreements and click Install
This process will take a few minutes, then request that it restart NetBeans, let it.
Now we need to set up the NBAndroid plugin, which is the Netbeans Android connector. Once again select Tools->Plugins. This time select Settings in the resulting dialog:
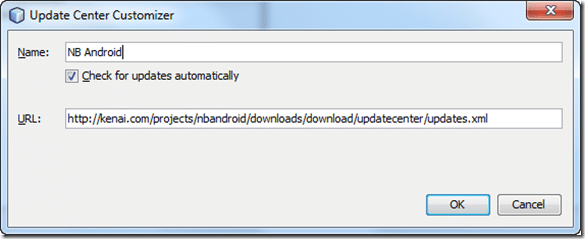
Then click add, and fill in the following in the dialog. For name enter whatever you want, I went with NBAndroid. For URL enter http://kenai.com/projects/nbandroid/downloads/download/updatecenter/updates.xml, now click OK.
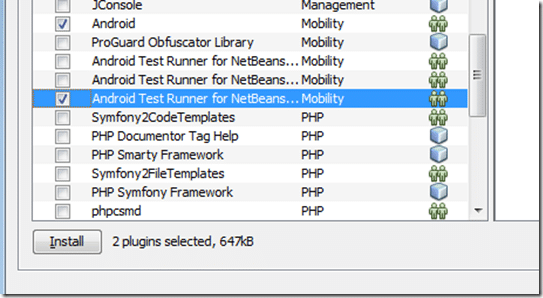
At this point Android should show up as an option under Available plugins. For me, as is the way with software, I encountered a bug and it didn’t. At this point I exited and re-launch NetBeans, go to Tools->Plugins and now the options are there under Available Plugins. If they don’t show up for you, restart Netbeans. Now select Android and Android Test Runner for Net Beans 7.x, like so:
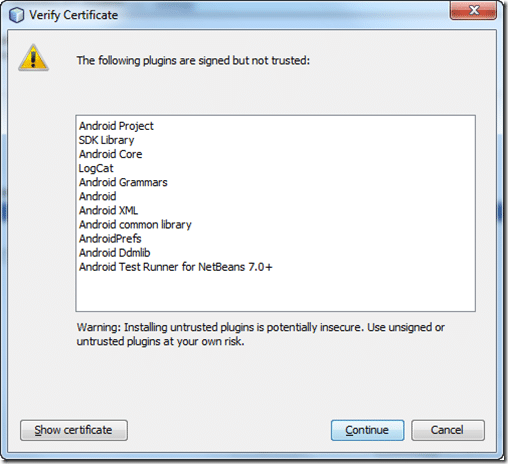
Click install, then as before, agree to the EULA and continue. You may run into this scary message, just click continue:
All right, Android is now configured, let’s create our project!
Creating your PlayN project
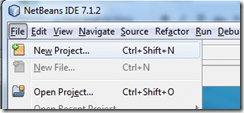
Select the File->New Project menu
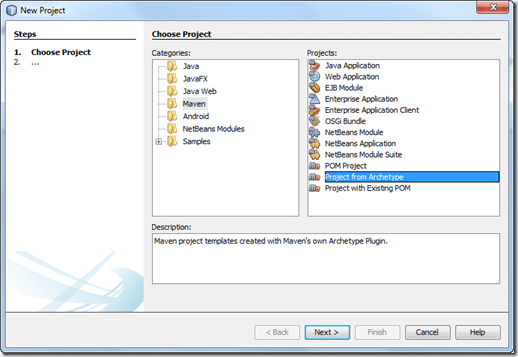
In the resulting dialog, select the Maven category, then under Projects select “Project from Archetype”. Click Next.
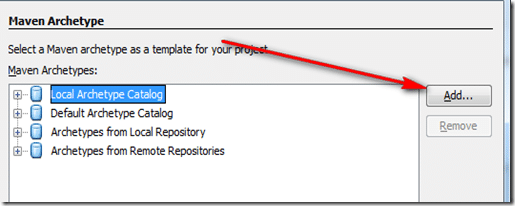
In the next screen, on the right hand side click the Add… button
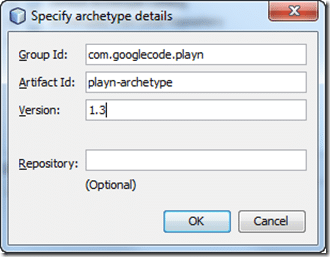
Fill the next dialog in with the following details; Group Id = com.googlecode.playn Artifact Id= playn-archetype Version 1.3, then click OK.
Now make sure your newly added Archetype is selected and click Next.
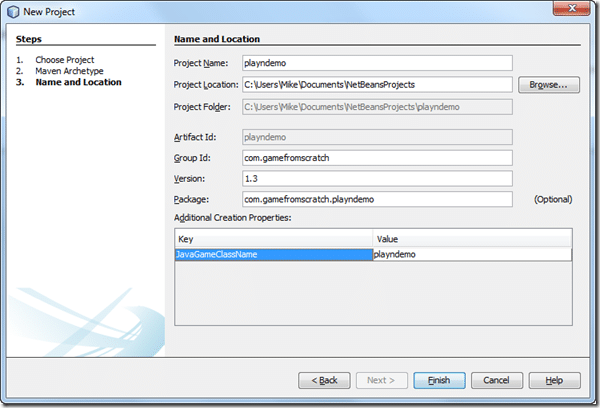
Now fill in the following details. Name your project in ProjectName, I am going with playndemo and assume you did too for the rest of this tutorial. Artifact Id will be set automatically. Group id is your url, in my case com.gamefromscratch. Be sure to specify 1.3, it will start as 1.0-SNAPSHOT, you don’t want this! Finally, and this part is extremely important, fill in the value for JavaGameClassName! I went with playndemo, but it is extremely important to click somewhere on the screen after setting it, another text box for example, or the setting will not be saved!!! If you get an error later on that JavaGameClassName was not set, you ran into the bug of this value not saving. Now click Finish.
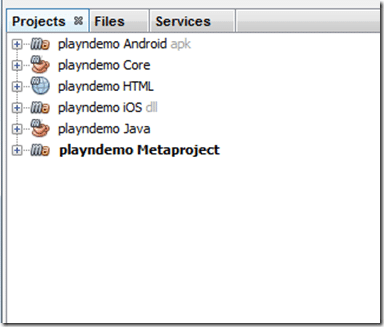
If all went well, it should have generated your project like this:
Building your project ( resolve Maven dependencies )
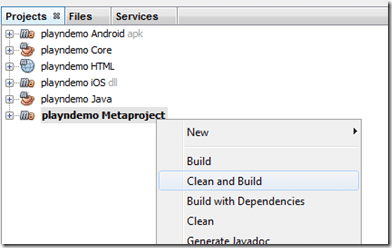
This next part is incredibly important, we need Maven to bring in all the various dependencies. Right click the Meta Project and select Clean and Build.
Maven is now going to download and configure all of the various dependencies, and there are a lot of them. Like tea? Perhaps now would be a good time to brew a cup. Just keep an eye on the bottom right of your screen:
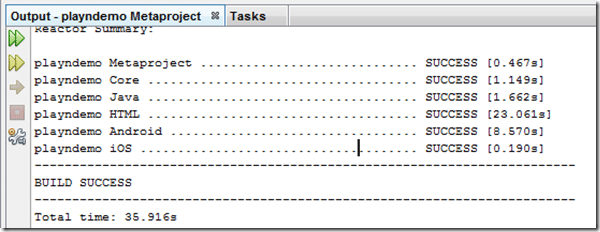
Ideally what you want to see is this:
Fortunately, you only need to do that part once. If you are sitting there thinking… wow, this really took a long time, I wonder if something went wrong?!?!?! Nope, nothing went wrong, it really does take that long! Welcome to maven.
Running the Desktop Java app
Normally all you would have to do is right click the Java project and choose run. However as of right now there is a dependency on the LWJGL native dlls that you need to resolve manually. If you are reading this at some point in the future, you may no longer need to perform this step!
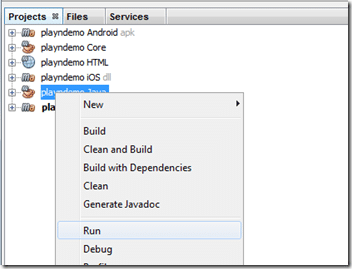
Try running the Java App. Right click playndemo Java and select Run
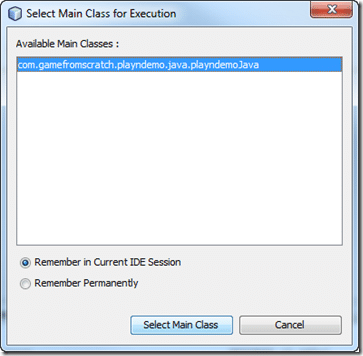
In the resulting dialog, select your main class if required and click Select Main Class.
You will receive:
Failed to execute goal org.codehaus.mojo:exec-maven-plugin:1.2:exec (default-cli) on project playndemo-java: Command execution failed. Process exited with an error: 1(Exit value: 1) -> [Help 1]
If you scroll up the error, you will see:
Exception in thread "main" java.lang.UnsatisfiedLinkError: no lwjgl in java.library.path
at java.lang.ClassLoader.loadLibrary(ClassLoader.java:1738)
at java.lang.Runtime.loadLibrary0(Runtime.java:823)
at java.lang.System.loadLibrary(System.java:1028)
at org.lwjgl.Sys$1.run(Sys.java:73)
at java.security.AccessController.doPrivileged(Native Method)
at org.lwjgl.Sys.doLoadLibrary(Sys.java:66)
at org.lwjgl.Sys.loadLibrary(Sys.java:95)
at org.lwjgl.Sys.<clinit>(Sys.java:112)
at org.lwjgl.opengl.Display.<clinit>(Display.java:135)
at playn.java.JavaGLContext.viewWasResized(JavaGLContext.java:125)
at playn.core.gl.GLContext.setSize(GLContext.java:48)
This is because of the missing libraries, lets add those now. ( Or if you didn’t, this problem is fixed and skip ahead! )
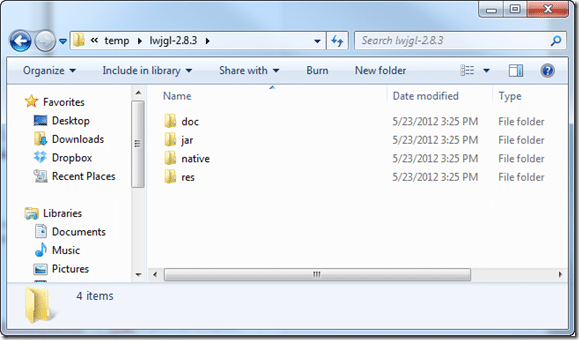
Head on over to LWJGL’s download site and download the binaries zip. Now extract the contents of this file somewhere, it doesn’t really matter where. I extracted to c:temp, preserving folder names. The end results looked like this:
It’s really only the native folder we care about. Stick it anywhere, just remember the path.
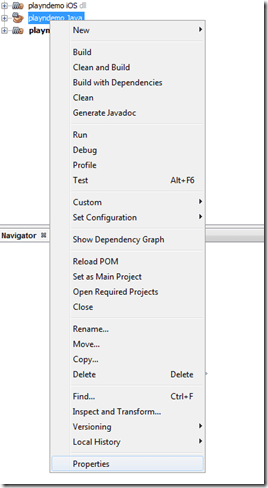
Now back in NetBeans, right click playndemo Java and select Properties.
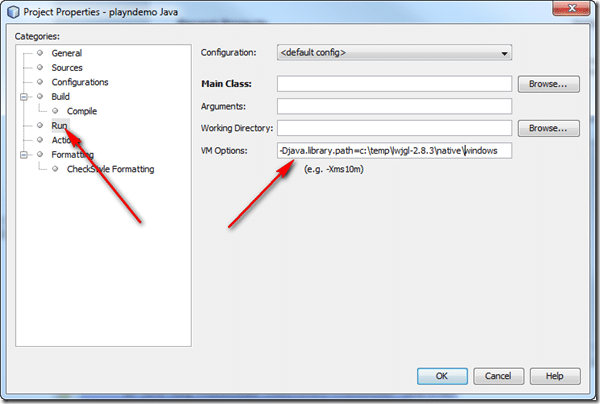
We now have to add a VM param to the Run options. On the categories side, select Run, then on the right in VM options, add -Djava.library.path=c:pathtolwjgwlwindows, like this:
Click OK, then right click the Java project and select Run.
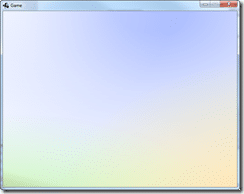
Voila, your running Java PlayN application. Now on the the HTML project.
Running the PlayN HTML application
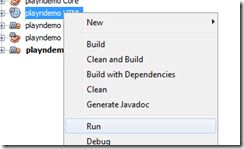
Right click playndemo HTML and choose Run:
If Run isn’t an option, something went wrong when you configured the Java Webserver plugin, or you aren’t running EE edition. Go back and repeat that step until run appears.
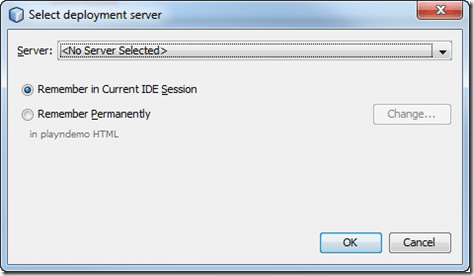
On first run ( assuming you didn’t install a webserver as part of your Netbeans install ), you will encounter this dialog with an empty server list:
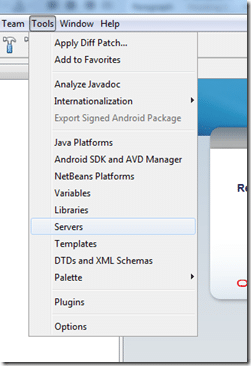
We now need to install and configure a web server, don’t worry, its an easy process. In the menu, select Tools->Servers
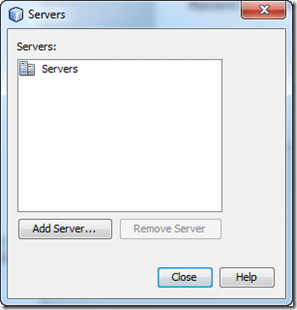
In the resulting dialog, click Add Server…
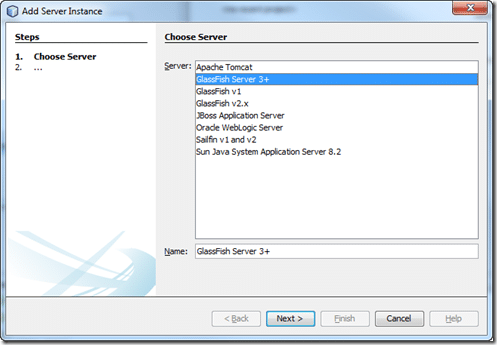
Click GlassFish Server 3+, then Next
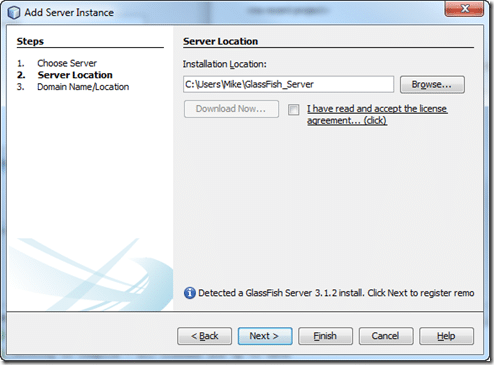
Save it wherever you want, I went with the defaults, click Finish ( unless you want to change default settings ):
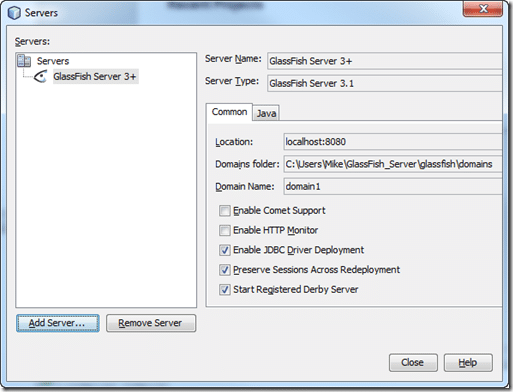
If all went well, you should see the following screen, simply click Close.
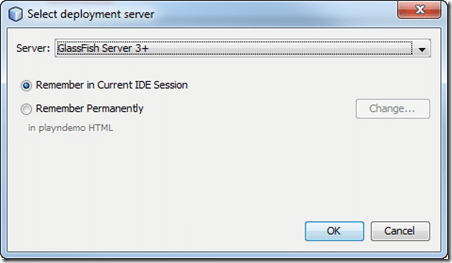
Now right click playndemo HTML and choose run. Now in the deployment dialog, you have a server you can select, do so and click OK:
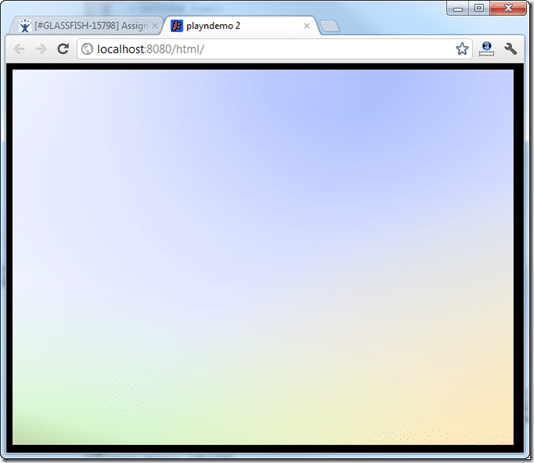
And voila, your app running in a browser:
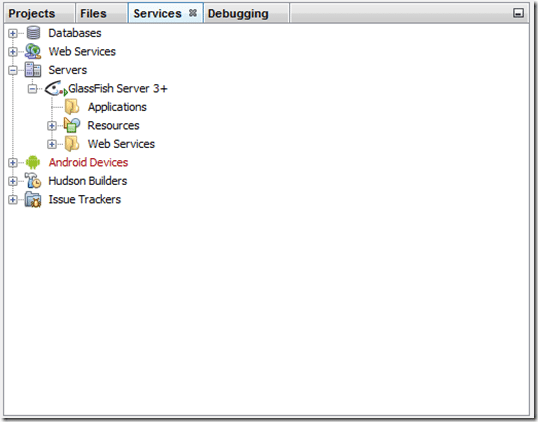
If you have problems or need to maintain or restart your GlassFish install, you can do so via the Window->Services menu option:
Running your PlayN Android Application in Netbeans
This part has a bit of a gotcha attached. PlayN switched to use OpenGL 2.0 and the Android emulator simply doesn’t support Open GL 2.0 yet. You can try to run it on the emulator, but it will crash every time. If you have a physical device, you can get Netbeans to target it.
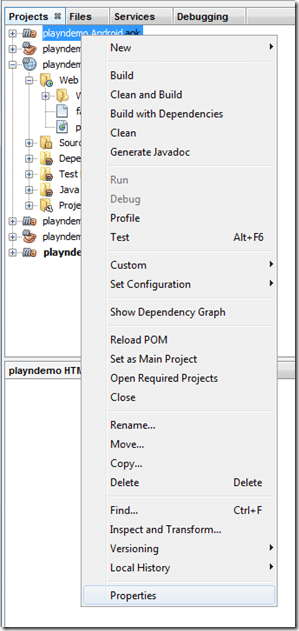
First right click playndemo and select Properties:
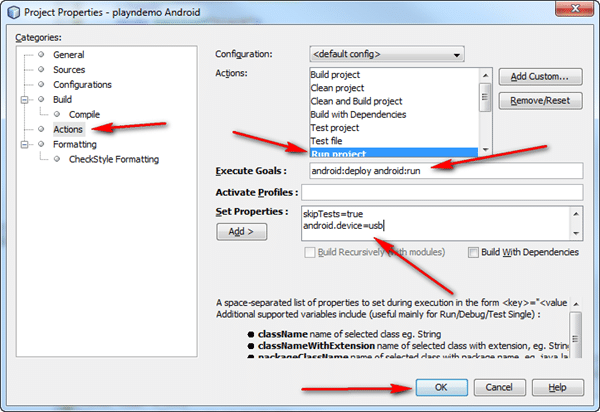
On the left hand side selection Actions. In the Actions list, select Run Project. Under Execute Goals: enter android:deploy android:run, and under Set Properties: enter skipTests=True and android.device=usb. Finally click OK. This is behind the scenes configuring a pair of maven commands.
Now with your Android phone plugged in, with USB debugging enabled, right click playndemo and choose Run. Oddly enough, sometimes it deploys and runs the application, sometimes it simply deploys it and fails to run. Worst case scenario, locate the app icon on your device and launch it manually.
Voila, PlayN running on my Galaxy Note ( the black is because of the 1280×720 resolution ):
As you can see, you can successfully target all three platforms from Netbeans. Trust me, that process looked a lot more complicated than it actually was. Plus, you only have to do 95% of it once.

