
Unity have just added volumetric clouds to Unity 2021.2 using the HDRP, and in this post we will walk through the process of using them. If you want to learn more about Unity volumetric clouds you can check out the documentation available here with the more in-depth documentation available here.
To get started with Volumetric Clouds, you need to be running Unity 2021.2 or later and you need to create an HDRP project.
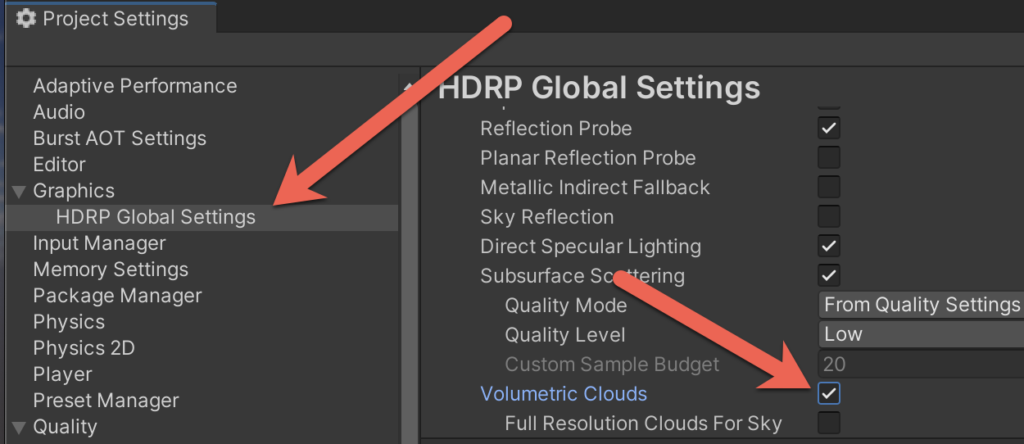
To get started, there are a few settings you need to configure. Got to Edit->Project Settings. Go to Graphics->HDRP Global Settings, locate Lighting and enable Volumetric Clouds.
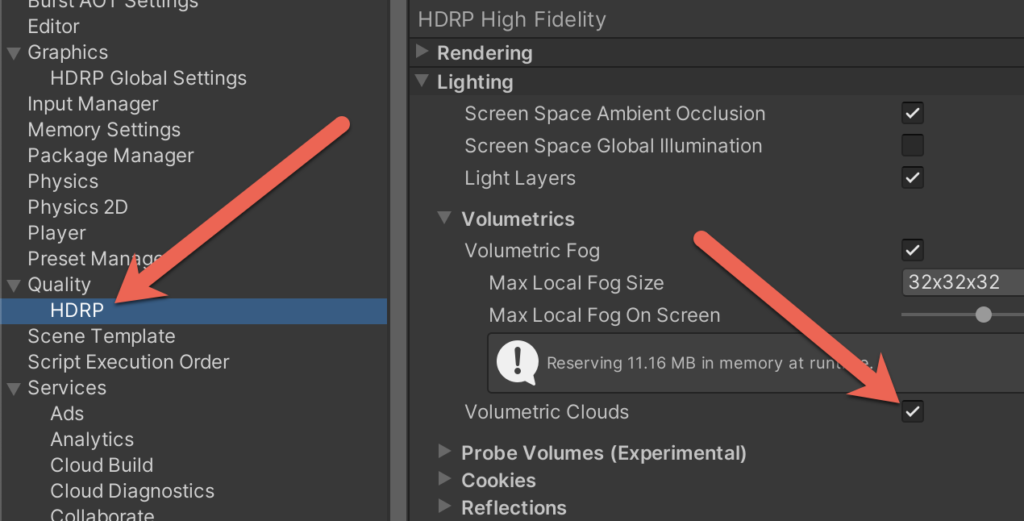
Next, also in the Project Settings, select Quality then take notice of the Currently Active Quality Level. Select the HDRP option on the left, then select the quality level and locate
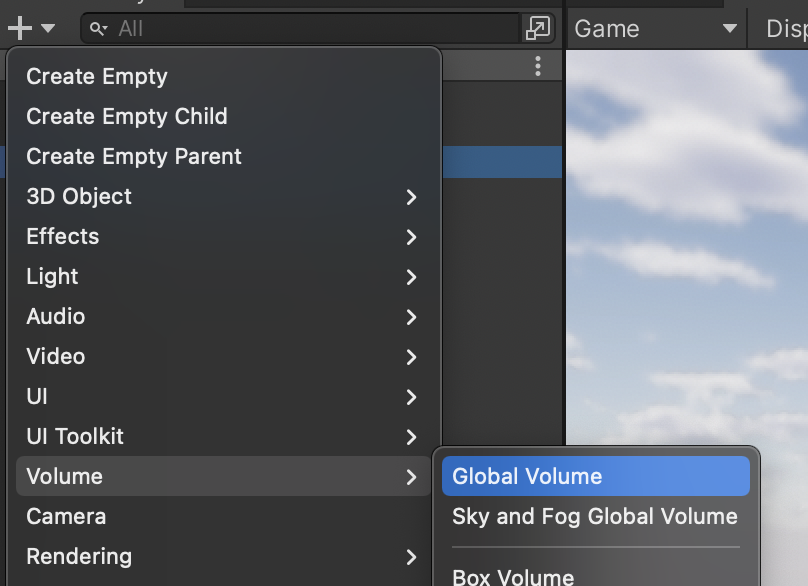
Next you need to add a volume to the scene (or use an existing one). Simply add a New->Volume->Global Volume to your scene.
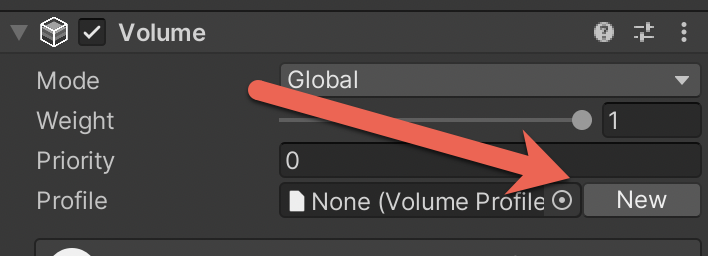
Now create a Volumetric Profile by clicking New.
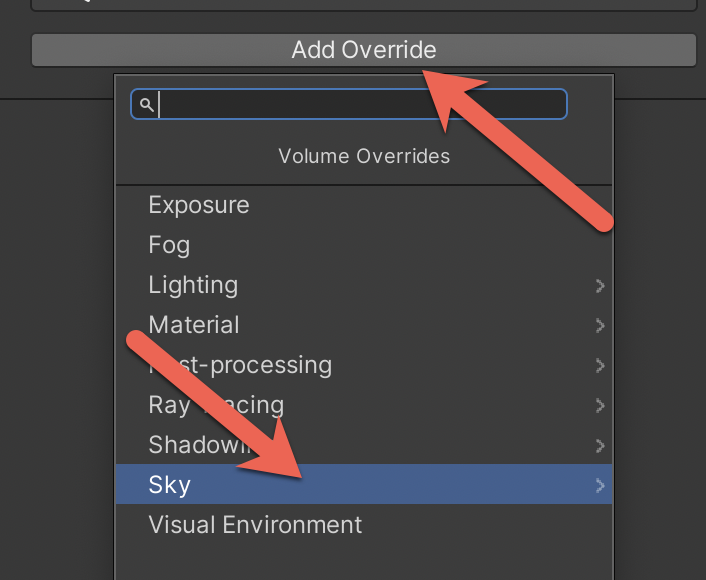
Now click Add Override, then select Sky->Volumetric Clouds
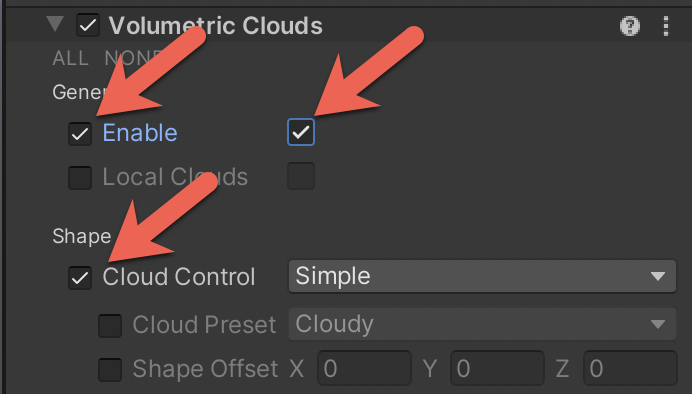
Now we will go with the defaults. Turn on Enable and set it to active, turn on Cloud Control and set it to simple
Voila! Now you have volumetric clouds. You have a great deal more control over how the clouds are created, which you can see in more detail in the video tutorial linked below.