So at this point in time we’ve covered configuring Cocos2d-x, basic graphics, mouse, touch and keyboard event handling but wouldn’t it be nice to, you know… do something? Most games are pretty boring if they are completely static, no? Well in this tutorial section we are going to make things a bit more interesting. One of the ways we are going to add a bit of life to our game is using Actions, which we will cover in a second. First we need to cover something else, the game loop.
Handling Updates
Pretty much every game ever made has a game loop, even if it’s hidden by the game engine. A Cocos2d-x game is no exception, although it might not be immediately obvious.
What’s a game loop?
A game loop is essentially the heart of a game, what causes the game to actually run. The following is a fairly typical game loop:
void gameLoop(){
   while (game != DONE){
      getInput();
      physicsEngine.stepForward();
      updateWorld();
      render();
   }
   cleanup();
}
As you can see, it’s quite literally a loop that calls the various functions that make your game a game. This is obviously a rather primitive example but really 90% of game loops end up looking very similar to this.
However, once you are using a game engine, things get slightly different. All this stuff still happens, it’s just no longer your codes responsibility to handle it anymore. Instead the game engine performs the loop and each step then calls back to your game code. Consider when your game handles input events, where do those events come from? Well chances are the game engine has a getInput() somewhere inside it, and as part of that process calls your event handlers. Even though you don’t have to handle the games lifecycle yourself, it’s helpful to understand what’s going on behind the scenes.
So far in all of our examples we either handled everything in init() or in response to input event callbacks and that can only get you so far. What happens when you want to update your game independently to input events? One option is to update your game every time you render a frame of graphics, but this is generally not a great idea. It’s very common to try to run graphics as fast as possible but update the game at a fixed frequency. Plus, logically, does it really make sense to be updating stuff during a function that’s responsible for drawing graphics? No, not really.
Fortunately there is a ready and much better named alternative… you guessed it, update. The method update is part of the Node class and is easily overridden. Let’s take a quick look at a game that handles update. I got so sick of recreating scenes each time I created a new project, so the name might look somewhat familiar.
Also you are going to need a sprite for this sample. Personally I am using a picture of my car… yeah, that’s it.

Feel free to use whatever you want. Now the code:
HelloWorld.h
#pragma once

#include "cocos2d.h"

class HelloWorld : public cocos2d::Layer
{
public:
    static cocos2d::Scene* createScene();
    virtual bool init() override;
    CREATE_FUNC(HelloWorld);

    void update(float) override;

private:
   cocos2d::Sprite* sprite;
};
HelloWorld.cpp
#include "HelloWorldScene.h"

USING_NS_CC;

Scene* HelloWorld::createScene()
{
    auto scene = Scene::create();
    auto layer = HelloWorld::create();
    scene->addChild(layer);
    return scene;
}

bool HelloWorld::init()
{
    if ( !Layer::init() )
    {
        return false;
    }

    sprite = Sprite::create("Veyron.png");
    sprite->setPosition(this->getBoundingBox().getMidX(), this->getBoundingBox().getMidY());
    this->addChild(sprite, 0);

    this->scheduleUpdate();
    return true;
}

void HelloWorld::update(float delta){
   auto position = sprite->getPosition();
   position.x -= 250 * delta;
   if (position.x  < 0 - (sprite->getBoundingBox().size.width / 2))
      position.x = this->getBoundingBox().getMaxX() + sprite->getBoundingBox().size.width/2;
   sprite->setPosition(position);
}
Now, if you run the code you get:
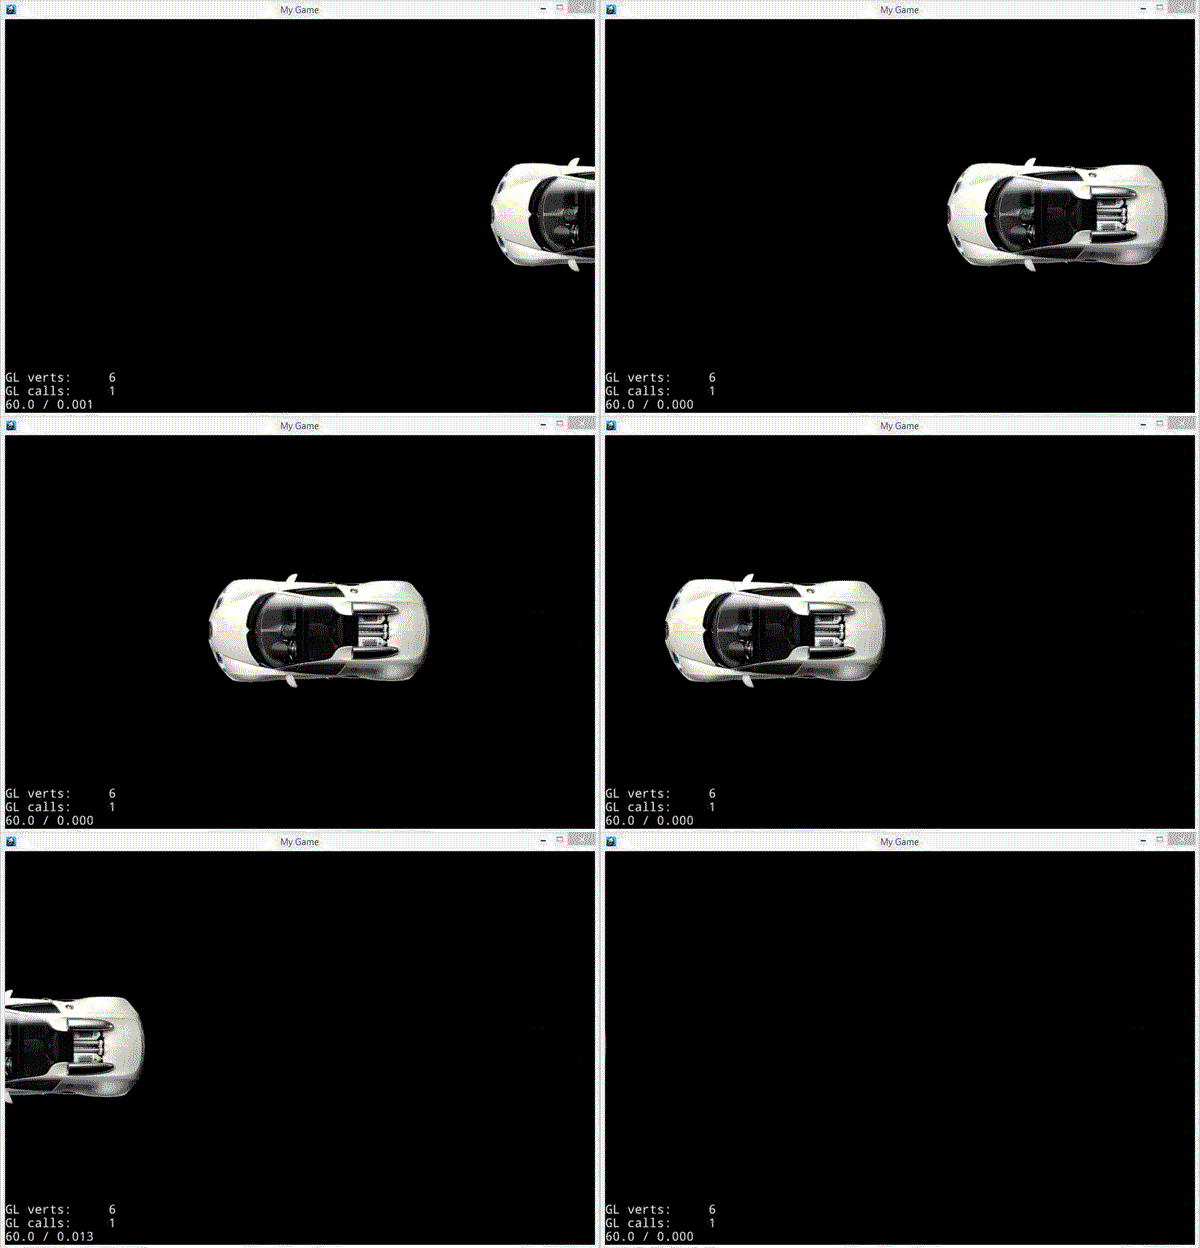
So what’s going on here? Well think back to that game loop example I gave earlier. Now imagine somewhere deep inside Cocos2d-x when it performs the “updateWorld” portion, that it loops through all the the Nodes in the game and calls their update() method. Well that’s basically exactly what happens. The line:
this->scheduleUpdate();
Is what tells Cocos2d-x to call the Node’s update function. We then override update to implement our logic. The sole paramater passed to update is a float value representing the amount of time, in seconds since the last time the update function was called. Therefore if it’s been 1/10 of a second since the last time update was called, the value passed in will be 0.1.
Inside the update itself, we simply change the position of our sprite until it is fully off screen on the left hand side. At which point we move it to the right hand side and repeat the process. The only code that is of interest here is this line:
position.x -= 250 * delta;
This is a pretty common technique in game dev for creating smooth animations. What we are saying here is we want to move by 250 pixels to the left. The problem is, we have no idea how fast our update is going to be called, so on a faster computer the car will move faster and on a slower computer it will move slower. This is obviously not ideal. Enter the delta value. Since we know how long it was since the last frame, we know if we multiply our move amount by the fraction of a second each frame takes, it will perform roughly the same speed on all computers. So, using the 0.10 value above, this means we are running 10 updates per second, so each time we will be updating by 250 * 0.10 or 25, literally a 10th of the amount we want to update. If however this value is over one second, things will get screwy. That said, if your game is running at less than 1FPS, you’ve got bigger problems to worry about! So, in a nutshell, when moving on a frame by frame basis, express your units in seconds, then multiply them by the delta passed in to the update function.
Now remember earlier when I said it’s possible to run your updates in the render method but it wasn’t always ideal, how then do we control the frequency that our update is called?
Well, we can’t really as you never know how fast the computer or phone you are going to be running is. You do however have control over the priority the updater will view your update function with. By default when you call scheduleUpdate() your update function will be called every single frame. If the node you are updating doesn’t actually need to be updated every frame, you are just wasting CPU power ( and battery life ). If you have a lower priority update you can tell Cocos2d-x this using:
this->scheduleUpdateWithPriority(42);
The actual value passed in is simply relative to other priorities. When Cocos is trying to decide which update’s to call, it will first call all of the update() that don’t have a priority set. Then it will call the one with the lowest value, then the next highest, etc. So if you have three Node with update set, one with no priority set, one with a priority of 42 and one with a priority of 13, the no priority update will be called first, then the 13 and finally the 42. In some ways you aren’t actually setting the priority, you are setting the lack of priority!
In place of overriding update() you can also use schedule and scheduleOnce to schedule any function to be called. Either after a period of time or a number of times. The called function needs to have the same profile as update, that is takes a single float parameter and a void return type.
Sometimes however instead of reacting each frame and updating your world, you just want to “fire and forget” something. For example let’s say you want to move an object to a certain location over a certain period of time. This is where Actions come in.
Using Actions
As just mentioned, Actions allow you to set something in motion and forget about it. Actions are remarkably consistent in how they work, so I will only show small snippets of code for each one. We are using the following code as our base:
#include "HelloWorldScene.h"

cocos2d::Scene* HelloWorld::createScene()
{
    auto scene = cocos2d::Scene::create();
    auto layer = HelloWorld::create();
    scene->addChild(layer);
    return scene;
}

bool HelloWorld::init()
{
    if ( !Layer::init() )
    {
        return false;
    }

    sprite = cocos2d::Sprite::create("Veyron.png");
    sprite->setPosition(this->getBoundingBox().getMidX(), this->getBoundingBox().getMidY());
    this->addChild(sprite, 0);

    auto listener = cocos2d::EventListenerKeyboard::create();
    listener->onKeyPressed = [=](cocos2d:: EventKeyboard::KeyCode code, cocos2d::Event * event)->void{
      // This is where our different actions are going to be implemented
      auto action = cocos2d::MoveTo::create(2, cocos2d::Vec2(0, 0));
      sprite->runAction(action);
   };

    this->_eventDispatcher->addEventListenerWithSceneGraphPriority(listener,this);
        return true;
}
This is also our first example of using an Action. In this case we are using the MoveTo action to move the target node to the position (0,0) over a duration of 2 seconds. You run the action on a Node using the runAction method. Run it and press any key and you will see:
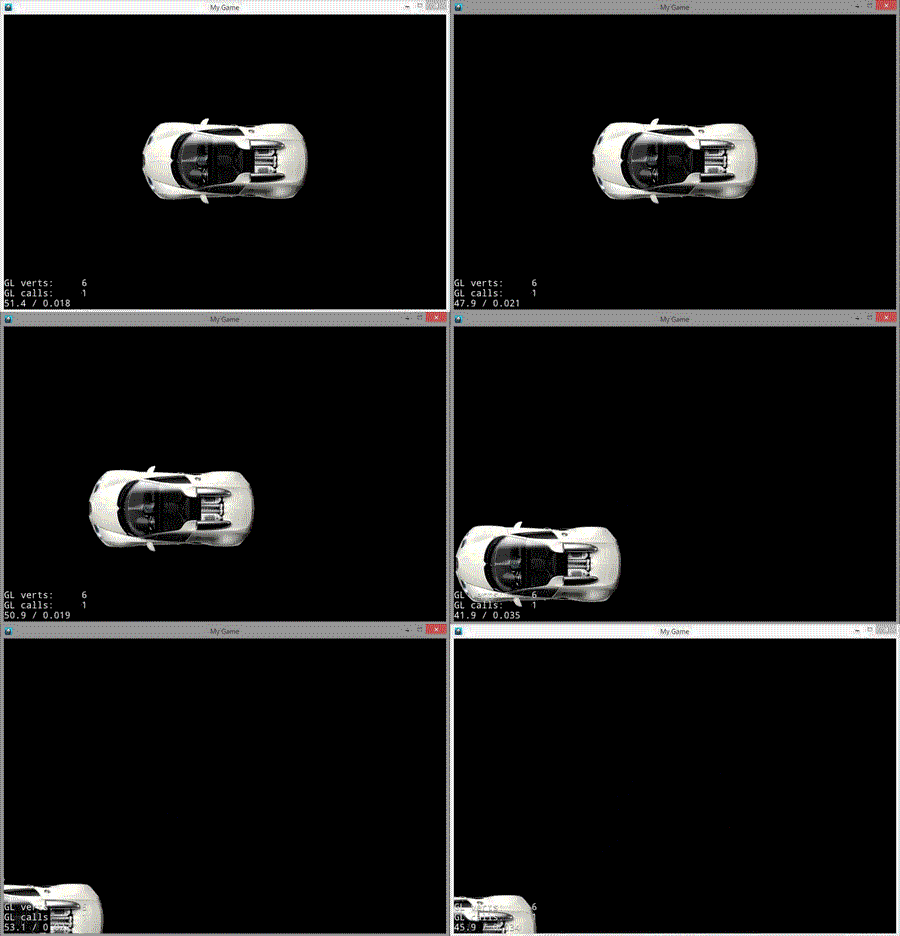
There are several similar actions, let’s take a look at a couple of them now. Instead of MoveTo, there is also MoveBy, which enables you to move your node relative to it’s current position, like so:
 auto listener = cocos2d::EventListenerKeyboard::create();
   listener->onKeyPressed = [=](cocos2d:: EventKeyboard::KeyCode code, cocos2d::Event * event)->void{
      auto action = cocos2d::MoveBy::create(2, cocos2d::Vec2(300, 300));
      sprite->runAction(action);
   };
When you run this, instead of moving to a destination over a period of 2 seconds, we instead move by 300 right and 300 up over the same time period.
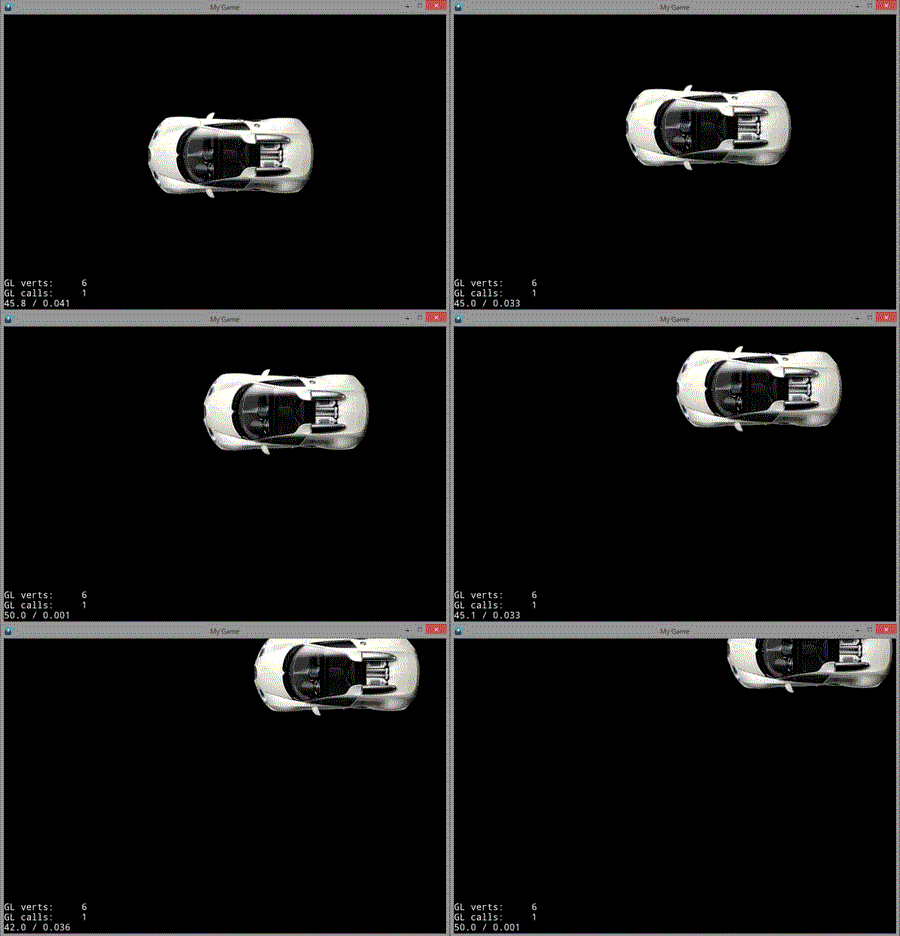
There are several similar Actions that can be used to transform and modify a Node such as RotateBy, RotateTo, ScaleTo, SkewTo, TintTo, TintBy and more.
In addition to transforming nodes, you can actually loop and sequence actions, to make combo’s. Let’s take a look at an example of a sequence of several actions. In this example we are going to perform a ScaleBy, TintTo then FadeTo back to back using the Sequence action.
 listener->onKeyPressed = [=](cocos2d:: EventKeyboard::KeyCode code, cocos2d::Event * event)->void{
      cocos2d::Vector<cocos2d::FiniteTimeAction*> actions;
      actions.pushBack(cocos2d::ScaleBy::create(1.5, 1.5));
      actions.pushBack(cocos2d::TintTo::create(1.5, 255, 0, 0));
      actions.pushBack(cocos2d::FadeTo::create(1.5, 30));

      auto sequence = cocos2d::Sequence::create(actions);

      sprite->runAction(sequence);
   };
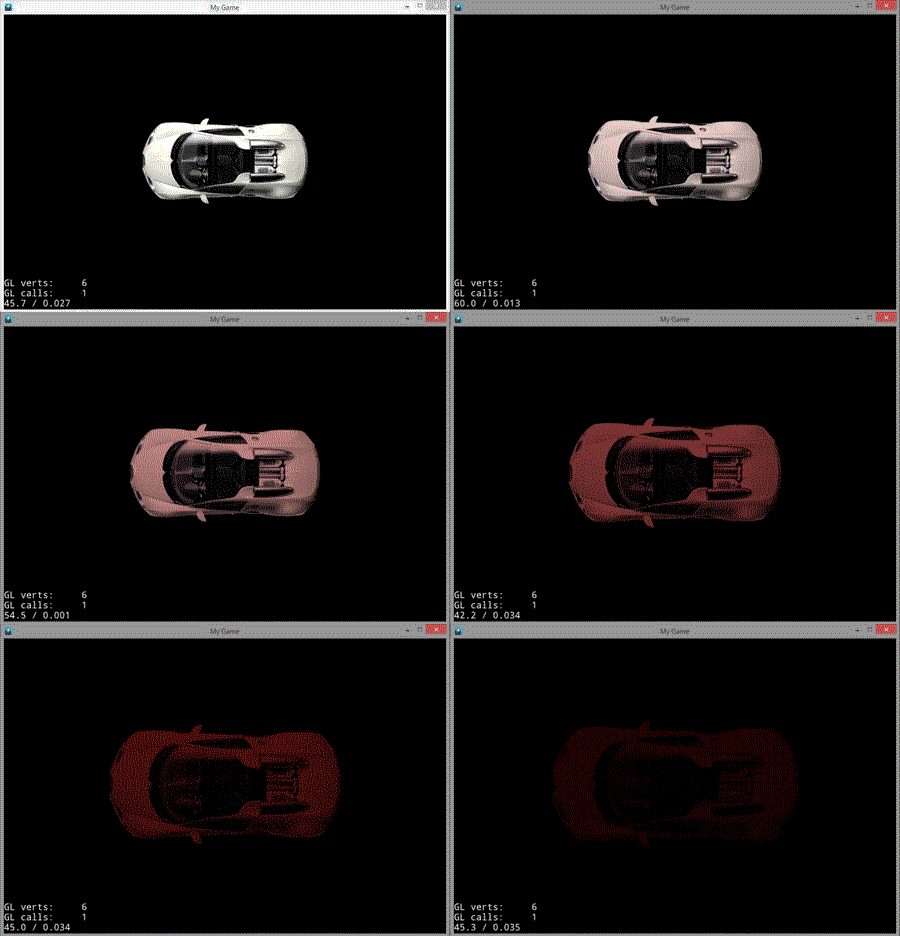
And when run:
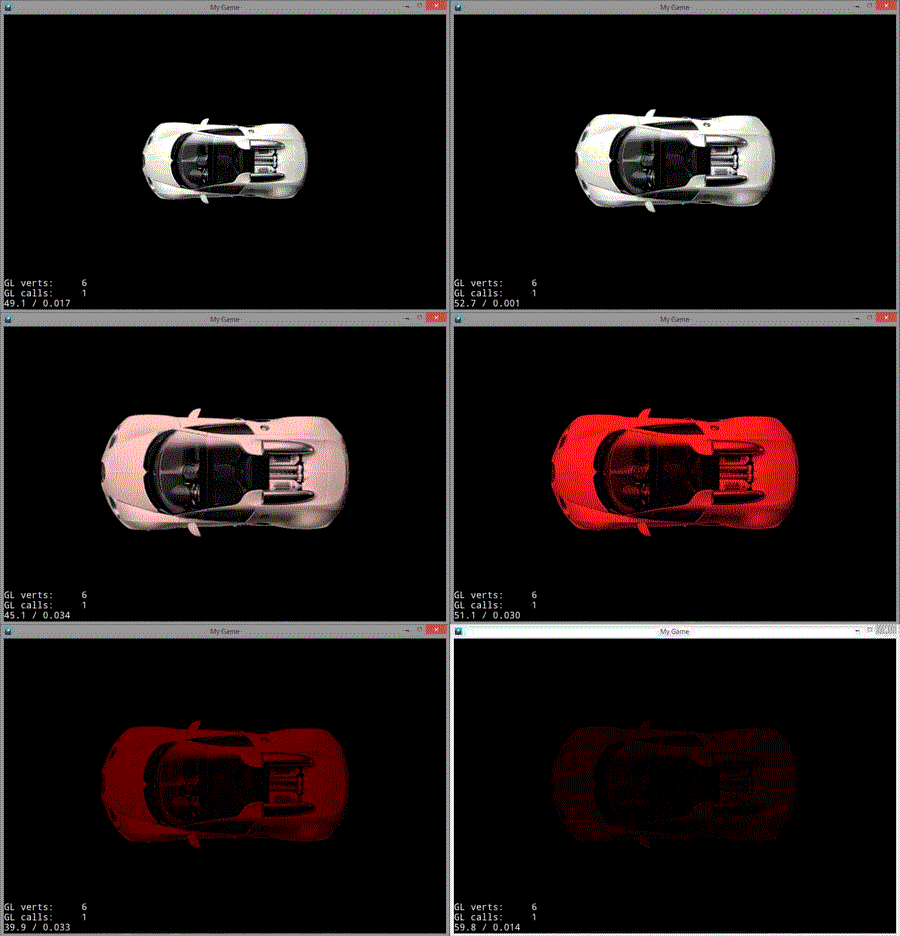
There are two things to be aware of from this example. First you may notice that TintTo takes three GLubyte values to repesent the red, green and blue values of the colour, while FadeTo takes a single GLubyte value to represent that alpha or transparency. A GLubyte is an 8bit value that ranges from 0 to 255 in value. In all cases 255 is the fully on value, and 0 is the fully off value. Therefore the value (255,0,0) is 100% red, 0% green, 0% blue, while the value 30 in TintTo is 30/255 or 11.7% opaque. The second import thing to note is the use of Vector. This is a cocos2d value type, NOT a std::vector, although ultimately behind the scenes, I believe it is still implemented using a std::vector. This means you cant use it as a std::vector, nor can you use a std::vector where a cocos2d::Vector is expected. This also unfortunately means you can’t use initializer lists.
So, that’s how you can perform a number of actions in sequence, what happens if you want to perform them all at once? You can do that too using Spawn, which personally I think could really have a better name! Let’s look at exactly the same example using Spawn instead. The only difference is I increased the duration of each action to 4 seconds, mostly just to make it easier to screen capture. 🙂
   listener->onKeyPressed = [=](cocos2d:: EventKeyboard::KeyCode code, cocos2d::Event * event)->void{
      cocos2d::Vector<cocos2d::FiniteTimeAction*> actions;
      actions.pushBack(cocos2d::ScaleBy::create(4, 1.5));
      actions.pushBack(cocos2d::TintTo::create(4, 255, 0, 0));
      actions.pushBack(cocos2d::FadeTo::create(4, 30));

      auto parallel = cocos2d::Spawn::create(actions);

      sprite->runAction(parallel);
   };
And run it:
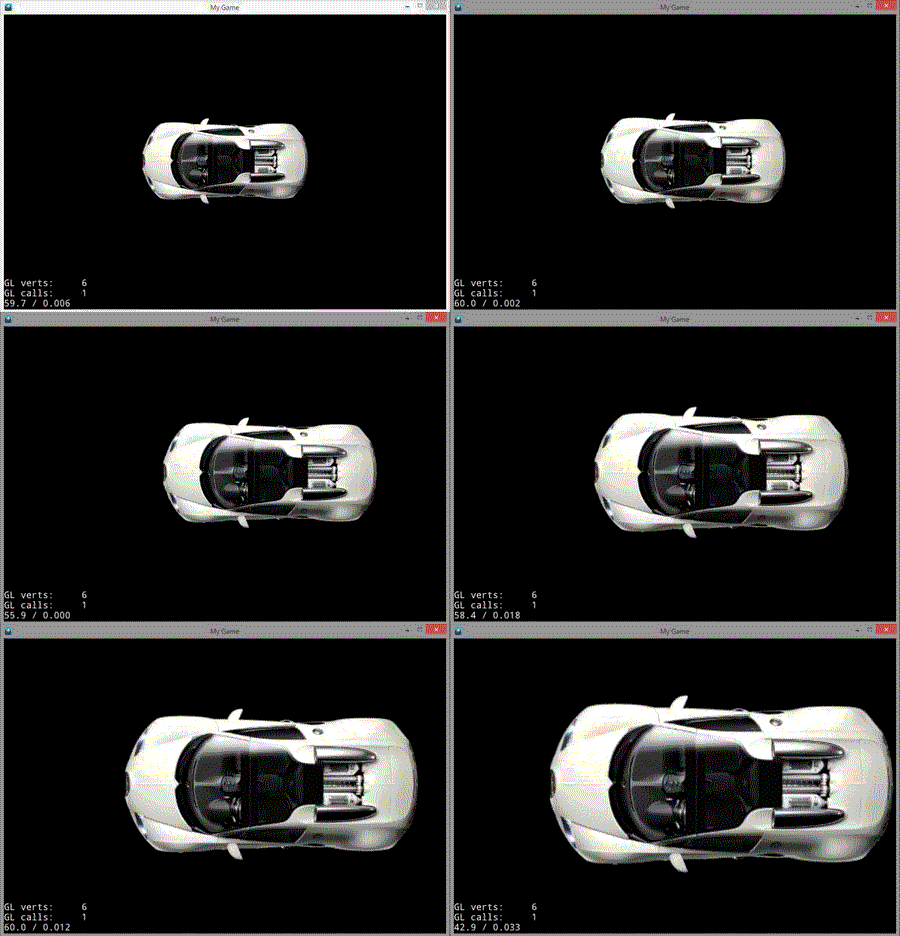
You also have the ability to repeat actions, both a certain number of times, or simply forever. That is exactly what this example is going to do. The first action moves to the right by 10 pixels every 0.2 of a second. The second action scales the sprite up 30% every 2 seconds. The first action will be repeated 10 times, the second forever, or until it crashes your computer that is. 🙂
   auto listener = cocos2d::EventListenerKeyboard::create();
   listener->onKeyPressed = [=](cocos2d:: EventKeyboard::KeyCode code, cocos2d::Event * event)->void{
      auto action = cocos2d::MoveBy::create(0.2, cocos2d::Vec2(10, 0));
      auto action2 = cocos2d::ScaleBy::create(2, 1.3);
      auto repeat = cocos2d::Repeat::create(action, 10);
      auto repeatForever = cocos2d::RepeatForever::create(action2);

      sprite->runAction(repeat);
      sprite->runAction(repeatForever);
   };
Running:
So far we’ve only looked at Actions inherited from ActionInterval, which are actions that happen over time. There are also actions that happen instantly, let’s take a look at some of them now. These actions inherit from ActionInstant. In this example we illustrate several instant actions ( as well as a MoveTo, DelayTime and Sequence, as a bunch of instant actions doesn’t make for a great demonstration! )
   auto listener = cocos2d::EventListenerKeyboard::create();
   listener->onKeyPressed = [=](cocos2d:: EventKeyboard::KeyCode code, cocos2d::Event * event)->void{
      cocos2d::Vector<cocos2d::FiniteTimeAction*> actions;
      actions.pushBack(cocos2d::MoveTo::create(1, cocos2d::Vec2(0, 0)));
      actions.pushBack(cocos2d::DelayTime::create(1));
      actions.pushBack(cocos2d::Place::create(cocos2d::Vec2(
         this->getBoundingBox().getMidX(), this->getBoundingBox().getMidY())));
      actions.pushBack(cocos2d::DelayTime::create(1));
      actions.pushBack(cocos2d::FlipX::create(true));
      actions.pushBack(cocos2d::DelayTime::create(1));
      actions.pushBack(cocos2d::FlipY::create(true));
      actions.pushBack(cocos2d::DelayTime::create(1));
      actions.pushBack(cocos2d::Hide::create());
      actions.pushBack(cocos2d::DelayTime::create(1));
      actions.pushBack(cocos2d::Show::create());
      actions.pushBack(cocos2d::DelayTime::create(1));

      actions.pushBack(cocos2d::CallFunc::create([=]()->void{
         this->setColor(cocos2d::Color3B::RED);
      }));

      actions.pushBack(cocos2d::DelayTime::create(1));
      actions.pushBack(cocos2d::RemoveSelf::create(false));

      auto sequence = cocos2d::Sequence::create(actions);
      sprite->runAction(sequence);
   };
This code running:
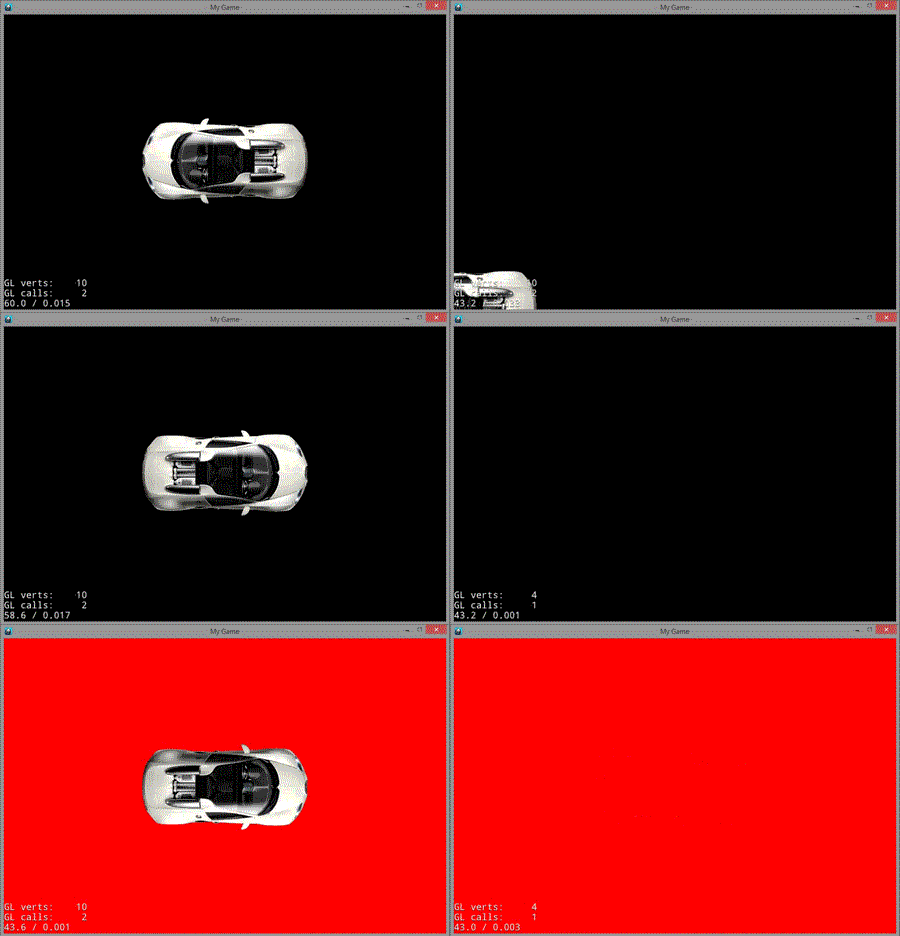
As you can see, instant actions work almost indentically. FlipX mirrors the Node along the X axis, FlipY does the same across the Y axis. DelayTime we havent used yet, does exactly what it’s name says, delays for the given amount of seconds before executing the next Action. The Place action can by thought of as a 0 duration MoveTo call, putting the Node at the specified position.
CallFunc and RemoveSelf are the two actions that probably require the most explanation. CallFunc enables you to call code using an action, in this case I use a lambda that simply changes the background color of the Layer. CallFunc is an incredibly important action and allows you to do just about anything using Actions, such as updating state, playing a sound, etc. RemoveSelf is another handy action… it’s basically a kill switch. When a removeSelf action is encountered, that Node is removed from it’s parent. Passing true causing cleanup to be done. This is incredibly handy for something like handling the lifespan of a bullet in the scene for example.
Setting a Layer’s Background Color
You may have noticed I changed the background of the scene in the previous example using a call to setColor(). However if you try to run this code as is, you will notice it doesn’t actually work. This is because, behind the scenes, I made a couple small changes. Instead of our scene inheriting from Layer we instead inherit from LayerColor, which adds, you guessed it, color information. Additionally, install of calling Layer::init() in our own init, we call LayerColor::initWithColor(). With these two changes you can now set the background color in the layer.
Odds and Ends
There are a few interesting topics that fit into this chapter but we didn’t cover yet, so I am going to shoehorn them here at the end. One very common activity developer’s want to perform when working with Actions is to pause them. As you can have several Actions running at once, so then, what do you do when you want to pause your game? Thankfully it’s quite simple to accomplish using ActionManager.
HelloWorldScene.h
#pragma once

#include "cocos2d.h"

class HelloWorld : public cocos2d::LayerColor
{
public:
    static cocos2d::Scene* createScene();
    virtual bool init() override;
    CREATE_FUNC(HelloWorld);

private:
   cocos2d::Sprite* sprite,*sprite2;
   cocos2d::Label* label;
   bool spritePaused = false;
   cocos2d::Vector<Node*> pausedNodes;
};
HelloWorldScene.cpp
#include "HelloWorldScene.h"

cocos2d::Scene* HelloWorld::createScene()
{
    auto scene = cocos2d::Scene::create();
    auto layer = HelloWorld::create();
    scene->addChild(layer);
    return scene;
}

bool HelloWorld::init()
{
   if (!LayerColor::initWithColor(cocos2d::Color4B::BLACK))
    {
        return false;
    }

   label = cocos2d::Label::createWithSystemFont("Press space to pause all, 1 to pause left", "Arial", 30);
   label->setPosition(cocos2d::Vec2(this->getBoundingBox().getMidX(), this->getBoundingBox().getMaxY() - 20));

   sprite = cocos2d::Sprite::create("Veyron.png");
   sprite2 = cocos2d::Sprite::create("Veyron.png");
   sprite->setPosition(250, this->getBoundingBox().getMidY());
   sprite2->setPosition(700, this->getBoundingBox().getMidY());

   auto rotate = cocos2d::RotateBy::create(1, 45);
   auto rotate2 = cocos2d::RotateBy::create(1, -45);

   auto repeat1 = cocos2d::RepeatForever::create(rotate);
   auto repeat2 = cocos2d::RepeatForever::create(rotate2);

   this->addChild(label,0);
   this->addChild(sprite, 0);
   this->addChild(sprite2, 0);

   sprite->runAction(repeat1);
   sprite2->runAction(repeat2);
   auto listener = cocos2d::EventListenerKeyboard::create();
   listener->onKeyPressed = [=](cocos2d::EventKeyboard::KeyCode code, cocos2d::Event * event)->void{
      // On Spacebar, Pause/Unpause all actions and updates
      if (code == cocos2d::EventKeyboard::KeyCode::KEY_SPACE){
         if (pausedNodes.size()){
            cocos2d::Director::getInstance()->getActionManager()->resumeTargets(pausedNodes);
            pausedNodes.clear();
            spritePaused = false; // In case user currently has 1 pressed too
         }
         else
            pausedNodes = cocos2d::Director::getInstance()->getActionManager()->pauseAllRunningActions();
         label->setString("Spacebar pressed");
      }
      // Pause/UnPause just sprite 1
      if (code == cocos2d::EventKeyboard::KeyCode::KEY_1){
         if (spritePaused)
            sprite->resumeSchedulerAndActions();
         else
            sprite->pauseSchedulerAndActions();
         spritePaused = !spritePaused;
         label->setString("1 pressed");
      }

   };

   this->_eventDispatcher->addEventListenerWithSceneGraphPriority(listener,this);
   return true;
}
And run it:
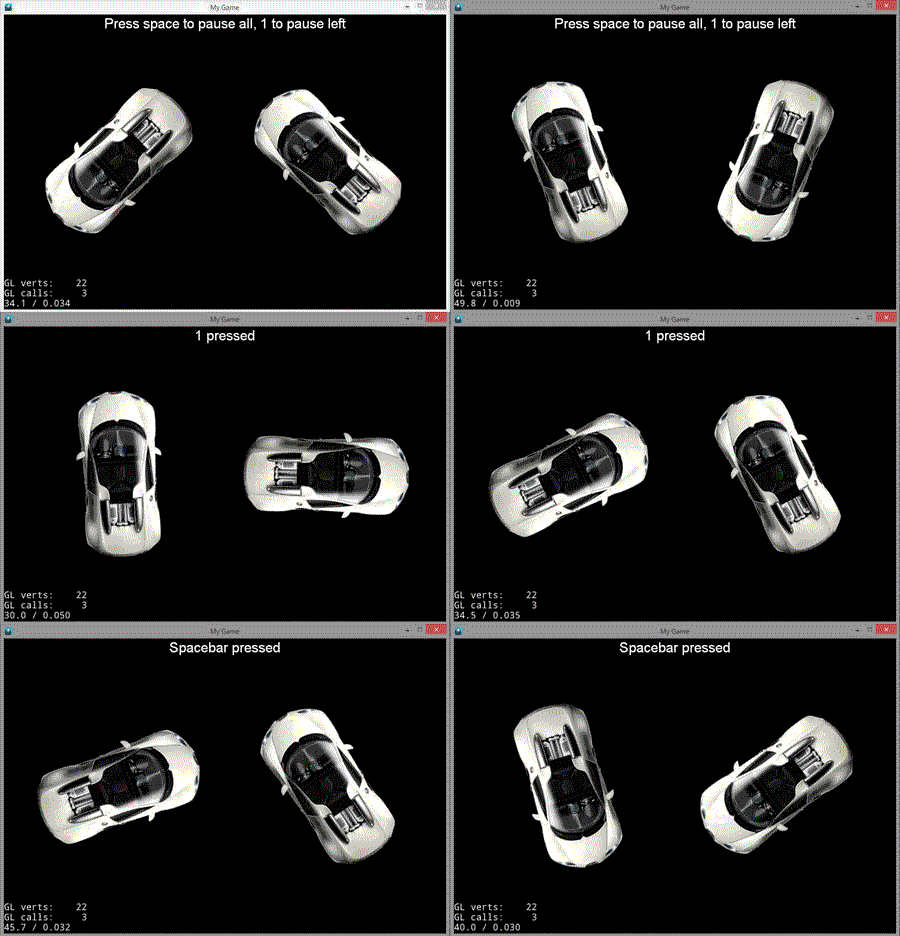
As you can see using ActionManager you are able to pause execution of Actions, either to a single Node or all Nodes at once. In the event of a single Node it’s simply a matter of calling pauseSchedulerAndActions and resumeSchedulerAndActions. You can also call pause() which is also result in the Node no longer receiving events too.
In the event of pausing all running actions by calling getActionManager()->pauseAllRunningActions() this returns a cocos2d::Vector off all the Nodes that were paused. When resuming, you simply pass this Vector back in a call to resumeTargets().
Earlier on we called scheduleUpdate() with resulted in our update method being called every frame. However you can also schedule any kind of function using the scheduler. Let’s take a look:
#include "HelloWorldScene.h"

cocos2d::Scene* HelloWorld::createScene()
{
    auto scene = cocos2d::Scene::create();
    auto layer = HelloWorld::create();
    scene->addChild(layer);
    return scene;
}


void HelloWorld::callOnce(float delta){
   cocos2d::MessageBox("Called after 10 seconds elapsed", "Message");
}

bool HelloWorld::init()
{
   if (!LayerColor::initWithColor(cocos2d::Color4B::BLACK))
    {
        return false;
    }

   this->scheduleOnce(schedule_selector(HelloWorld::callOnce), 10);
    return true;
}
This code will wait 10 seconds and then call our method callOnce().
So, even though the event loop is hidden away in a Cocos2d-x, there are plenty of ways you can control the action, be it using updates, scheduling functions to run or using Actions.Previous Part
