OK “Actions” may be a bad choice of words, but I never came up with a better name and as you will see shortly, there are some items here that would probably make more sense to be in the tools section. Just like the tools menu, the Actions menu can be minimized by clicking the arrow icon in the center. Additionally by clicking the top right icon you can maximize the screen, although functionally I found very little use for this feature. All right, lets jump right in, from left to right.
The first icon simply brings you back to the main screen, prompting you to save if you haven’t already. Actually, so far as I have encountered, it is the only way to save! Another one of those features that could have been nicely implemented in the (missing) menu, but I digress!
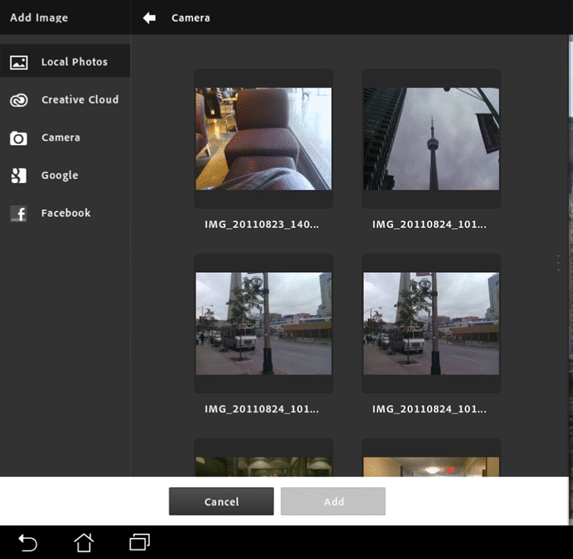
Next up is the add image icon which brings up the Add Images interface. You can bring in images from a number of sources, as shown below:
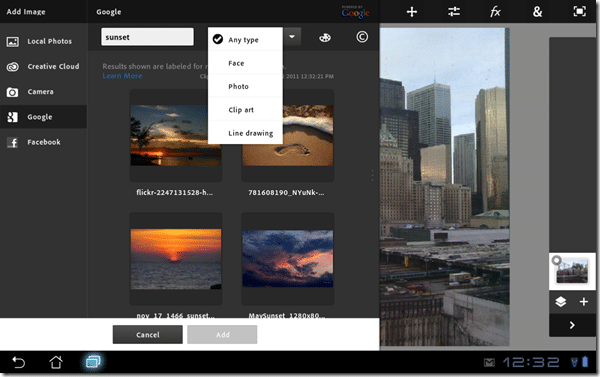
Local Photo allows you to grab an image off your device, the name is a bit misleading as it isn’t limited to photos, but any image it finds on your device. Creative Cloud is Adobe’s cloud storage solution and basically the easiest way to share with your home computer. In fact the only way if you want to keep the image in it’s native format! Camera brings up your camera and allows you to snap an image on the spot. Facebook obviously allows you to log in and grab images from your Facebook account, while Google is actually pretty cool. Google is basically a wrapper around Google Image search, which sounds a bit superfluous at first but once you use it you will realize it’s utility. You of course can switch over to the browser, do an image search, save the image to your device, switch back to PS Touch and import it but that is quite the pain. The integrated solution is much cleaner.
Need a sunset, search for sunset and go! You can specify the picture type like shown above. Perhaps more impressively you can also specify the images primary color or the license it was published with! For quick and easy access to images, this is hard to beat.
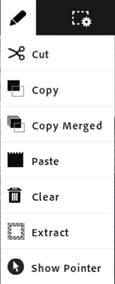
This is the “Pen” or edit menu as I will call it.
We have seen a great many of the features from this menu in action already. Cut copy and paste are fairly obvious in their usage. Copy merged copies across layers as a single image. Clear erases the currently selected pixels and works with the various different selection tools including the new scribble select. Extract we used earlier, erases everything except the selected pixels. It acts on the current layer instead of into a new one, so it is not non-destructive, so be aware of that before you use clear or extract in PS Touch.
Finally we have Show Pointer, which as we demonstrated earlier is used to toggle the visibility of the pointer object. Again, it is very handy for doing precision work, a very (desktop) tablet like experience, but can require a bit of hand gymnastics to get it working comfortably.
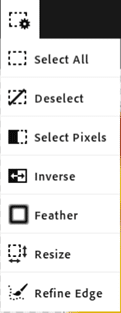
This is the expanded selection menu.
Select all and Descelect are pretty self explanatory, one selects the entire image and the other clears the selection.
Select Pixels is rather useful in that it automatically does a selection containing all of the pixels on the active layer. It does a pretty good job with its selection, leaving perhaps a 3mm gap between the pixels and the blank area. For a quick select it is a very serviceable tool.
Inverse inverts the current selection. So whatever you have selected will be unselected and whatever is unselected will be selected. Useful for selecting and removing the background around a selected item, mask in the item you want to keep, Inverse then Clear.
Feather is use to “soften” your selection. Once you select Feather it will bring you to a slider menu which allows you to “feather” the selection. Basically put, 0% does nothing, while increased amounts cause the selection to become larger and “softer”, smoothing out the selection mask.
Resize works almost identically to feather, it brings you to a slider interface that allows you to increase ( or decrease with this tool ) the selection amount. There is a visual depiction of how it is going to effect the change but frankly I don’t see the point of it, it would be much nicer if they simply showed what the new selection mask would be instead. Anyways, this tool pretty much linearly scales the selection area, so if you increase is by 15px, the selection area will “scale out” by 15px.
Finally there is refine edges, which allows you to paint changes to the selected area. In theory it sounds like a wonderful idea and works very similar to the paint selection tool, in reality it is extremely slow and I found it near to useless.
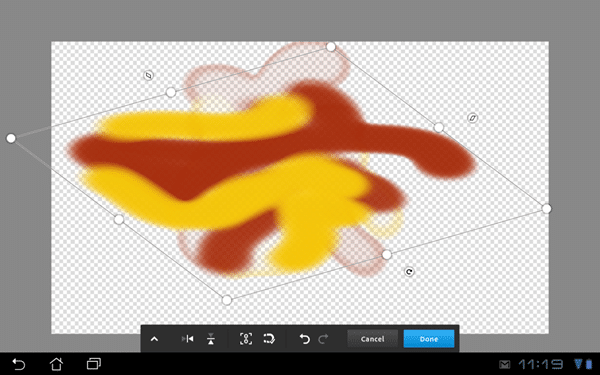
Next up is Move. Unlike the others, it is not a menu but instead brings you directly to this interface:
As you can see, you can use this tool to scale, skew and rotate your layer. You can see a ghost outline of the unchanged image in the background. Speed is pretty good, as it responds smoothly and quickly to your touches. Not really much else to say here, it is what it is and frankly works extremely well with a touch interface. You can pinch to zoom and multi finger swipe to pan in this interface just like the main screen. Clicking cancel will undo all your changed, while Done will commit them. This is another one of those areas where not following the standard Android UI is infuriating, as it is so natural to click the back button instead of Cancel ( something I’ve literally done dozens of times ) and instead of doing what you expect, it will exit the App! Very irritating. You would think you would stop doing it in time, but after more than a week I still haven’t!
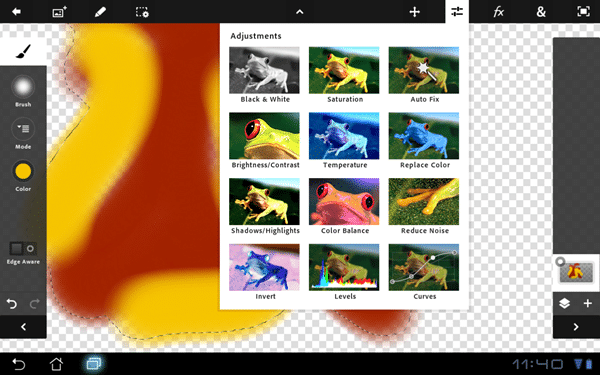
Next up is the effects Adjustments menu. There is where you can make image adjustments to the selected area, such as saturation, colour replacement, etc… Here are your options:
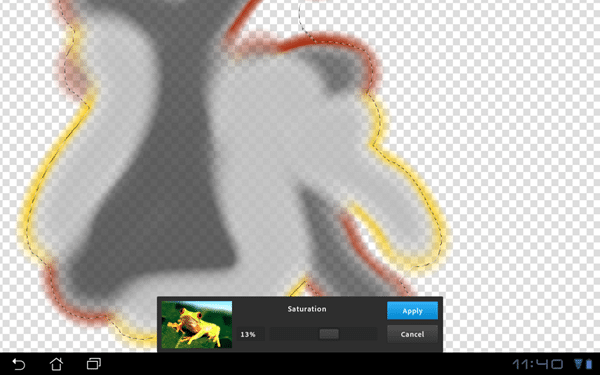
Not quite as comprehensive as on the desktop, but most of what you would need are there. Some actions, such as Black & White simply execute, while others like Saturation bring up an interface such as this:
Allowing you to adjust the amount while interactively showing the result. Performance here can vary massively, ranging from almost instant to downright sluggish. Overall though, I would say performance was more than adequate.
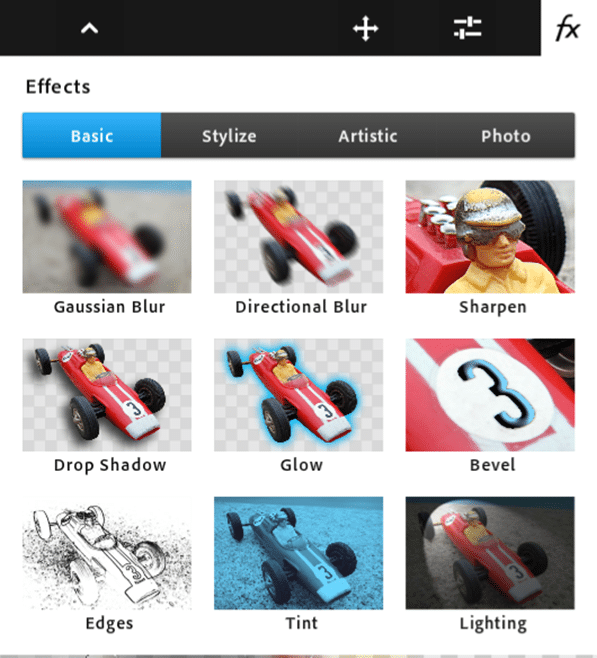
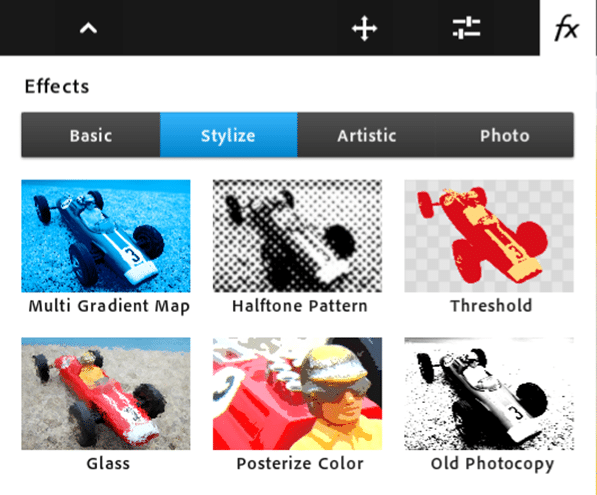
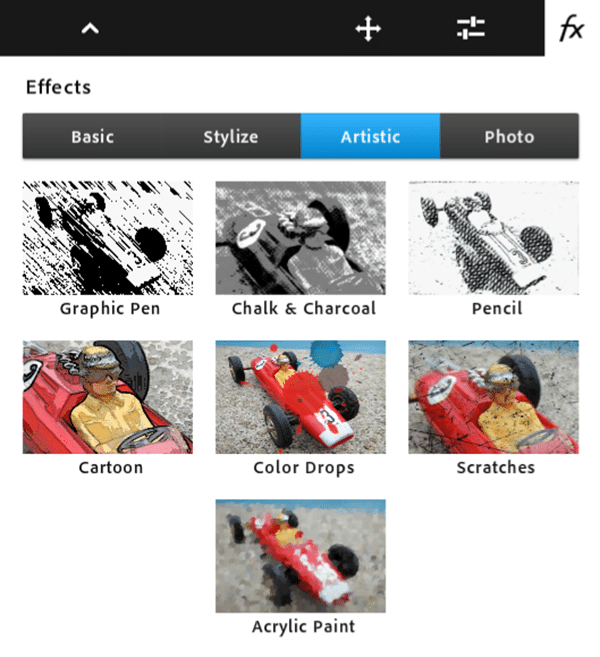
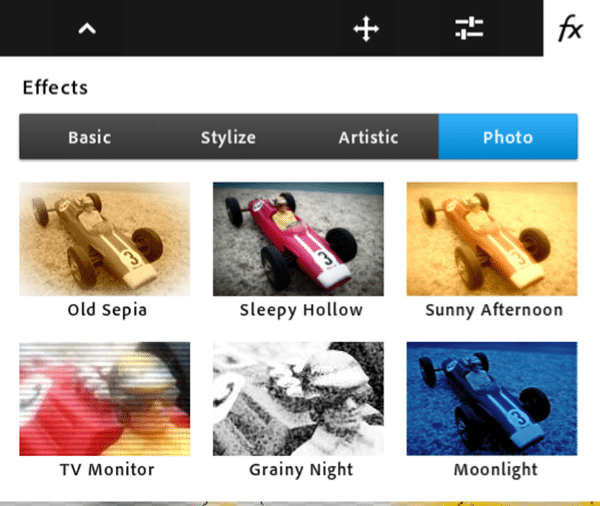
Next up are the various FX’s or filters that can be applied to your selection. Just like the Saturation tool above, each one brings up an interactive control with various slidebars depending on it’s function, instead of running through them all, I will simply show them to you.
Honestly, a much better selection of options than I was expecting. Most work reasonably quickly and do what you would expect. On cursory glance, there are no glaring exceptions, except maybe lens flares and really… is that a bad thing? All told, this part of the package I found extremely impressive, I didn’t expect near this many options.
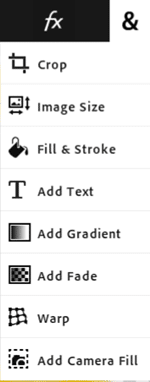
Finally we have the Ampersand menu, or the “we didn’t know where the heck to put it, so we put it here!” menu. Many of these items such as Fill, Gradiant or Add Text could easily have been made tools, frankly I’m not really sure why they weren’t. At first I was shocked there was no Fill or Text tool, only to later discover them here. If you’ve been following along thinking “I can’t believe it doesn’t support X”, you are probably going to have an “Ahhhh” moment or two. Lets take a look at the expanded menu:
Crop does exactly what you would expect. It brings you to an interaction selection box that allows you to crop the image, either linearly, or to a variable width and height. Like before it uses Cancel and Done, and again pressing Back will exit the app.
Image size will allow you to scale up your canvas, a dialog pops up allowing you to specify a new width and height. Your image will be scaled to match the new dimensions.
Fill & Stroke is your traditional paint brush tool. There are four modes of operation, Fill, Stroke, Noise and Clouds. Select a region of pixels, pick an operation and if applicable a colour, specify an amount then apply or cancel. Again it happens in an interactive preview window and is reasonably quick.
Add Text is obviously your text tool, I will cover it in more detail in a second.
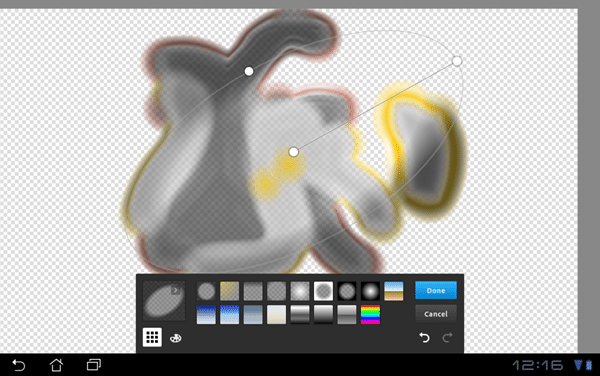
The Add Gradient tool is where you add gradient fills to the selection. They actually did a really slick job with this tool. For off, you pick the type of gradiant ( radial, linear, etc ) then you the interactive widgets to set the gradient. Then you can click in to define the gradient colours and strengths.
The Add Gradient Tool:
Frankly they did a really good job with this tool and it fits nicely to a tablet interface. Speed and interactivity are perfectly fine. Again it uses the Cancel/Done method and again, don’t hit back!
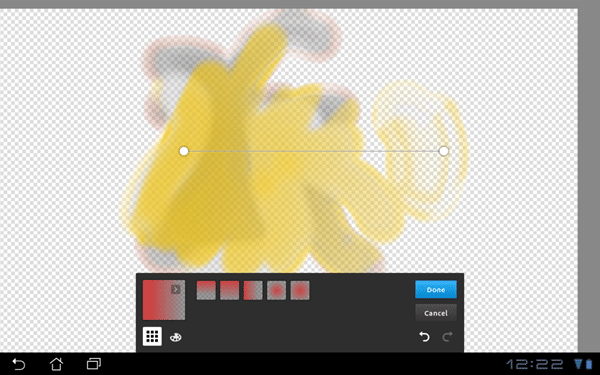
Add Fade works basically identical to Add Gradient, just with slightly different tools:
Instead of a 3 setting slider, Add Fade has only two, and a much reduced set of tools, otherwise they work identically.
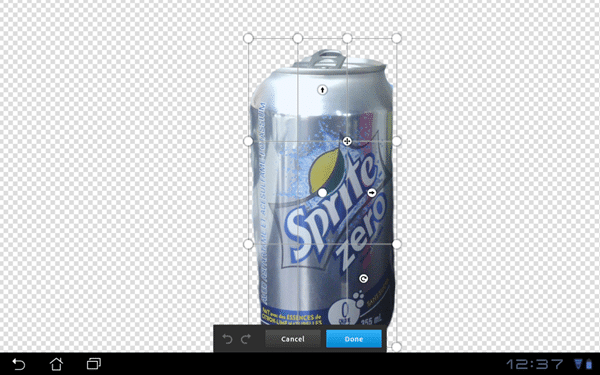
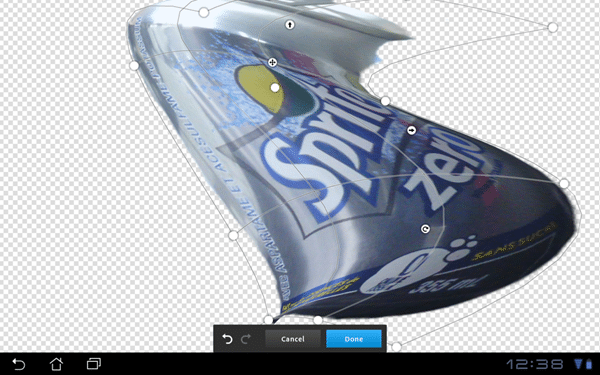
Warp allows you to modify an image using a 2D lattice, it is a pretty capable tool and I was shocked at its inclusion. You can affect rather small, to rather extreme changes in seconds. It works quite smoothly on my tablet, lags a little bit on extreme movements, but for the most part was realtime feedback. Here is the tool in action:
Before:
After:
It deforms very naturally and with the results you would expect, the performance is good enough and it is completely intuitive, all told a very nice implementation and another area the touch interface of the tablet shines!
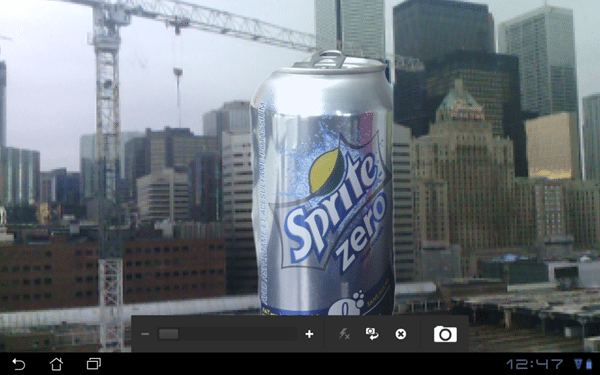
Camera Fill is a feature unique to Android, and given the quality of cameras ( awful! ) included with tablets, is more of an oh neato feature than anything else. To use it, select an area to fill then click “Camera fill”. In this case I took the above can of Sprite Zero, did a Select Pixels, followed by an invert. Once you click Camera Fill, this screen appears:
It interactively fills your selection with what the camera sees, updating as you pan the camera around. You have the option of toggling between the front and back camera, zooming in and taking a picture and that’s about it. Once done, your selection is filled with the captured image. One thing to keep in mind is the image is captured to the selected layer, so this operation is a destructive one. I can’t think of too many real world uses for this that I wouldn’t simply do with layers now, but it is kinda fun.
Finally, text. At first I thought there was no text features in PS Touch, which seemed like a glaring oversight, so I was happy to find them in the “and everything else!” menu. The tools are robust, intuitive and flawed all at once. Lets take a quick look at the text manipulation tools.
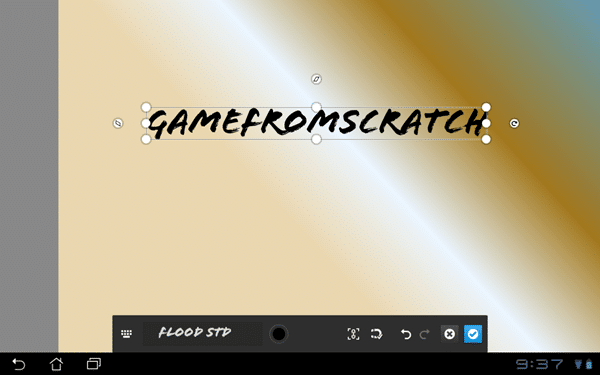
Text creation is pretty straight forward. You click Add Text and it brings you to this interface:
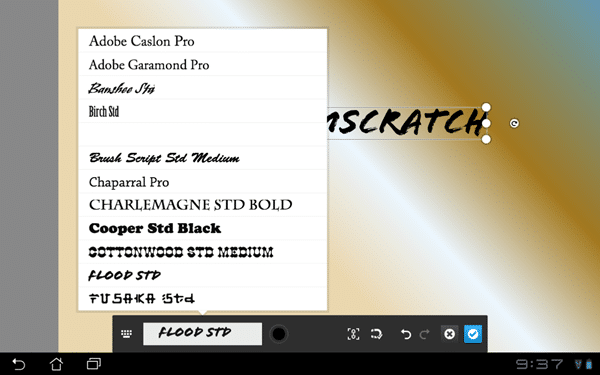
You drag around with your finger to move/place the text, then click the keyboard icon to edit the text. The text selection box and colour selector are next to the keyboard icon. As you can see below, the font selection isn’t overwhelming and there are some major omissions ( Courier, Times New Roman ) that you would expect to be there. I am not sure if this is an Android issue or a PS Touch issue, but the lack of choices is a bit disappointing. The selection process is nice though, with a good solid preview of each font in action:
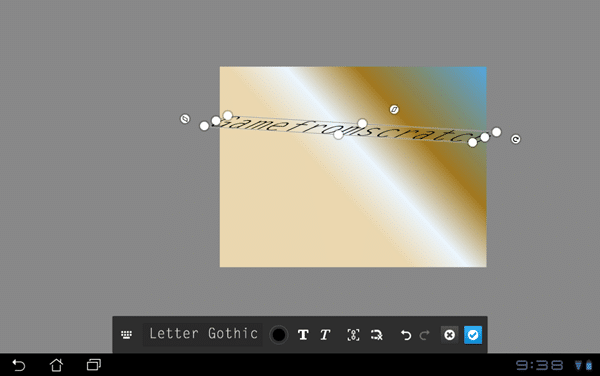
Moving and placing text is very simple, a matter of dragging control points or the rotation handle:
Notice something odd? No Cancel/Done menu, instead this time its an X or Checkbox icon. For such a polished UI, deviating exactly once from the standard seems like a bit of a mistake. Of course though, they didn’t deviate from the annoying lack of a back button!
Over all the text placement is capable, quickly and adapted well to the tablet. However there is one small and one giant flaw. First the small flaw, there is no way to numerically size text, so getting different text elements to be the same size is a right pain in the butt. If you noticed the different font sizes earlier in my tool menu illustration, this is why! Even if it defaulted the next text to the same size as the previously created one it would go a long way towards improved usability.
Now for the huge flaw. Once you click the checkbox, your text item is now just pixels. Want to change the font, size, position or text? You can’t. Delete it and start over. This, simply put, sucks. EDIT: You can still manipulate the layer it generates as you would normally, so you can still transform and manipulate the pixels, you just no longer can manipulate it as text, change fonts or text, etc.
All that said, the text tools are quite useful and with a few small tweaks and a few more fonts would be downright excellent. Let’s hope those tweaks happen!

