As you may have noticed, I am somewhat excited about the addition of BMesh into the main Blender trunk in the upcoming release. What you may be wondering is why? In the past I explained what an ngon is, but without seeing them in action their benefit can be a bit hard to understand.
So that is exactly what this post is going to cover, it will demonstrate the new functionality that will be available in Blender 2.63 once BMesh support is added. Each animated image is actually 1080p in size, so click on it to see more details. Some of these features, such as the bridge edge tool, aren’t specific to ngons specifically ( and could be accomplished without BMesh ), however the internal changes to support BMesh made adding these features more feasible.
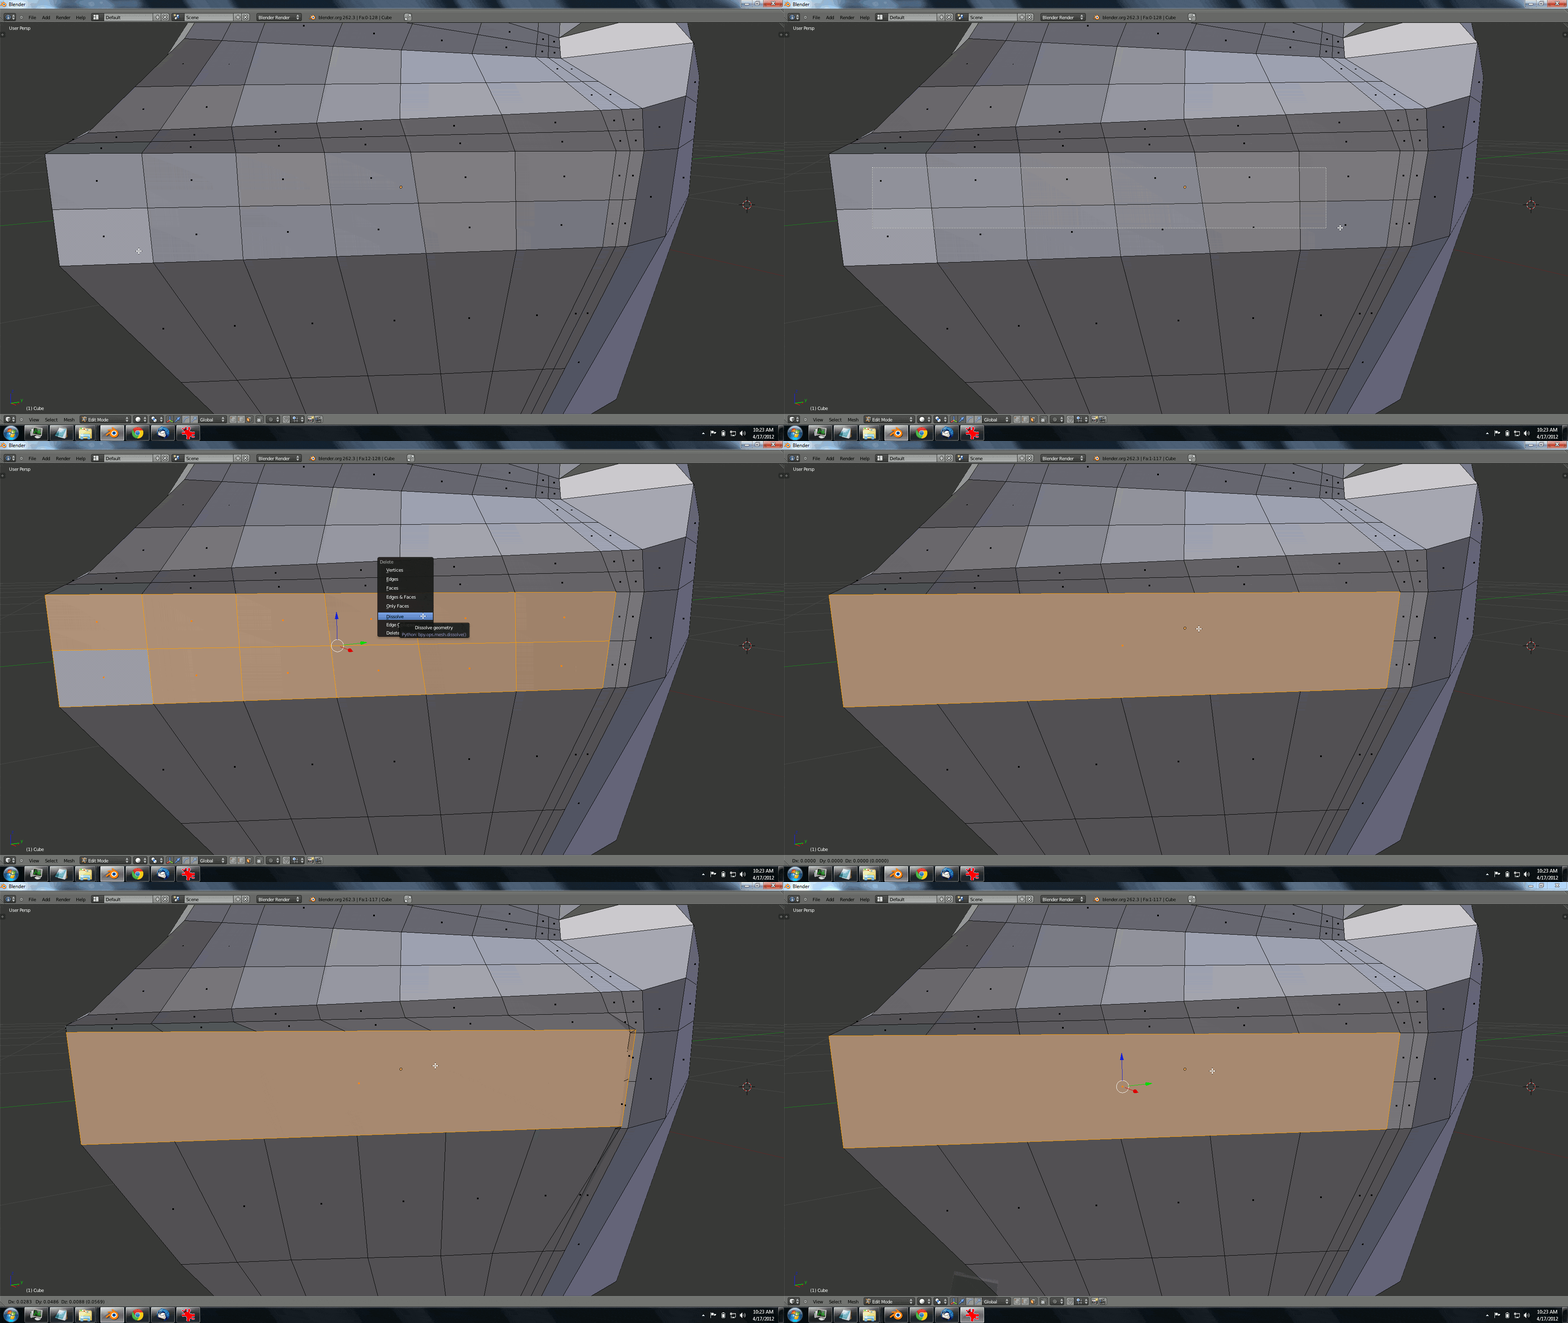
Dissolving face/edges/vertices
What are we seeing here?
Coupled with the knife tool, this is easily the biggest feature of BMesh. Instead of simply deleting faces, vertices and edges, you can now dissolve them, which effectively turns the selection into a single giant ngon. Therefore you can add detail where you need it, or quickly remove it where you don’t. With traditional triangles/quads, retooling a mesh was an arduous process of deleting faces/vertices then rebuilding them one quad/tri at a time. Now with BMesh it’s a heck of a lot easier. One word of warning though, just because you can do something doesn’t mean you should!
Dissolve can result in some really funky geometry, especially if what you are dissolving isn’t planar. In the end, when it is sent to the renderer, it is still triangulated, so if you have dissolved into an impossible shape, you will get some weird artifacts. That said, some time with the knife tool can quickly fix up most problems. One thing to remember, BMesh does not replace the need for a good topology! It may make things easier, but in the end the same basic modeling principles hold true.
One last note, dissolve works slightly different based on if you have edges, faces or vertices selected.
How do you do it?
In edit mode, select your geometry.
Hit ‘x’.
Select dissolve.
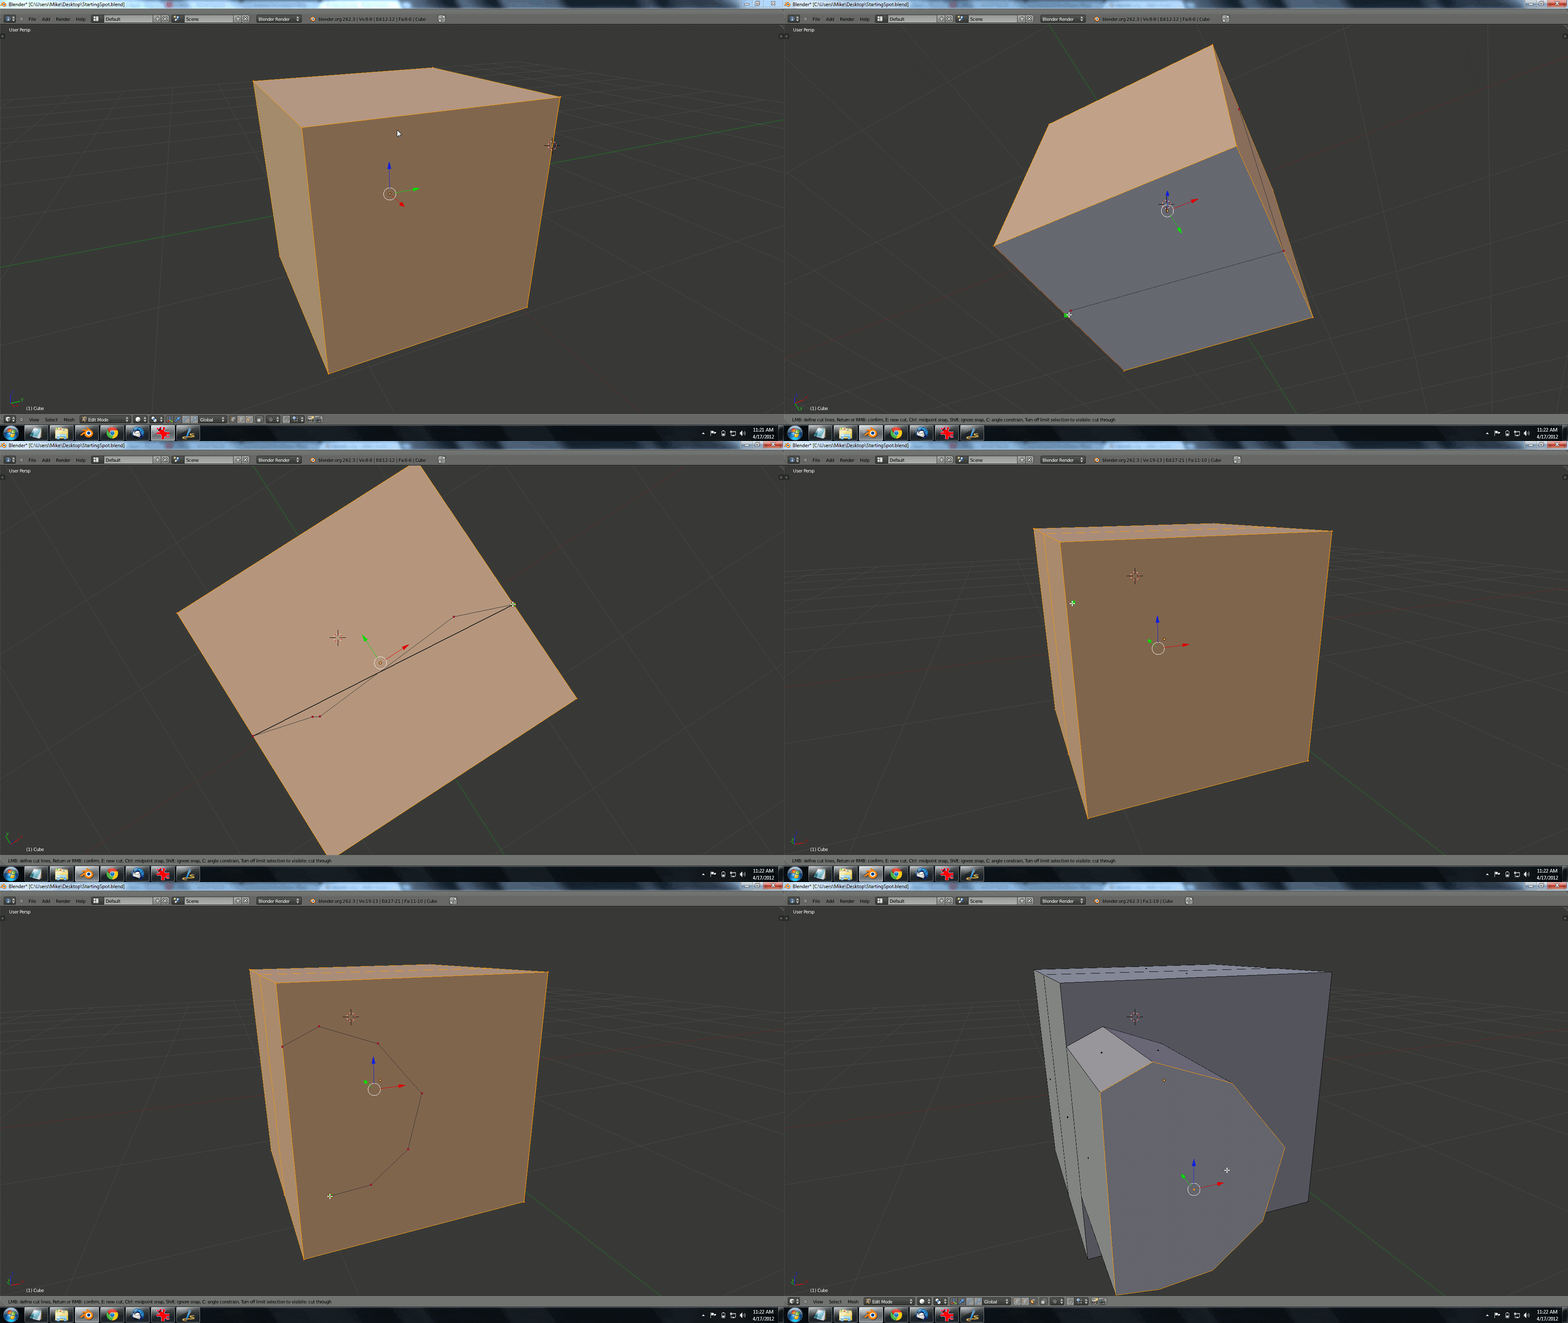
Knife Tool
What are we seeing here?
The other major part of BMesh is the knife tool. There is a knife tool in Blender 2.5x but it’s fairly awful. First it has to tessellate as it goes because of the 3-4 vertices per face limit. The new knife tool is much more capable and flexible and as you can see from the image above, can make pretty arbitrary cuts with ease. Again though, good topology is still important, so use the knife with care!
How do you do it?
In edit mode, press K.
A green dot will appear where the cut will appear.
Left click to make cut, move mouse and repeat.
Right click to complete.
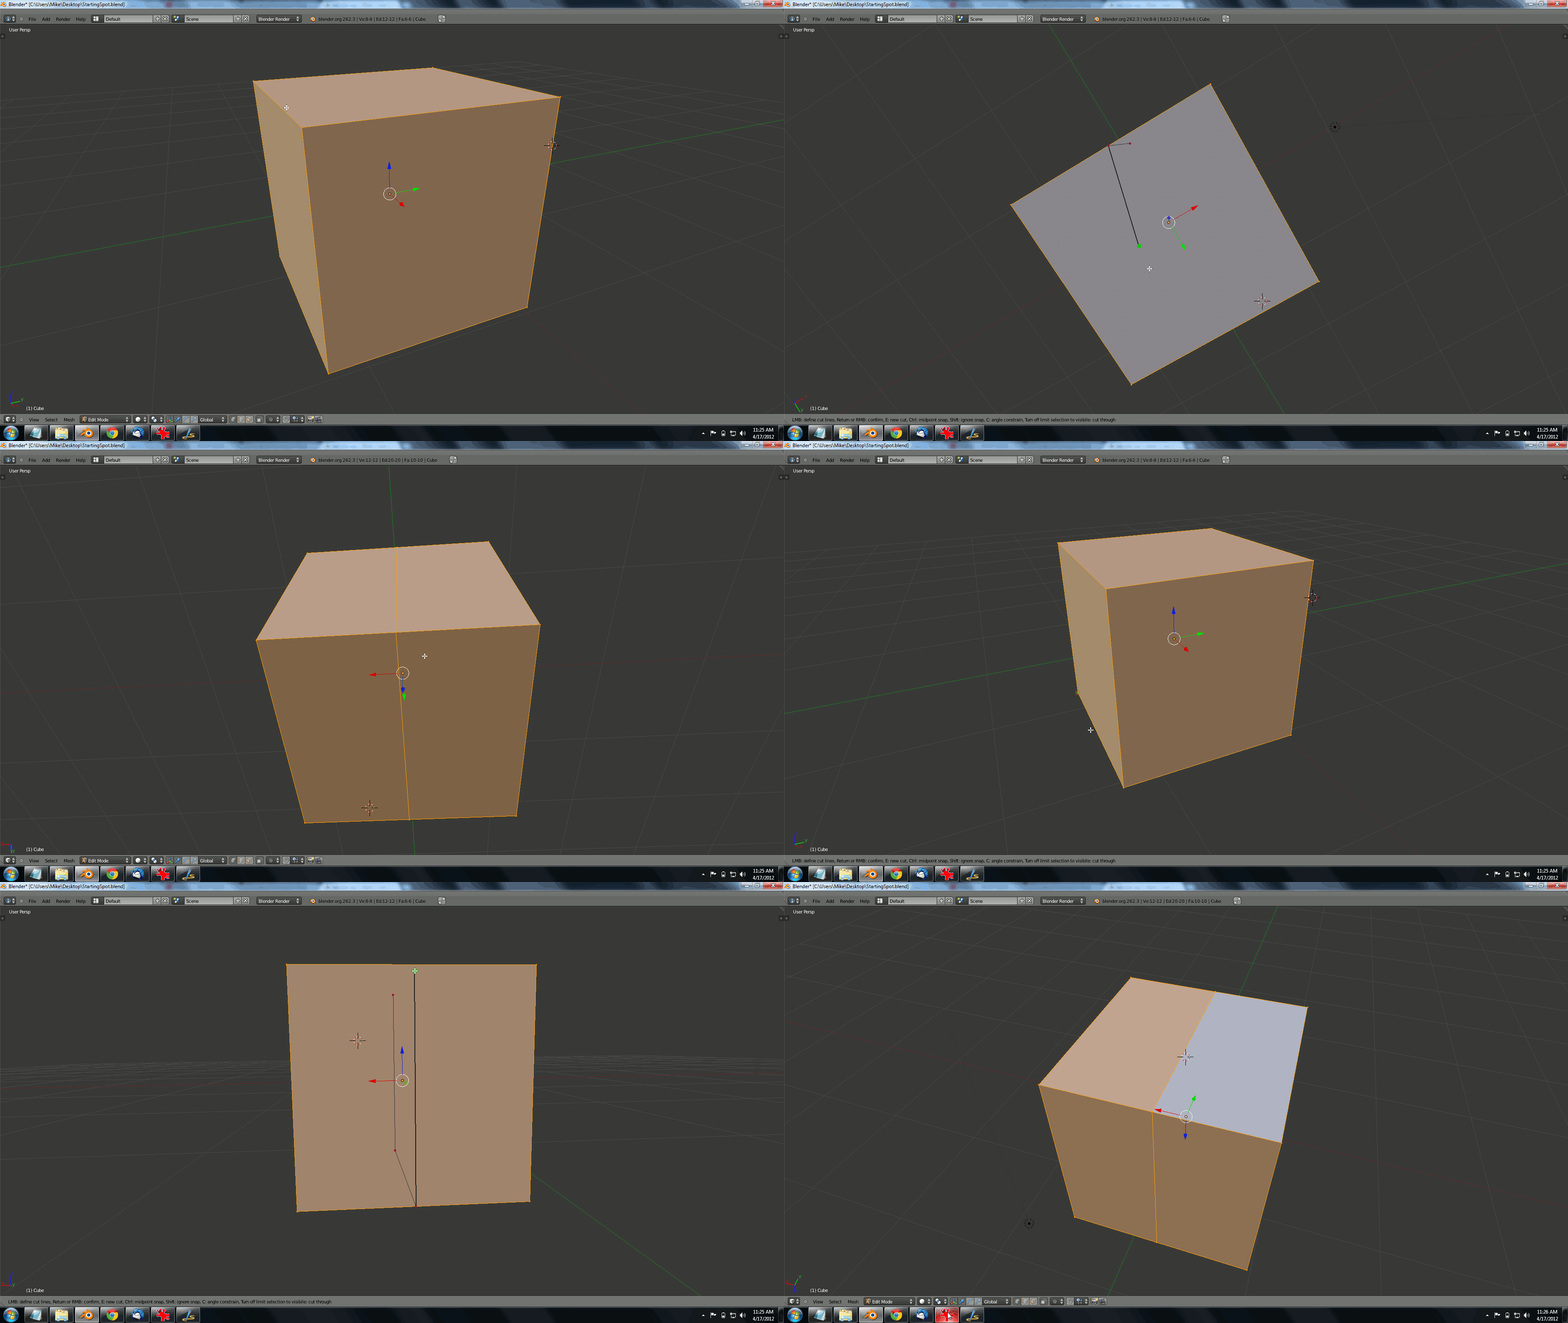
CTRL + Knife Tool ( centered cut )
What are we seeing here?
Quite often you want to cut at the halfway point, this is exactly what cutting with the Control key pressed down will do. The green dot will snap to the halfway point between the two nearest vertices.
How do you do it?
Exact same process as the knife tool, just hold down CTRL to snap to midpoint.
Creating > 4 sided faces
What are we seeing here?
On of the big pains of working with polygons in Blender before was manually recreating faces. You had to select 3 or 4 vertices in order then hit the F key, repeating for every polygon you need to create. Now, select the bordering edges or vertices, regardless to their count and it will create a single ngon, which can be extrudes, scaled, etc… like a normal face. Just like dissolve though, it is quite easy to create “bad” geometry.
How do you do it?
In edit mode, select bordering vertices or edges.
Press F to build ngon.
Bevel ( finally! )
What are we seeing here?
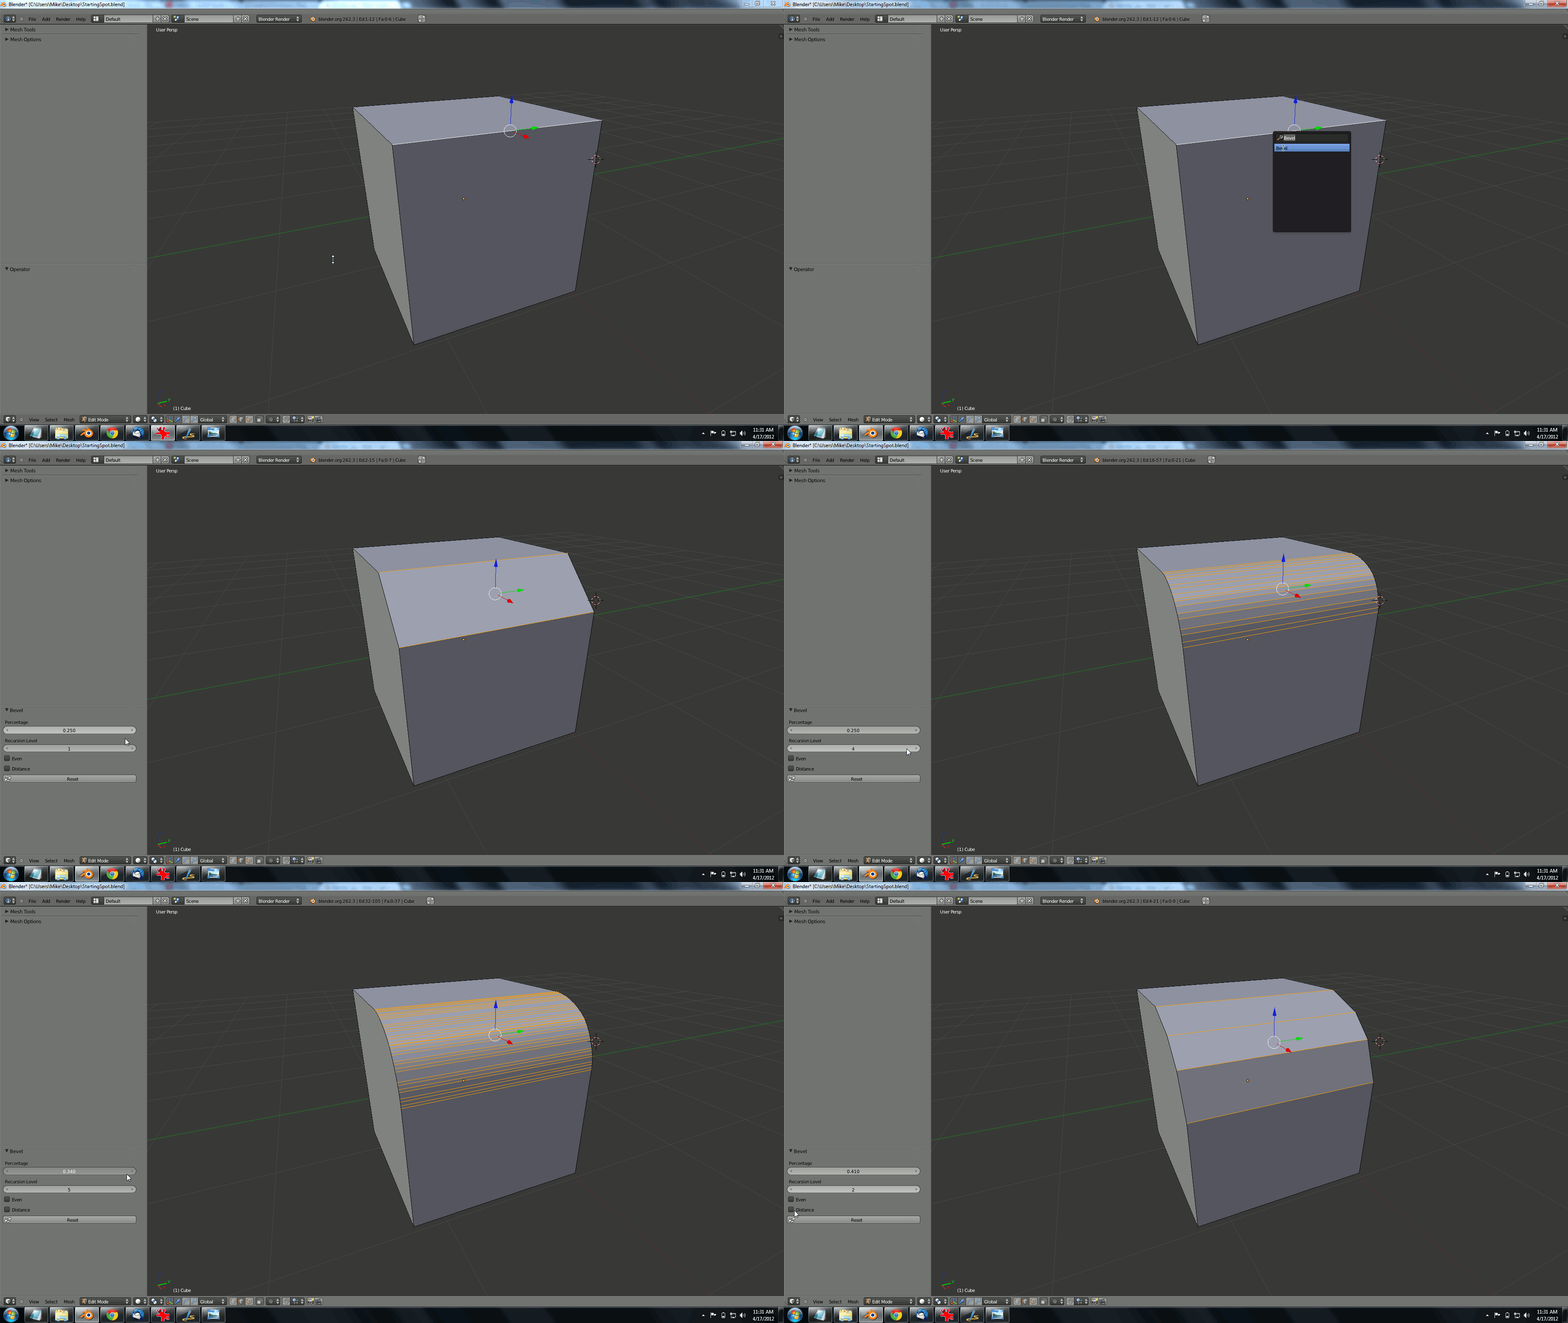
Blender 2.4x has a bevel, 2.5x replaced it with an awful modifier that I don’t think anyone was happy with. Now, with BMesh, bevel is back! It can be a bit buggy at times, especially with multiple edges selected and can result in some strange cornering geometry, but its really nice to see bevel back. Bevel basically allows you to add more geometry evenly spaced and rounded, normally used for rounding corners.
How do you do it?
In edit mode, select 2 or more consecutive vertices, or one or more edge or face.
Hit spacebar, type “Bevel”. Click Bevel in popup menu.
On the left hand Mesh Tools menu ( hit T if not open ), select percentage or recursion level.
Percentage determines how big bevel is ( relative to next closest edge/face/vertex )
Recursion level determines how many times the bevel will be performed ( number of edges created )
Inset/Outset face(s)
What are we seeing here?
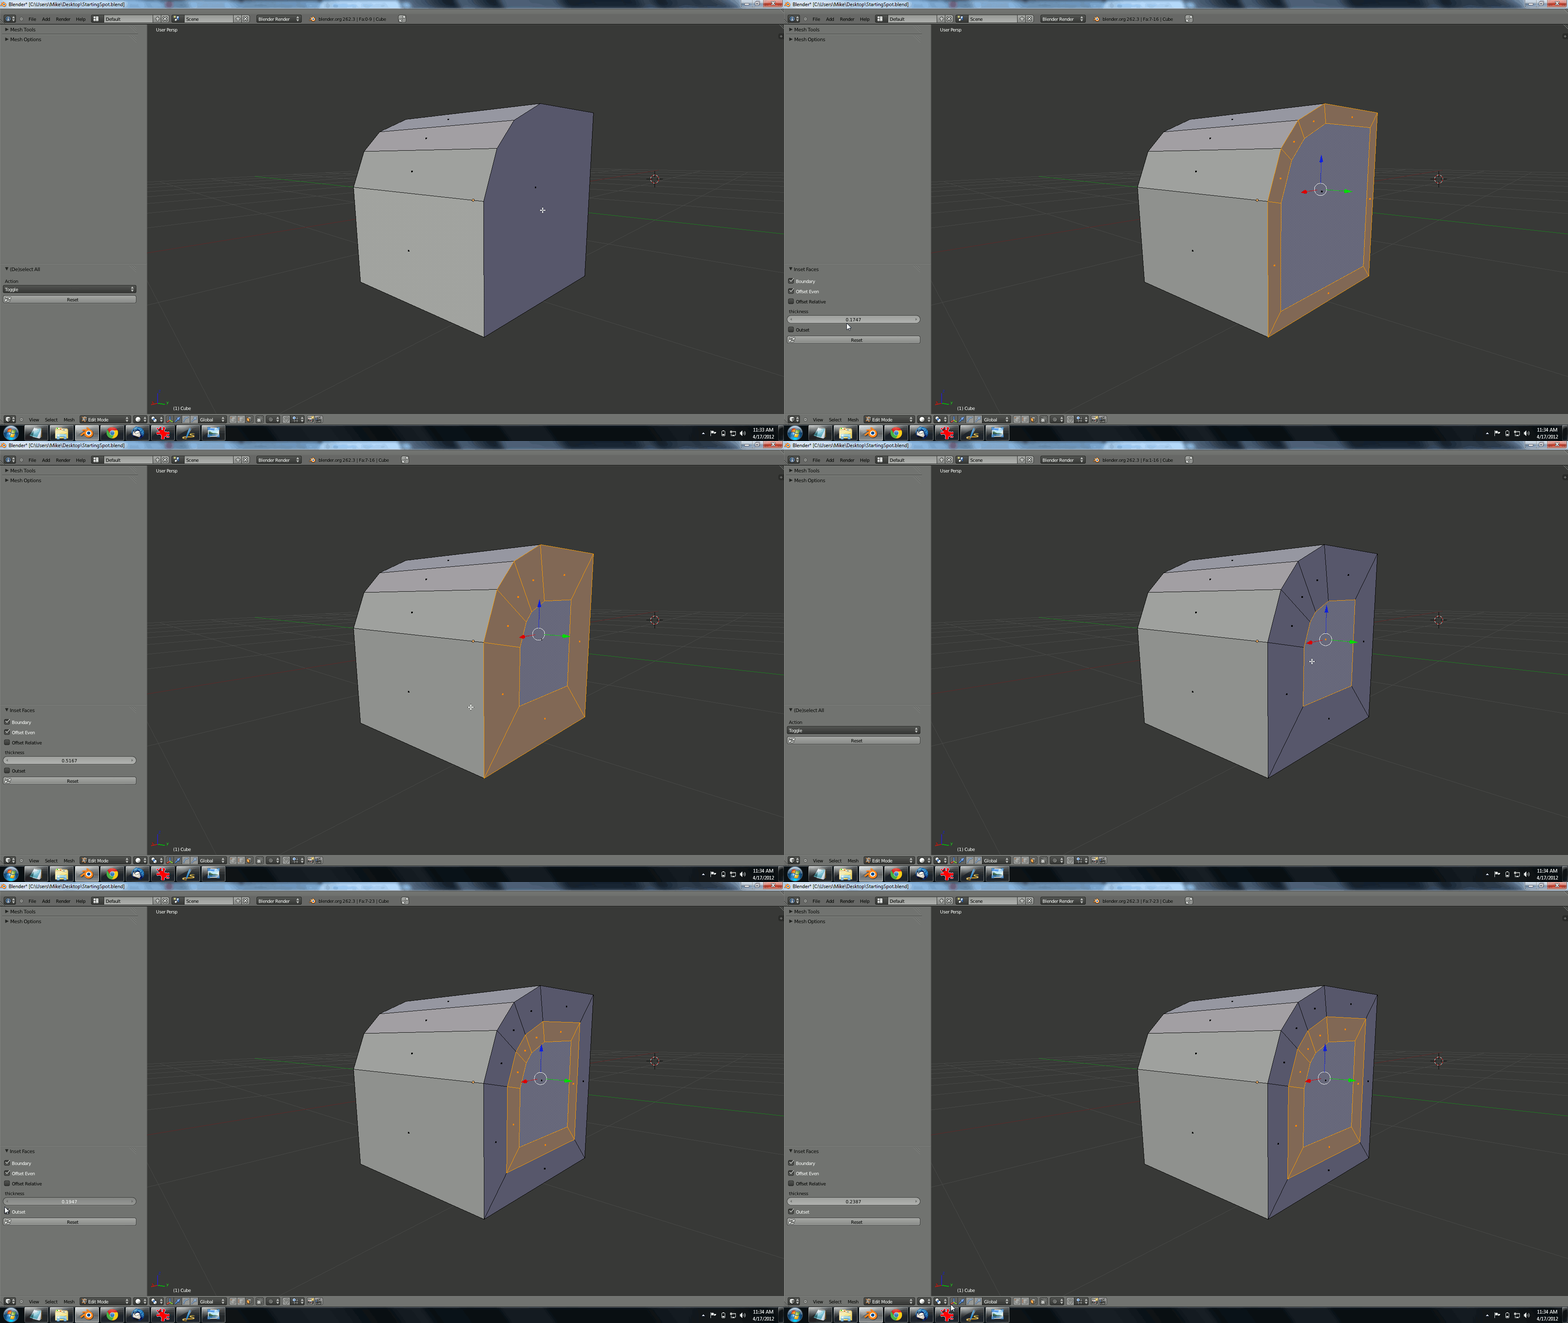
Inseting is basically identical to doing a zero distance extrude followed by a scale, but much easier. Think of it kind like creating an edge loop, but instead its relative to the selected edges. Inset causes the new geometry to be created within the selected geometry, while outset causes the geometry to be created surrounding selected value. The above image illustrates an inset, followed by an outset.
How do you do it?
In edit mode, select the face.
Hit spacebar, type “Inset face”, select menu item.
In the tools panel, thickness slider determines the amount it is offset.
Check outset if you wish to outset instead of inset.
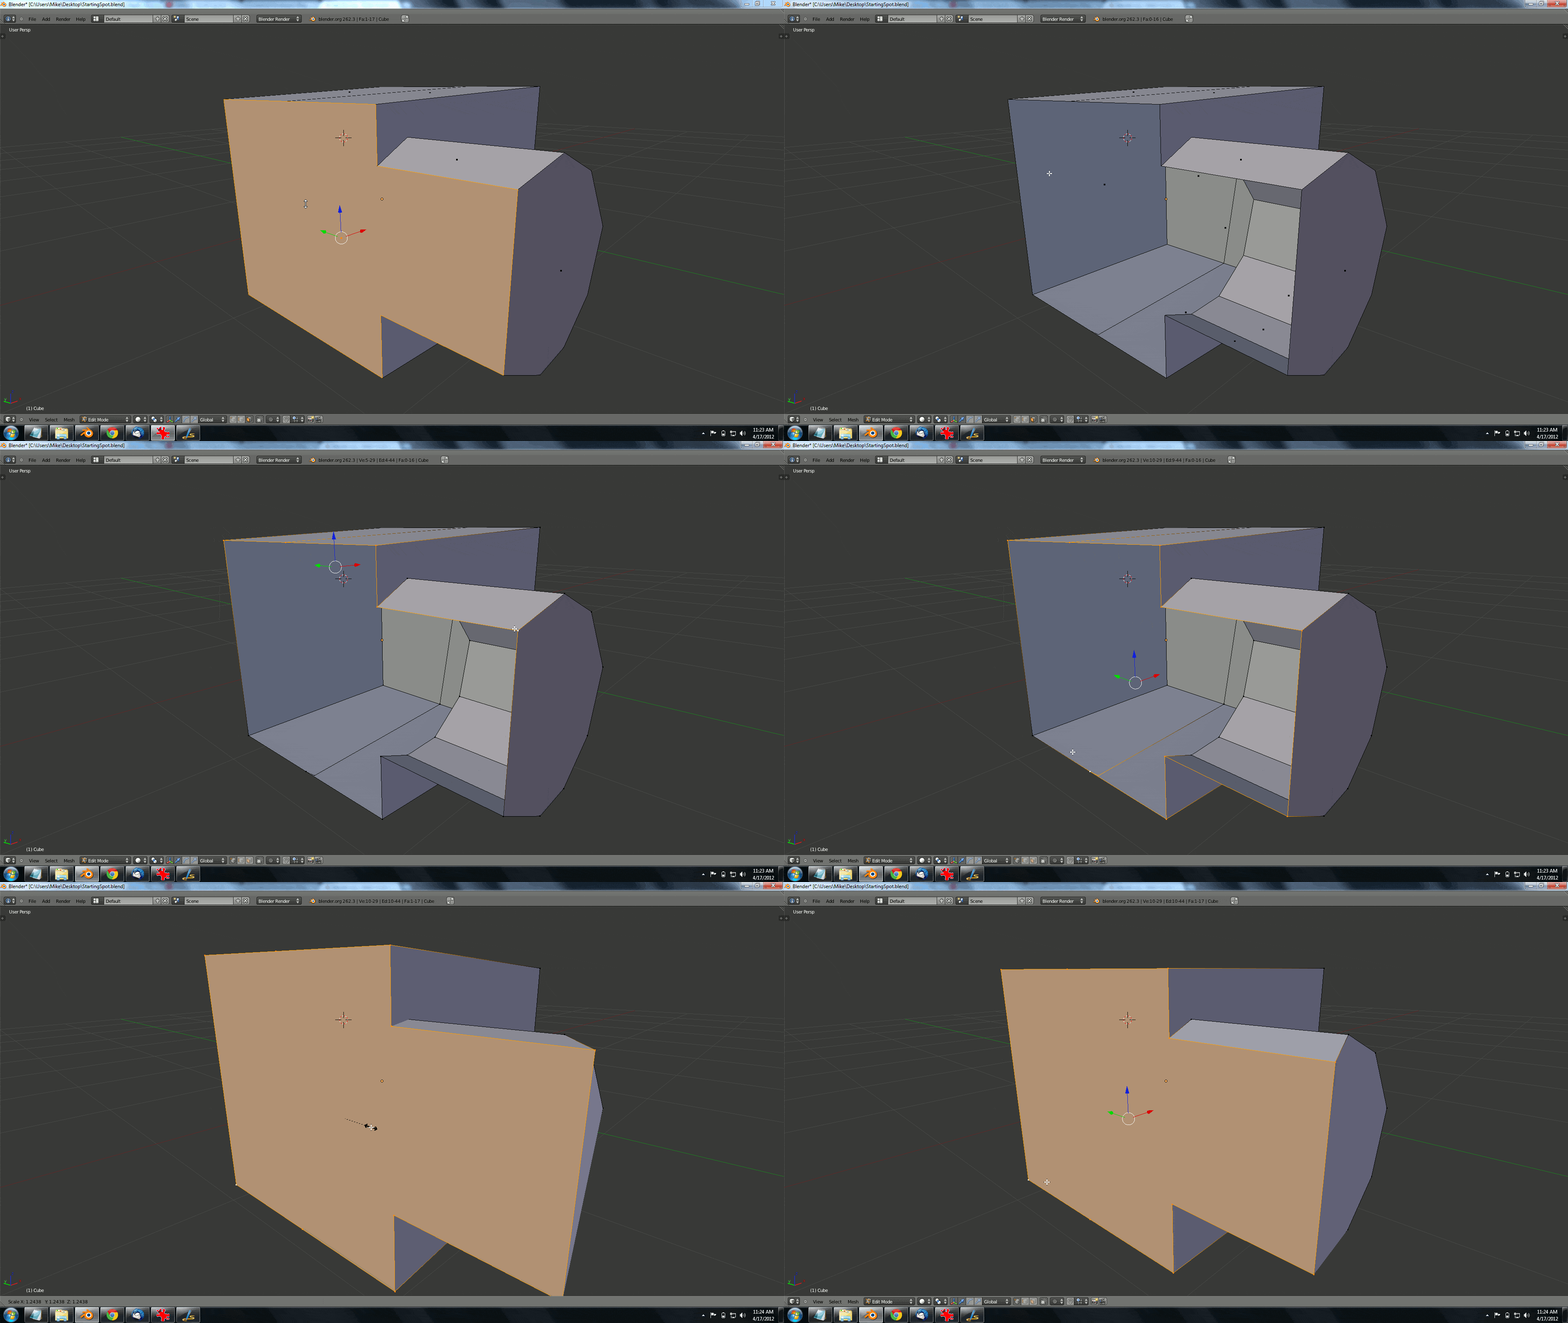
Bridge Edge tools
What are we seeing here?
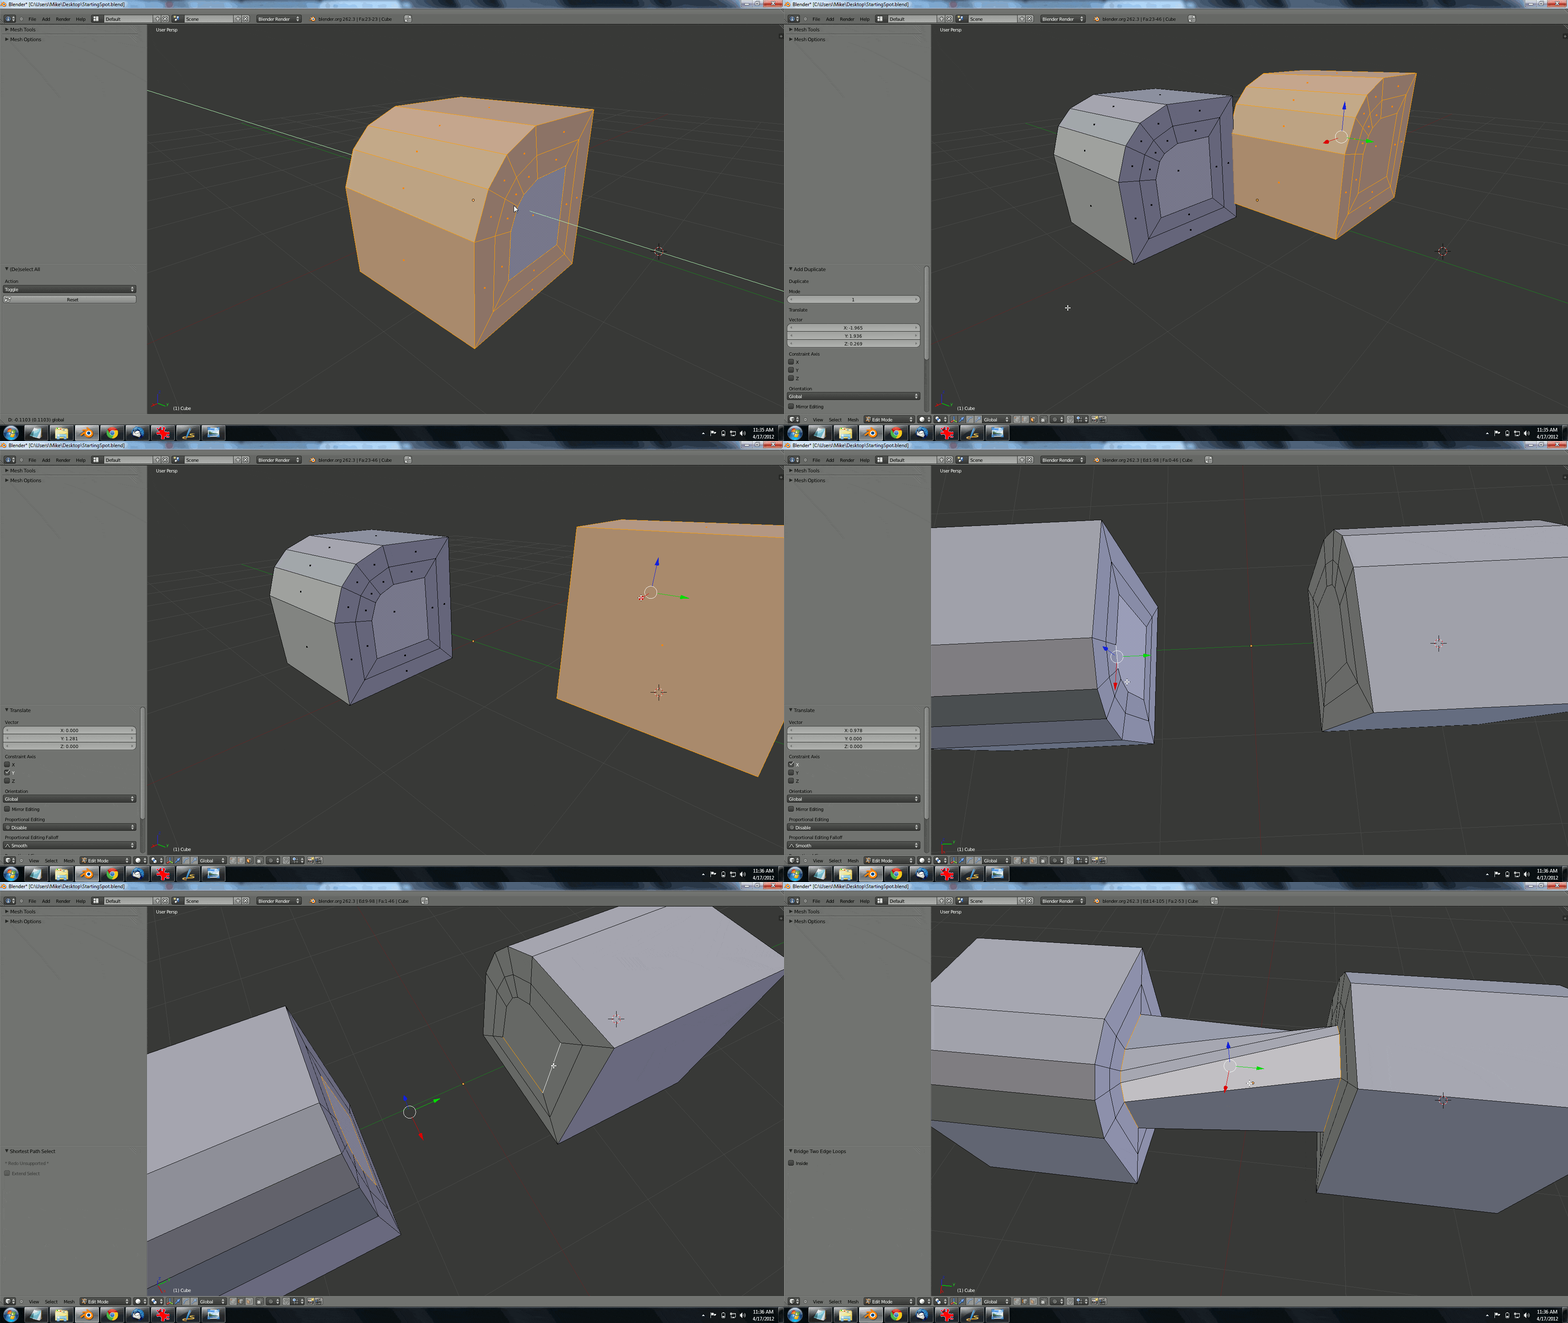
This functionality was actually available via the loop tools plugin, but it’s nice to see it part of the main application. Select two edge loops (within the same/connected mesh ) and it will create a “bridge” between those two points. Sadly it doesn’t delete the interior face, so be sure to delete the face before bridging.
How do you do it?
In edit mode, select two edge loops.
Hit spacebar, type ‘Bridge Two Edge Loops.
Note! Both edge selections need to have the same number of edges.

